| KIT #: | P4030 |
| PRICE: | $20.50 |
| DECALS: | One option |
| REVIEWER: | Brian Baker |
| NOTES: | Vintage kit, originally Lindberg. Very simple. Comes with paper hangar and parking ramp. |
| HISTORY |
The Ercoupe was originally designed
by Fred Weick as an entry in a “Safe Airplane” contest, the idea being to
produce a lightplane incapable of spinning. The secret was to have no rudder
pedals, and the twin rudders were connected individually to the ailerons, so if
you used right aileron, you got slight movement of the right rudder, and vice
versa. The rudder overcame aileron yaw to a certain extent, but there was never
enough rudder control to cause a spin. When you stall the airplane, it just
mu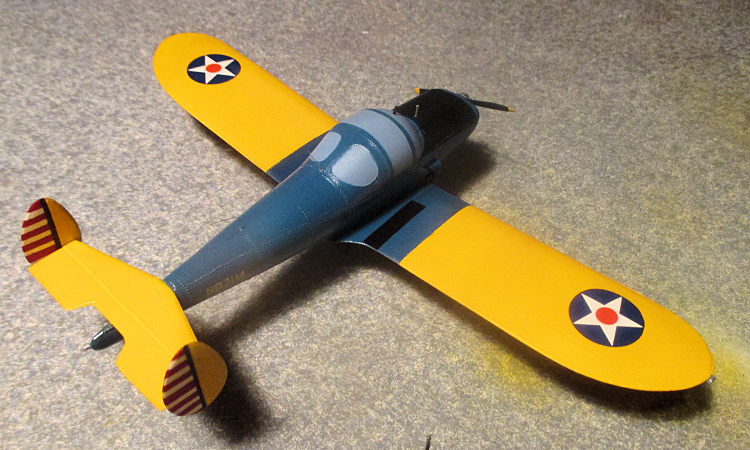 shes, not turning in either direction like most airplanes. As a result, it is
extremely easy to fly. In extreme crosswinds, the pilot merely keeps the
airplane headed into the wind instead of straight down the runway, touching down
on the runway in a crab. The plane then straightens itself out, and you steer
with the wheel, since there is no rudder control. It is kind of a strange
experience at first, but you get used to it, and it’s actually fun. The landing
gear is built like a tank, so there is little chance of doing any damage
regardless of the wind velocity.
shes, not turning in either direction like most airplanes. As a result, it is
extremely easy to fly. In extreme crosswinds, the pilot merely keeps the
airplane headed into the wind instead of straight down the runway, touching down
on the runway in a crab. The plane then straightens itself out, and you steer
with the wheel, since there is no rudder control. It is kind of a strange
experience at first, but you get used to it, and it’s actually fun. The landing
gear is built like a tank, so there is little chance of doing any damage
regardless of the wind velocity.
I have flown quite a few of them over the years, and I always look forward to the experience. The Ercoupe was originally produced in the late thirties, and became a very popular airplane, although a pilot who learned to fly in an Ercoupe needed extensive training if he or she were to attempt to fly a conventional tailwheel airplane, such as a Luscombe, Cub, or Aeronca. Production began about 1940, and was discontinued during the war, resuming immediately after VJ Day. Slightly modified versions were produced up to 1951, when production ended. Some later models were produced by Alon, Forney, and Mooney (with a single tail). Various engines were installed, and there are numerous Ercoupes of all varieties still active. Some have rudder pedals added, but most do not. They are fun to fly, and almost foolproof. There is an active Ercoupe Pilots’ Association, and these stalwarts exchange all kinds of information and hardware pertaining to Ercoupes. They have fly-ins that usually attract nearly a hundred airplanes.
| THE KIT |
 I recall building this kit as a
teenager back in the early fifties, and looking at this issue, I don’t think
much has been done to improve the kit. The kit appears to be reasonably accurate
in outline, although it consists of only 12 parts, including a one piece wing,
two fuselage halves, an elevator/stabilizer assembly, two rudders, two main
landing gear struts and wheels, a nose gear strut and wheel, and a propeller.
That’s it. It fits together nicely, although there is no clear glass, with the
cockpit requiring some kind of paint to simulate glass. I used RAF Azure Blue.
Although originally issued by Lindberg, the kit was later distributed by the
Ercoupe Owners’ Association. Now it comes from Mexico. I hope it has enough
power to get over the wall.
I recall building this kit as a
teenager back in the early fifties, and looking at this issue, I don’t think
much has been done to improve the kit. The kit appears to be reasonably accurate
in outline, although it consists of only 12 parts, including a one piece wing,
two fuselage halves, an elevator/stabilizer assembly, two rudders, two main
landing gear struts and wheels, a nose gear strut and wheel, and a propeller.
That’s it. It fits together nicely, although there is no clear glass, with the
cockpit requiring some kind of paint to simulate glass. I used RAF Azure Blue.
Although originally issued by Lindberg, the kit was later distributed by the
Ercoupe Owners’ Association. Now it comes from Mexico. I hope it has enough
power to get over the wall.
| CONSTRUCTION |
As some of you know, I build only
1/72 scale. What happened is this. I have a good friend that had an Ercoupe 415C
which was painted like an Army PQ-13. The Army had two of these at the beginning
of the war, and these were classified as man-carrying aerial targets. The only
photo I have seen of one if these is in what appears to be silver markings with
dark wing leading edges and tail stripes. There
 were only two, 41-25196 and
41-39099, and these were delivered in 1942, but their fate is unknown. Anyway,
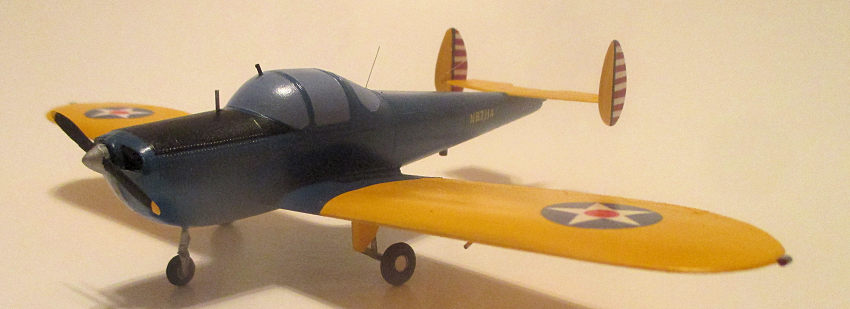
my friend and fellow flying club member Gen. Chuck Rosenfeld (U.S. Army, Ret.) ,
acquired a model 415C and had it painted in standard Army blue and yellow
markings, with tail stripes and early roundels. He flew it for a number of years
until he had a propeller hub failure over some pretty inhospitable terrain in
Nevada, and although he wasn’t hurt, he got it down safely, but the airplane was
totaled. He was an Army pilot, and flew such aircraft as the OV-1 and OV-10, and
his skill showed in his forced landing of the aircraft. He now has another Ercoupe, which he flies regularly.
were only two, 41-25196 and
41-39099, and these were delivered in 1942, but their fate is unknown. Anyway,
my friend and fellow flying club member Gen. Chuck Rosenfeld (U.S. Army, Ret.) ,
acquired a model 415C and had it painted in standard Army blue and yellow
markings, with tail stripes and early roundels. He flew it for a number of years
until he had a propeller hub failure over some pretty inhospitable terrain in
Nevada, and although he wasn’t hurt, he got it down safely, but the airplane was
totaled. He was an Army pilot, and flew such aircraft as the OV-1 and OV-10, and
his skill showed in his forced landing of the aircraft. He now has another Ercoupe, which he flies regularly.
 Last week, he came up to me and
said that he finally found a kit of the Ercoupe, and that he bought it for me.
Since I don’t do 1/48 scale, I decided to build it and give it to him in
remembrance of the airplane he had. It was a quick build kit, and it took me
only several days to complete and paint it. I have it painted in the colors of
his airplane, and I used as references some of the photos I have taken of the
airplane in the past few years.
Last week, he came up to me and
said that he finally found a kit of the Ercoupe, and that he bought it for me.
Since I don’t do 1/48 scale, I decided to build it and give it to him in
remembrance of the airplane he had. It was a quick build kit, and it took me
only several days to complete and paint it. I have it painted in the colors of
his airplane, and I used as references some of the photos I have taken of the
airplane in the past few years.
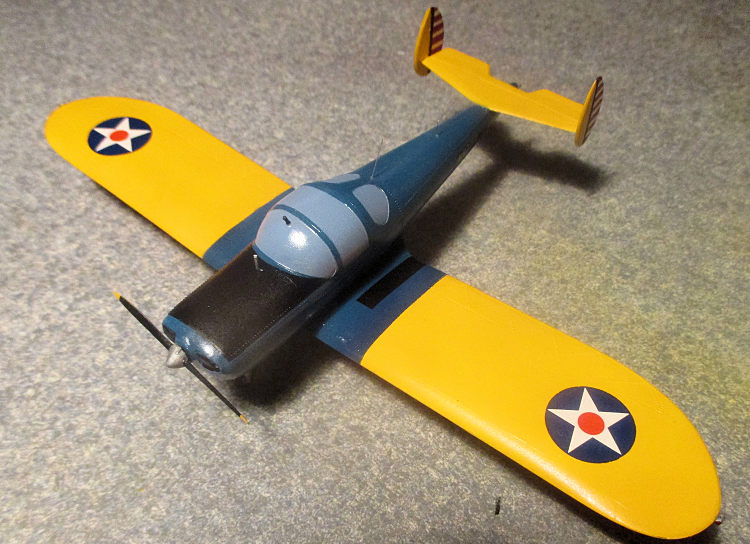
This is a pretty simple kit. The instructions say to join the fuselage halves, then insert the one piece wing into the structure, attaching it with glue in the proper position. The tail unit attaches to the rear fuselage, and the rudders are glued on to the ends of the tail unit. I painted my rudders first, as they had pre-war tail stripes. I painted the landing gear struts and wheels, and attached them after I had the airplane painted. One thing I’m glad I did was to add some weight in the nose, as without it, the plane would sit tail down. I used a small amount of putty on the wing-fuselage joints, but otherwise, the whole thing went together with little problem.
| COLORS & MARKINGS |
Once the seams were
sealed, I painted the wings and tail units Testors’ Chrome Yellow. Once dry, I
masked off the yellow in the proper places, using my photos as a guide, and
painted the fuselage Testors’ True Blue, which approximates the shade on the
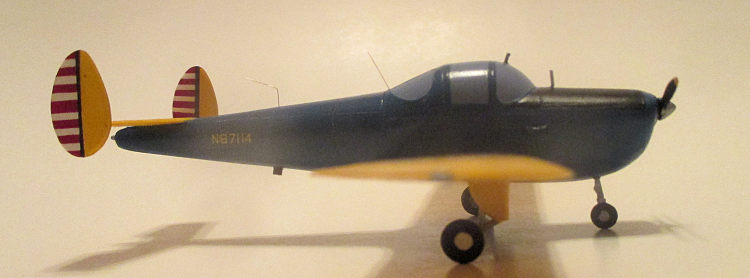
real airplane. I masked off the rudders, painting the stabilizers yellow and the
rudder portions white. Using masking t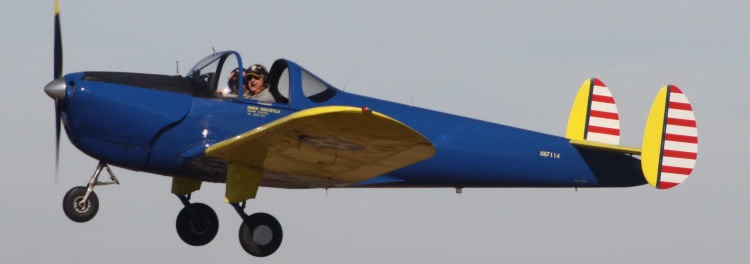 ape, I eyeballed the size of the tail
stripes, and believe I got close. I then unmasked the finished product, and then
applied a set of star-and-ball insignias on the wings from my spare decals box.
Fortunately, I has a set of yellow letters and numbers in the decal box, so I
could put the “N” number, N87114, on the rear fuselage. I’m not sure whether the
numbers were white or yellow, but I used yellow, and I don’t think Chuck will
mind.
ape, I eyeballed the size of the tail
stripes, and believe I got close. I then unmasked the finished product, and then
applied a set of star-and-ball insignias on the wings from my spare decals box.
Fortunately, I has a set of yellow letters and numbers in the decal box, so I
could put the “N” number, N87114, on the rear fuselage. I’m not sure whether the
numbers were white or yellow, but I used yellow, and I don’t think Chuck will
mind.
When the painting and decal application were finished, I added such things as a venturi tube, VHF and ELT whip antennas, a pitot tube, wing lights, an OAT gauge, and a fuel gauge just ahead of the pilot’s windshield. These are tiny details, but they go a long way in making the model look realistic.
| CONCLUSIONS |
This is a kit that most people will probably never see. Civilian airplanes seem to be unpopular these days, except for airliners, and I enjoy building them. If you like civilian planes, this one is worth getting. The kit is made in Mexico, and is probably available through mail order hobby shops. It’s like going back in time.
8 May 2017
Copyright ModelingMadness.com
If you would like your product reviewed fairly and fairly quickly, please contact the editor or see other details in the Note to Contributors.
Back to the Main Page Back to the Review Index Page Back to the Previews Index Page