
F-RSIN 1/144 ATR-72
| KIT #: | 14020 |
| PRICE: | $? |
| DECALS: | One livery |
| REVIEWER: | Carmel J. Attard |
| NOTES: | Resin with metal parts |
| HISTORY |
The
Avions de Transport Regionale family of twin-engined airliners was the result of
successful collaboration between Aerospatiale and Alenia, both newcomers to the
regional airline market. Despite this, then
| THE KIT |
It is
not my usual modelling acquaintance that usually opts for 1/72 popular scale and
military subjects but a change once in a while does no harm. F-RSIN new release
of the
The
1/144 scale kit comes packaged in a sturdy box having a colourful side view of
the 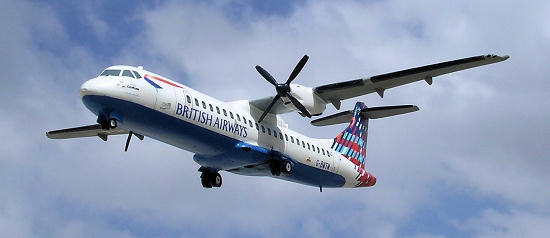 and eight wing fences. These are
all cast in nicely finished cream coloured resin. The main wing part comes in a
separate sealed bag and is wisely packed in such a way so that the correct
dihedral of this important item is retained. One small bag contained the nose
wheel metal leg, undercarriage doors, spinners and eight separately cast blades.
and eight wing fences. These are
all cast in nicely finished cream coloured resin. The main wing part comes in a
separate sealed bag and is wisely packed in such a way so that the correct
dihedral of this important item is retained. One small bag contained the nose
wheel metal leg, undercarriage doors, spinners and eight separately cast blades.
The solid resin fuselage has a smooth finish and accurate outline especially noticeable around the cockpit and tail unit area. There is a moulding seam around the lower fuselage that requires careful sanding having a slight overlap around the rear that may require some filler in order to preserve the correct shape. The rest of parts also have a smooth finish with very fine panel lines. The larger items are flush free. Undercarriage is issued so that the kit can be assembled with the gear down or in flight configuration.
| CONSTRUCTION |
Construction begins with assembly of the main planes and tail planes. The main
planes easily slot in the upper mid fuselage recess and have to be correctly
aligned and once cemented the small gap around the joint needs to be attended to
using small amount of filler. The rear fuselage lacked the much-needed recess
for the tail planes to fit into but there are tiny level engraved lines, which
makes finding the correct placement an easy task. I found that the tail planes
joining end required a small amount of adjustment by filing or gentle sanding in
order to place them accurately to conform to the scrap plan view on the
instructions. The main undercarriage has cast on metal legs and extra care is
required when separating these integrated small castings from the resin runner
in order to avoid unnecessary breakage, as these are very fragile. It is best to
separate the excess resin using a fine
 saw and shape with a smooth flat file.
The fuselage requires drilling locating holes once their position is carefully
marked. The same applies to the nose wheel in order to locate the ‘T’ shaped
metal oleo leg. I also drilled the exhaust outlet orifice deeper using a 3mm
drill. A 1mm diameter hole was also drilled to each of the engine nacelle front
so that the prop shaft aligns and fits.
saw and shape with a smooth flat file.
The fuselage requires drilling locating holes once their position is carefully
marked. The same applies to the nose wheel in order to locate the ‘T’ shaped
metal oleo leg. I also drilled the exhaust outlet orifice deeper using a 3mm
drill. A 1mm diameter hole was also drilled to each of the engine nacelle front
so that the prop shaft aligns and fits.
One big
advantage is that this kit needed no nose weight to balance. The two prop
spinners had a small amount of flash
that is removed before the blades are inserted in each of the four recesses..
One may be reminded that when fitting the blades a small amount of pitch is
added to the fitting blades. The main planes wing tips required shaping to
conform to scrap view of same item. There is also a small missing fairing to the
wing tips that I added and was made from a tiny piece of scrap resin flush that
was in the box. A small amount of filler was needed to the engine nacelles and
tail plane roots
While
the overall finish was of high quality there were small isolated areas that
contained fine small air bubbles. These were mainly located at the undercarriage
area as well as leading edge and undercarriage parts. I found best to treat each
bubble individually with a small amount of soft filler. As for the main
undercarriage doors these required minor reshaping and a small rectangular
projection was cut at the upper edge since this is at an angle when the doors
are in open position. . I made reference to good pictures of the
| COLORS & MARKINGS |

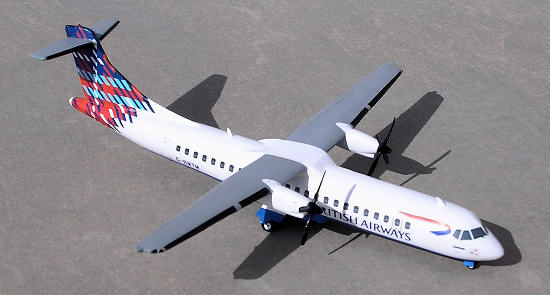
The decal sheet was of good quality. This caters for a single British Airways livery, which is colourful. The fuselage has white upper and royal blue lower. I used Humbrol semi gloss paints. The engine nacelles are white while the wings are light grey. One front view in the instructions does show the nacelles grey. De-icing boots for the leading edges are also in decal form and to my surprise these needed more care that the rest of the decal sheet when it came to applying them.
| CONCLUSIONS |
The
| REFERENCES |
Civil Aircraft Today by Paul E.Eden
January 2009If you would like your product reviewed fairly and quickly, please contact me or see other details in the Note to Contributors.