| KIT #: | MB 35100 |
| PRICE: | $52.99 SRP |
| DECALS: | Several license options |
| REVIEWER: | Dale Rannals |
| NOTES: |
| HISTORY |
The
Mercedes-Benz W136 was Mercedes-Benz's line of four-cylinder automobiles from
the mid-1930s into the 1950s. The car was first presented in public in February
1936, although by that time production had already been under way for a couple
of months. Between 1936 and 1939, and again between 1947 and 1953 it was the
manufacturer's top selling automobile.
Mercedes-Benz
W136 is the name, using the manufacturer's works number, under which the car is
frequently known in retrospect, but the car introduced early in 1936 was known
as the Mercedes-Benz 170V. It replaced the six cylinder Mercedes-Benz W15, which
at the time had also been known as the Mercedes-Benz 170. Despite having a
similar engine capacity of 1.7 liters, the new car's four cylinder unit was more
powerful. 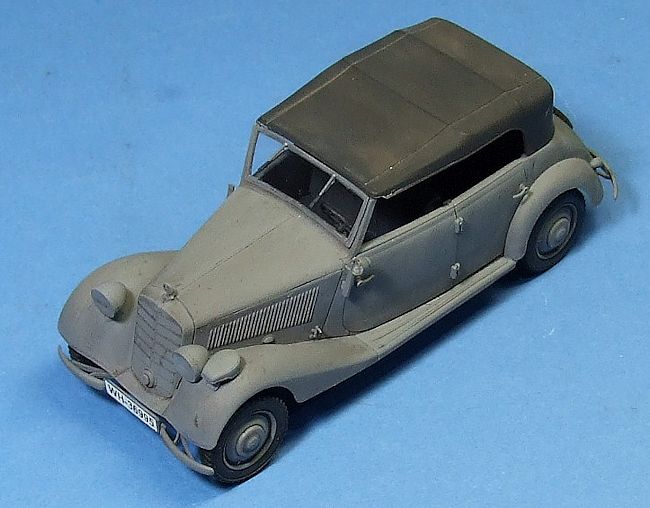 Technically and stylistically it was far more modern and could be sold
at a lower price. Over 75,000 were built making it by far the most popular
Mercedes-Benz model up till that point.
Technically and stylistically it was far more modern and could be sold
at a lower price. Over 75,000 were built making it by far the most popular
Mercedes-Benz model up till that point.
The "V" in
the 170V's name was short for "Vorne" (front) and differentiated the car from
the contemporary Mercedes-Benz 170H (where "H" was short for "Heck" or rear)
which used the same four cylinder 1697cc engine, but positioned at the back of
the car.
Claimed
maximum power output was 28kW (38 PS) at 3,400, using a compression ratio
(during the car's early years) of 6:1. The side-valve four cylinder engine
consumed fuel at the rate of less than 10 liters per 100 kilometers (24mpg). The
motor was attached using just two mountings and ran with a smoothness hitherto
unknown in a four cylinder unit.
Power was
delivered to the rear wheels via a four speed manual transmission which
initially came with synchromesh only on the top two ratios. However, in 1940 the
transmission was upgraded after which synchromesh was incorporated for all four
forward ratios.
Most of the
cars produced, and an even higher proportion of those that survive, were two or
four door "Limousine" (saloon/sedan bodied cars, but the range of different body
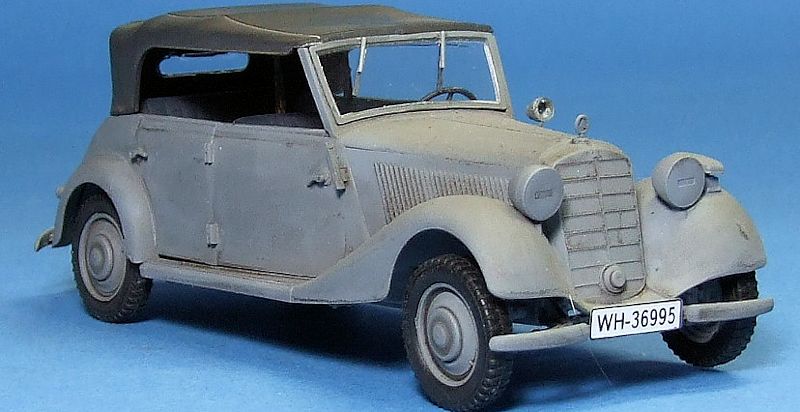
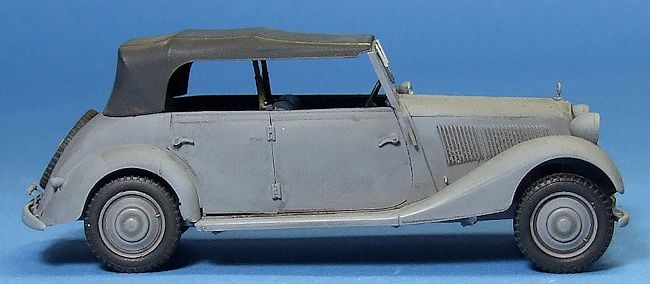
types offered in the 1930s for the 170V was unusually broad. A four door "Cabrio-Limousine"
combined the four doors of the four door "Limousine" with a full length foldaway
canvas roof. (this is the version depicted in the model – Dale)
A common feature of the 170V bodies was external storage of the spare
wheel on the car's rear panel.
The two-seater roadster featured a large flap behind the two seats with a thinly upholstered rear partition, and which could be used either as substantial luggage platform or as a very uncomfortable bench - the so-called mother-in-law's seat.
| THE KIT |
The kit comes in a good sized end-opening box. The contents are all contained in
a self-sealing plastic bag.
Contents are several sprues of gray colored plastic (actually two slightly
different shades of gray), one sprue of clear bits, a small decal sheet and one
gigantic foldout of instructions.
The gray plastic parts all look very crisp, and once I sorted out the sprues I
noticed some very fine, petite parts with no flash whatsoever.
The pieces looked to be very well done.
Clear bits are included for the windshield and side windows and five
vin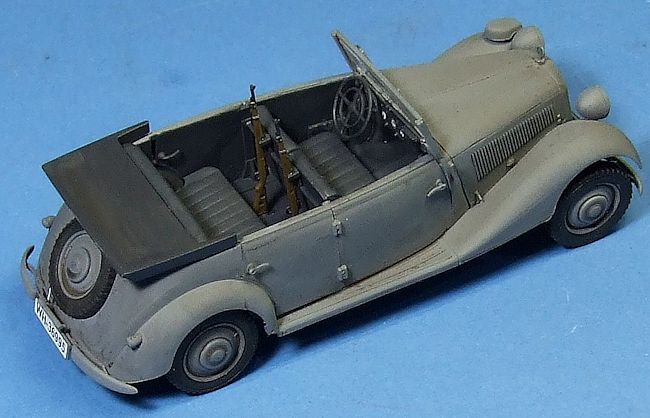 yl/rubber tires complete the ensemble.
The instruction foldout measures a good 12" X 17" per side, too big for my bench
but easily fold-able. The first
page is nothing but simple modeling instructions in several languages.
Most of the second contains a very nice large sprue layout drawing with
part numbers. ........ and this is good too because the sprues do not have any
part number stamped on them so you will be referring to the drawing often.
The assembly steps make up the remaining 2 ¼ pages, being brioken down
into “engine”, “frame”, and “autobody” sections. At first I thought the huge
size of the instruction sheet would be helpful, however this did not turn out to
be the case. Though the
instructions are huge, they are cumbersome.
And the CAD style assembly steps are vague in parts placement, if they
show where the part goes at all …. some steps have the parts just floating near
the spot they are supposed to somehow be placed.
The end-opening box features a nice picture on front but also, on the
back/bottom, contains color
profiles of four different options and a ¾ style picture of interior color
details. There are four pics on the box side of the assembled model, unpainted.
Color call-outs are in Vallejo numbers only.
A small decal sheet offers many different license plate numbers.
This is not a curbside at all. A full frame is included, as are a very complete engine and interior. You also have four options: Windows and top up; windows down, top up; windows up, top folded down; and finally both windows and top down.
| CONSTRUCTION |
Starting
with, and for the most part following the instructions, assembly starts with the
engine. It is very nicely detailed
but I did not assemble all the bits.
I was going to build this with it's hood buttoned up, so I did not bother
with things that won't be seen.
 The frame comes next and here is where the vague instructions start to strike.
You really have to study the drawing and study the parts to try to figure
out how things match up. And the big instruction sheet start to get annoying …
you constantly have to fold and unfold the sheet to look at the sprue layout to
find the part if it is not readily recognizable.
(Perfection would be to have a bench large enough to place the unfolded
instruction sheet under a pane of glass for constant reference … I did not have
this sort of space unfortunately).
Having said all this, I was impressed with how well everything fit together.
Some attachment points are very tiny and fragile(as are many of the
parts! Be extremely careful
cutting/snipping off the sprue!) so a delicate hand is a must.
The front bumper is truly a fantastic piece of molding – delicate and
light …. took me a few minutes to decide just how to remove it from the sprue
without breaking it. The frame
assembly … especially the rear axles … are going to take much weight, but the
model is small so it should not be a problem at all.
The frame comes next and here is where the vague instructions start to strike.
You really have to study the drawing and study the parts to try to figure
out how things match up. And the big instruction sheet start to get annoying …
you constantly have to fold and unfold the sheet to look at the sprue layout to
find the part if it is not readily recognizable.
(Perfection would be to have a bench large enough to place the unfolded
instruction sheet under a pane of glass for constant reference … I did not have
this sort of space unfortunately).
Having said all this, I was impressed with how well everything fit together.
Some attachment points are very tiny and fragile(as are many of the
parts! Be extremely careful
cutting/snipping off the sprue!) so a delicate hand is a must.
The front bumper is truly a fantastic piece of molding – delicate and
light …. took me a few minutes to decide just how to remove it from the sprue
without breaking it. The frame
assembly … especially the rear axles … are going to take much weight, but the
model is small so it should not be a problem at all.
 The body comes next and here parts placement bit me in the rear.
The trunk of the car is attached to the body proper, but again there are
not positive locators. I
unfortunately glued the trunk so the fenders attached to the top of the running
board, they should go behind and to the bottom of the running board.
Does sound like much, only talking a 1/16” or so difference, but this
rotated the trunk enough that the rear doors didn't mate up well at all, leaving
a large gap. I didn't want to risk
breaking the trunk back off and re-glueing, so I added some plastic card to fill
the gap. I could have also
disguised this by leaving the doors open, but I wanted things buttoned up.
I would suggest you cement the front and rear doors in place before you
attach the trunk … this will give you something positive to match up to. Not to
mention saving you a lot of grief. Again, the engineering of the parts is first
rate and quite impressive, but the instructions let you down.
The body comes next and here parts placement bit me in the rear.
The trunk of the car is attached to the body proper, but again there are
not positive locators. I
unfortunately glued the trunk so the fenders attached to the top of the running
board, they should go behind and to the bottom of the running board.
Does sound like much, only talking a 1/16” or so difference, but this
rotated the trunk enough that the rear doors didn't mate up well at all, leaving
a large gap. I didn't want to risk
breaking the trunk back off and re-glueing, so I added some plastic card to fill
the gap. I could have also
disguised this by leaving the doors open, but I wanted things buttoned up.
I would suggest you cement the front and rear doors in place before you
attach the trunk … this will give you something positive to match up to. Not to
mention saving you a lot of grief. Again, the engineering of the parts is first
rate and quite impressive, but the instructions let you down.
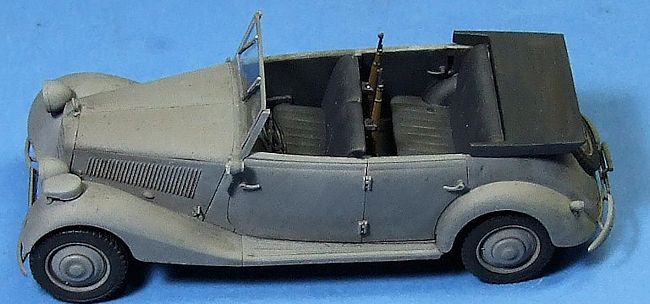
The interior assembles easy enough and is detailed enough for what will be seen. A nice touch is a rifle rack behind the front seat complete with two Kar98 rifles.
| COLORS & MARKINGS |
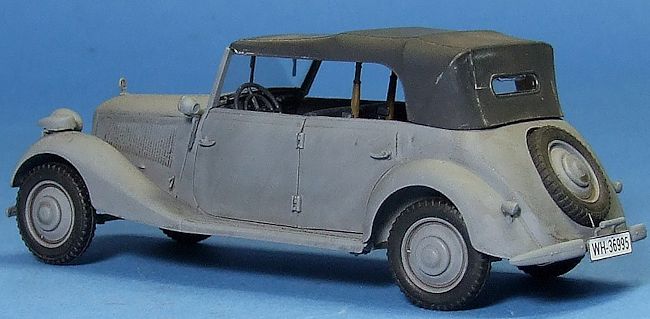 Painting was going to be a quick trip to the spray-booth … overall Panzer gray.
I left the tires, clear bits, and canvas top off and blasted everything
else. The top I sprayed a very dark
gray (almost black) and the interior was brush painted this same shade.
I added a very thin black oil wash to pop out some details and give it a
grittier look.
I had to sand down the rear of the canvas top in order to match the new angle to
to the trunk misalignment, but it looks okay.
I did not glue the top on, it just sits there in order to show both of
the top options.
Painting was going to be a quick trip to the spray-booth … overall Panzer gray.
I left the tires, clear bits, and canvas top off and blasted everything
else. The top I sprayed a very dark
gray (almost black) and the interior was brush painted this same shade.
I added a very thin black oil wash to pop out some details and give it a
grittier look.
I had to sand down the rear of the canvas top in order to match the new angle to
to the trunk misalignment, but it looks okay.
I did not glue the top on, it just sits there in order to show both of
the top options.
| CONCLUSIONS |
This
really is a fantastic little kit. I
was disappointed in the instructions, they are a let-down in a few areas, but
the plastic is well-engineered and thought out.
If you have any 1/35 tanks in your line-up, this is a good kit for size
reference. Just remember to glue
the doors on before the trunk........
| REFERENCES |
Wikipedia
Dale Rannals
April 2014 Thanks to your editor
for the review kit. If you would like your product reviewed fairly and fairly quickly, please
contact
the editor or see other details in the
Note to
Contributors.