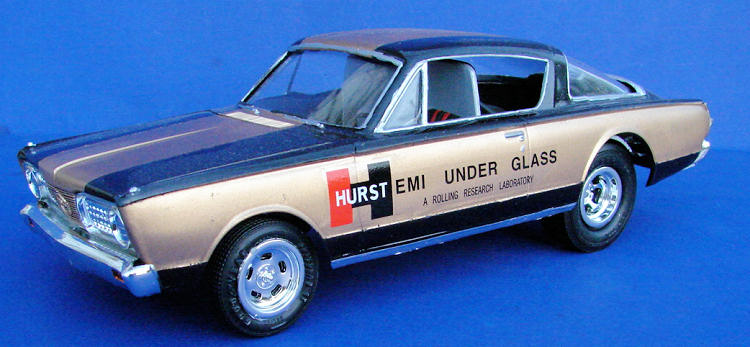
AMT 1/25 1966 'Hemi under Glass'
| KIT #: | 21433P |
| PRICE: | $10.00 at swap meet ($20.00 SRP) |
| DECALS: | One option |
| REVIEWER: | Mark Hiott |
| NOTES: |
Limited decals, no sponsor decals included |
| HISTORY |
 The
"Hemi under Glass" was a
The
"Hemi under Glass" was a
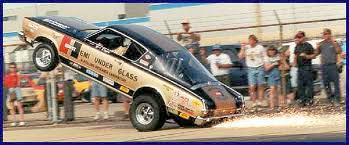
Bob Riggle decided to resurrect the "Hemi under Glass" in 1992 at the insistence of Linda Vaughn and began to build a replica of the 68 model. Completed in 1995, Bob Riggle continued to amaze crowds all across the country with full-track wheel-stands. (Photo is of the 1966 car. Ed)
| THE KIT |
 I'm
not quite sure, but I think this kit might date from the 70's. The sprues show
their age, as there is a lot of flash on the parts. The model is molded in white
plastic, with a chrome sprue as well as the required clear parts. It appears
that
I'm
not quite sure, but I think this kit might date from the 70's. The sprues show
their age, as there is a lot of flash on the parts. The model is molded in white
plastic, with a chrome sprue as well as the required clear parts. It appears
that
The
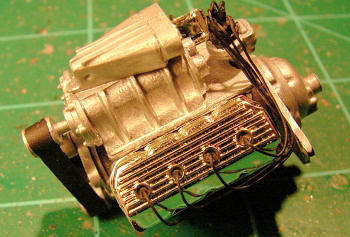
blown Hemi is not correct for the 66 car. The 66 was powered by an injected Hemi
and the stacks were very prominent through the rear window. It also appears the
Decals are very simple; 2 versions of the "Hemi under Glass" for the sides and
that's it. NO sponsor decals are included, I guess they didn't want to pay all
the companies royalties.
Instructions are also very simple, being typical
| CONSTRUCTION |
 I
start most my car builds with the most obvious part; the engine. The first thing
I did was to remove the chrome from most of the engine parts. I doubt people in
the 60's spent money they could ill afford to chrome things and make them
pretty. Besides, the huge attachment points make it kinda necessary. A quick dip
in some Westley's Bleche Wite did the trick. The distributor and valve covers
were also drilled out for plug wires.
I
start most my car builds with the most obvious part; the engine. The first thing
I did was to remove the chrome from most of the engine parts. I doubt people in
the 60's spent money they could ill afford to chrome things and make them
pretty. Besides, the huge attachment points make it kinda necessary. A quick dip
in some Westley's Bleche Wite did the trick. The distributor and valve covers
were also drilled out for plug wires.
The
chassis was assembled per the instructions. I chose to leave the front axle in
chrome as it was possible to hide the "ugly" areas. The engine was installed in
the chassis and the assembled cockpit added. The wheels were then glued to the
axles and the chassis set aside after making sure all 4 touched the ground. I
allowed this to dry over night.
There really is no assembly needed for the body, other then the normal chrome trim and windows. There are a few mold seams to take care of, then it was on to paint.
| COLORS & MARKINGS |
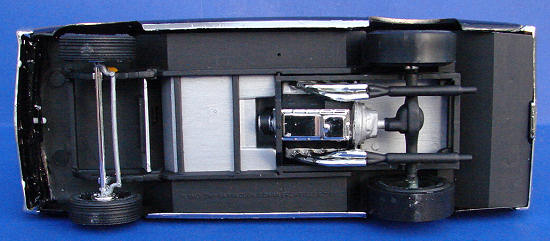 The chassis was brush painted flat black with various trim
parts painted aluminum. The engine block was painted flat black and the heads
and supercharger were painted aluminum. The body was painted with MM Gold then
masked off and the MM Gloss Black sprayed on. The black should have a feather
edge on the top, but I think it looks fine as it is. The inside of the body was
painted flat black after installing the clear part. I didn't really feel the kit
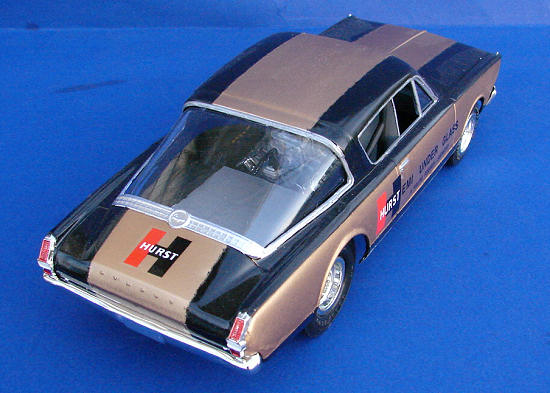
was worth using Bare Metal Foil, so I just painted the trim with Testors Chrome.
I did, however, use BMF on the lower rockers and the trim under the rear window.
The chassis was brush painted flat black with various trim
parts painted aluminum. The engine block was painted flat black and the heads
and supercharger were painted aluminum. The body was painted with MM Gold then
masked off and the MM Gloss Black sprayed on. The black should have a feather
edge on the top, but I think it looks fine as it is. The inside of the body was
painted flat black after installing the clear part. I didn't really feel the kit
was worth using Bare Metal Foil, so I just painted the trim with Testors Chrome.
I did, however, use BMF on the lower rockers and the trim under the rear window.
The
tail lights were painted Tamiya Clear Red, the backup lights flat white and the
front parking lights Tamiya Clear
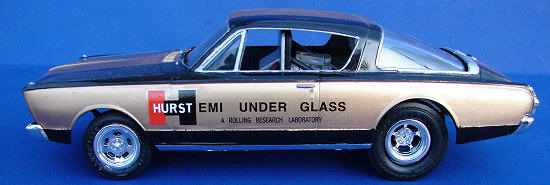 I
applied the decals as shown on the box top. I also used one of the extra decals
to install the "
I
applied the decals as shown on the box top. I also used one of the extra decals
to install the "
The
last parts added were the bumpers and tail lights. The body was then fitted to
the chassis, but not glued down.
| CONCLUSIONS |
 This is not the best kit, as it is definitely showing it's age. The
fit is poor, the chrome parts are typical 70's and it's not particularly
accurate. That being said, it does look nice when it's all said and done. If you
like cars, build one and add it to your collection.
This is not the best kit, as it is definitely showing it's age. The
fit is poor, the chrome parts are typical 70's and it's not particularly
accurate. That being said, it does look nice when it's all said and done. If you
like cars, build one and add it to your collection.
| REFERENCES |
Various websites for the history
Photos off the internet
If you would like your product reviewed fairly and fairly quickly, please contact the editor or see other details in the Note to Contributors.