ACE 1/72 Traction Avant
CV11
| KIT #: | 72273 |
| PRICE: | $8.95 from www.scale-model-kits.com |
| DECALS: | Four options |
| REVIEWER: | Mark Hiott |
| NOTES: | Curbside |
| HISTORY |
The Traction
Avant, French for "forward traction", was designed by André Lefèbvre and
Flaminio Bertoni in late 1933 / early 1934. Not only was the Traction Avant's
drive train innovative, so was its arc-welded monocoque (unitized body).
Most other cars of the era were based on a separate frame (chassis) onto which
the non-structural body ("coachwork”) was built. The suspension was very
advanced for the car's era. The front wheels were independently sprung, using a
torsion bar and wishbone suspension
 arrangement,
where most contemporaries used live axle and cart-type leaf spring designs. The
rear suspension was a simple steel beam axle and Panhard rod, trailing arms and
torsion bars attached to a 3-inch (76 mm) steel tube, which in turn was bolted
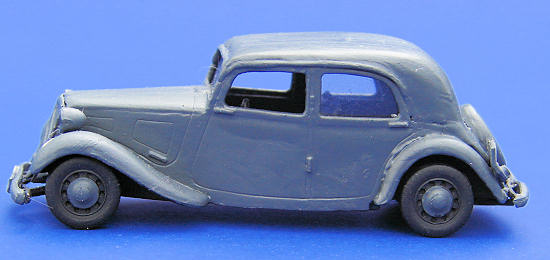
to the "monocoque". The novel design made the car seem very low-slung relative
to its contemporaries — the Traction Avant always possessed a unique look, which
went from appearing rakish in 1934 to familiar and somewhat old fashioned by
1955.
arrangement,
where most contemporaries used live axle and cart-type leaf spring designs. The
rear suspension was a simple steel beam axle and Panhard rod, trailing arms and
torsion bars attached to a 3-inch (76 mm) steel tube, which in turn was bolted
to the "monocoque". The novel design made the car seem very low-slung relative
to its contemporaries — the Traction Avant always possessed a unique look, which
went from appearing rakish in 1934 to familiar and somewhat old fashioned by
1955.
The original
models were a small saloon with a 1303cc engine. This model was called the 7A,
which was succeeded in June 1934 by the 7B and 7C with higher powered engines of
1529 and 1628 cc respectively. Later models were the 11, which had a
four-cylinder 1911 cc engine, and the 15, which had a 2867 cc six-cylinder
engine. The numbers refer to the French fiscal horsepower rating CV. The 11 was
an 11 CV, but curiously the 15 was actually 16 CV. The 11 was built in two
versions, the 11L ("légère", or "light"), which was the same size as the 7 CV,
and the normal model 11, which had a longer and wider wheelbase.
Production of the Traction Avant ended in July 1957. Over 23 years, 759,111 had been built, including 26,400 assembled in Slough in England, 31,750 assembled in Forest near Brussels and 1,823 assembled at Cologne in Germany.
| THE KIT |
Molded in an off-white plastic, parts breakdown is somewhat unusual in that the body is in four parts. However, the fenders are part of the chassis. The parts count is quite small as, being a curbside, there are very few detail parts. Although clearly shown on the box top, no wipers are included. The molding is crisp with very little flash or sink marks. No clear parts are provided, but templates are given for clear acetate that you have to provide. Decals are simple consisting of unit badges and license plates. Instructions are 1 sheet, folded in the middle. The four construction steps are easy to follow, but give no color callouts. Parts layout and decal guides constitute the rest of the instructions.
| CONSTRUCTION |
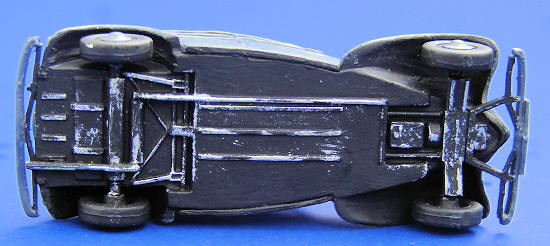
 I started
with the chassis. I attached all the suspension parts prior to painting, but
left off the bumpers until later. The chassis was then flipped over and the
interior was installed. This consists simply of the four seats, no other parts
are provided.
I started
with the chassis. I attached all the suspension parts prior to painting, but
left off the bumpers until later. The chassis was then flipped over and the
interior was installed. This consists simply of the four seats, no other parts
are provided.
Turning to the body, I found that a few more hands would have been helpful. The
body consists of left and right sides, with the roof and trunk as a separate
part. Getting the 3 parts to all line up was a bit of work. There is a somewhat
large seam in the engine cover where the 2 sides come together; some detail was
lost during filling and sanding.
The
window templates are very close to the correct size. I cut mine a bit oversized
and then trimmed them down to fit. I cut off the front windows as I think it
looks better with them down. Once the windows were in place, the dashboard was
attached to the underside of the body.
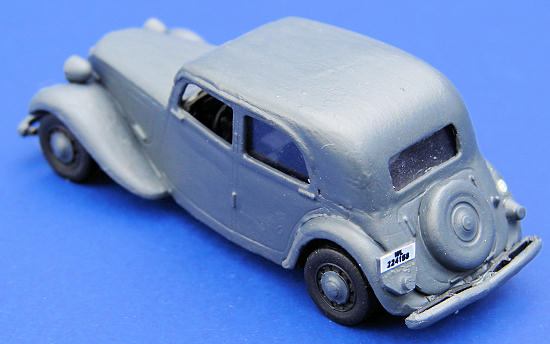
The wheels and bumpers were the last parts installed. As I look at the finished model, I get the feeling that the wheels may be a bit undersize.
| COLORS & MARKINGS |
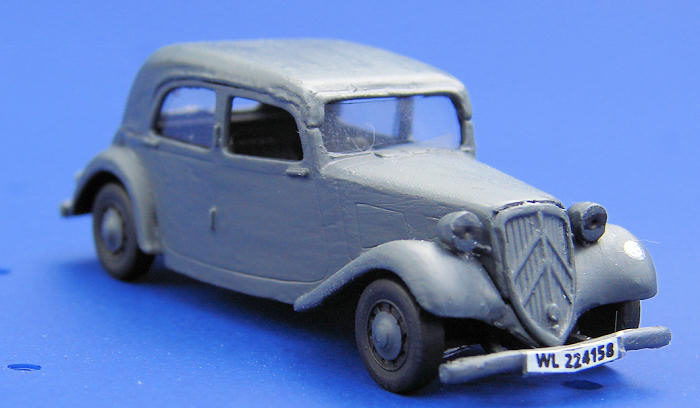
I
opted to build my CV as the Luftwaffe staff car on the Eastern Front in 1941. A
simple paint job in that the car is overall Panzer Gray. Given the odd parts
breakdown, I had to paint this model as I went along.
After the chassis was assembled, I painted it entirely flat black. A quick dry
brushing with silver bought out the detail. The interior was also painted black,
as I doubt the German army would opt for a nice red interior, besides in all the
movies I’ve seen; the German cars always have a black interior. The body was
painted flat black on the inside, the outside was painted gray and the windows
installed. The body was then attached to the chassis and the front fenders
painted. Once everything was dry, a bit of touchup was done.
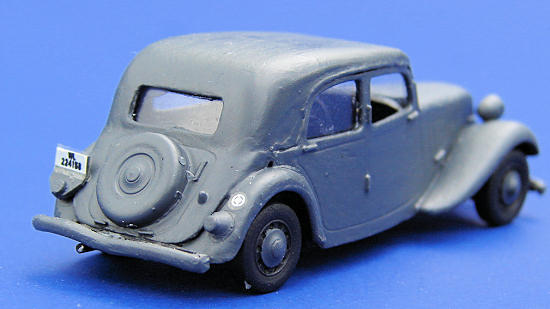
The decals have large carrier films and require a bit of trimming to fit. However, they went on and lay down with no trouble. The wheels were painted flat black with Panzer Gray center caps. The wheels and bumpers were installed on the chassis and the build was complete.
| CONCLUSIONS |
A
simple kit with very few parts, model RR guys as well as Wargamers should find
it interesting. The size and parts breakdown make me a bit leery of recommending
this for younger modelers, but experienced modelers should have no trouble.
| REFERENCES |
 Wikipedia
for the history
Wikipedia
for the history
If you would like your product reviewed fairly and quickly, please contact me or see other details in the Note to Contributors.