Italeri 1/24 Mercedes 230G
Paris-Dakar (Street Version)
| KIT #: | 3692 |
| PRICE: | $ |
| DECALS: | One option |
| REVIEWER: | Mark Hiott |
| NOTES: | Curbside, Street Conversion |
Some time ago (ok, back in April 2006), I did
the review of this kit OOB. You can see that review in the archives. Since I
covered basic build-up in that review, I will not cover that here. As noted in
that review, I stated that the street version parts were included. I will cover
what needs to be done to use those parts in this review.
| HISTORY |
From the instructions: "In 1979, the
Stuttgart based company began producing a completely new range of models,,
off-road vehicles that were the result of a partnership between
Daimler-Benz and the Austrian Steyr Puch. This, then, was the Series 'G'
cars capable of providing excellent off-road performance while retaining
the 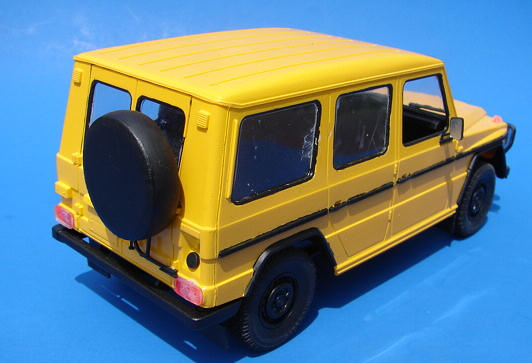 cruising comfort for which Mercedes-Benz is renowned.
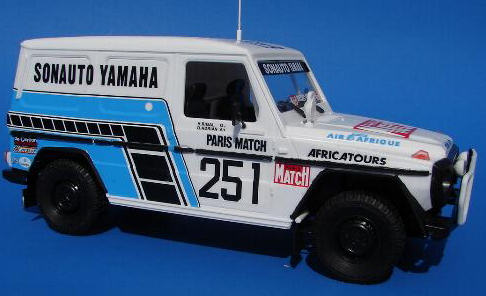
An immediate success, the series 'G' was to pave the way for further success by Mercedes in this sector. The 230G was originally equipped with a straight four cylinder engine of 2308cc and 90 hp. More powerful engine versions were later developed. One such model, specially adapted for the occasion, won the 1982 edition of the famous Paris-Dakar race with Jackie Ickx, and C. Brasseur trouncing a group of seasoned competitors after a long, hard fought race.
| THE KIT |
Since this is the winner of a 1982 race, I'll have to assume that this isn't a new kit. In fact, it seems that if one wanted to, a standard, non-racing version could be built as the instructions have blacked out the additional clear bits and the back seats.
The overall molding is very good with only a teeny bit of flash found in a few places. The additional long range fuel tank does have some rather large sink areas and these can be found on a few other bits. Though this is a curbside, it has a complete chassis with four wheel drive suspension and all the various shafts and links to fit under the floor pan. It also includes a few racing additions like the long range fuel tank, large, off road tires, a roll cage, a skid plate and a piece of plastic mesh to put over the grille's protective crash bar. There inside door inserts and a selection of instrument decals for the instrument panel. Most of the side windows are replaced by solid plastic inserts and additional driving lights are included. Both the clear bits and the body are in their own plastic bag to keep them from being scratched by the other loose sprues in what is a rather large box.
Instructions are the usual excellent ones we have come to expect from Italeri with ModelMaster and generic color references. This vehicle is basically white with some black trim. The large and very well printed decal sheet will take care of any of the color needs of the kit. I saw no registration problems with it and I have generally had good results from using Italeri kit decals. I see no reason why this one should not work just as well. I would suggest using a somewhat strong setting solution just to be sure that it will conform over all the hills and valleys of the body.
| CONSTRUCTION |
Construction is straightforward. When I saw the quality level of the castings, I decided to build this one truly out-of-box.
The chassis is the first step and is a bit fiddly. The front axle in particular takes about 3 hands to get it all in the right places. It appears that the kit was intended to have workable steering, but the last piece installed (25b) locks it straight ahead. The tie-bar (part 31b) is a bit too long and gives the tires excessive camber (in at the top). To cure this a very small chunk (about 1/8th) will have to be removed and the bar glued back together.
 Trap the axles between the
frame rails, but do not glue them, this will make installing the drive shafts
easier. I found the rear drive shaft to be too short. They are a positive fit
with a pin that fits in a hole. I had to remove the locating pin on the rear
shaft to get it to fit.
Trap the axles between the
frame rails, but do not glue them, this will make installing the drive shafts
easier. I found the rear drive shaft to be too short. They are a positive fit
with a pin that fits in a hole. I had to remove the locating pin on the rear
shaft to get it to fit.
The instructions show the exhaust pipes going over the fuel tank, but I couldn’t get it to fit. I ended up cutting some notches in the tank to make it fit and running it under the tank.
The interior is basic, but so was the real thing. It does however have nice decals for the gauges and other dash controls. Detail is good and one-piece side panels are included.
The instructions show the large fuel tank going in the very back of the truck. Given the position of the filler openings on the outside, it belongs right behind the drivers seat.
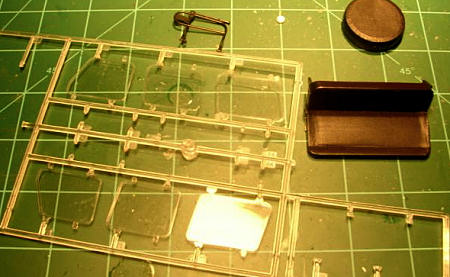
The window filler panels are shown being installed from the outside. The box art shows the filler panels recessed and I installed them from the inside to replicate this
The body has all the accessories that you would expect: driving lights, brush guard, radio antenna, etc. The clear parts for the driving lights don’t fit the actual lights and a bit of work is required here.
The kit gives you a wire mesh for the
brush guard and a template to cut it with. Don’t…the template is too small.
Instead, draw around the guard and use that as a template and just do a final
trim when you glue it in place. On that topic, CA-type glue will be
 required to
get the mesh to stick to the plastic guard.
required to
get the mesh to stick to the plastic guard.
Deconstruction:
The first step was to remove the parts of the
car that were race version only. The fuel tank, plugs for the windows and the
roll bar. I also removed all the outside parts that I would need to reinstall.
The next thing I needed to do was strip the kit
decals from the body. Since they were applied straight on the bare plastic with
no clear coat, a simple wash in warm water was all that was needed to loosen
them up. I then, very carefully, used a sharp knife and a cotton swab to remove
the decals.
After a good scrubbing again, the body was ready for paint.
| COLORS & MARKINGS |
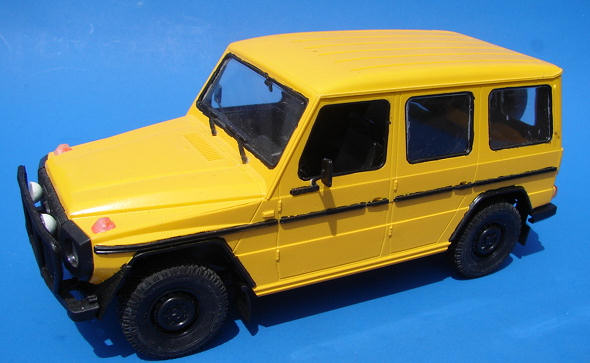
I went over to my paint shelf and picked a
color I had. I painted it with Model Masters Bright Yellow in a rattle can. The
side trim was repainted flat black, as were the window seals.
Reconstruction
 All the parts needed for the street version are
in the box: glass for all the side windows, interior seats as well as the rear
mounted spare tire.
All the parts needed for the street version are
in the box: glass for all the side windows, interior seats as well as the rear
mounted spare tire.
All that was needed for the interior was to
install the back seat. It locates in holes not used by the fuel tank or roll
bar, so that made it easy. Mounting the spare tire was a bit harder. I had to go
on the net and found some photos of the real thing to figure out how it was
mounted. It appears that the carrier was connected to the hinges on the right
rear door. It looks like the tire is mounted a bit high, but that how it’s
supposed to look I guess.
After repainting, all the exterior parts were reattached. I decided to leave the off-road lights and brush guard on the front, as it is a popular option.
| CONCLUSIONS |
There ya have it: the street version on the Mercedes 230G. Those of you who like to build street versions should like this kit. The fact that all the parts are in the box begs to wonder if Italeri puts out a street boxing.
Mark Hiott
May 2009
If you would like your product reviewed fairly and quickly, please contact me or see other details in the Note to Contributors.