| KIT #: | 60736 |
| PRICE: | ¥900 SRP |
| DECALS: | One option |
| REVIEWER: | Kevin Dolin |
| NOTES: | 1997 release |
| HISTORY |
Early in the development of the M6A1 Seiran (晴嵐 – Storm from a Clear Sky), the foldable floatplane designed to fit aboard I-400 class aircraft-carrying submarines, the largest submarines built during WWII and capable of carrying three Seirans for a planned attack on the Panama Canal, the IJN had two preproduction tandem two-seater land planes with retractable landing gear made. They were first used to test the flight characteristics of the airframe and then as trainers for the single seat Seiran. They were given the designation M6A1-K* and the name Nanzan (南山 – Southern Mountain). The folding tip of the vertical stabilizer was deleted as the larger tail the floats demanded wasn't needed. Like the Seiran, the Nanzan was one of the very few Japanese aircraft to use a liquid-cooled engine. After the war, one example of the Nanzan was transported to the Seattle, Washington area for testing. It's fate from there is unknown.
* For those of you unacquainted with the short IJN aircraft designations, the first letter signifies the mission. 'M' is for Special Floatplane, here Navy Special Attack Bomber. The next number shows that it is the sixth of this type, regardless of manufacturer, in this class. The next letter is the manufacturer, Aichi, and the last number shows the model of this particular aircraft, this being the one and only. If you see a dash and another letter, that shows the plane has been repurposed, here 'K' is the trainer designation.
| THE KIT |
 This kit has
sat across from the proprietor's cubby for years. I always see it as I squeeze
by (Can you say very narrow aisles? I knew that you could. I think Scott can
back me up on this.) to the main aircraft kit section. I have the 1/48 Seiran,
but I'm pretty sure I'll never see this in 1/48. I like trainers and the price
was right, so I knew I had to give it a good home. I'll have to look for the
1/72 Seiran to put next to it. It's unfortunate that he didn't have the
M6A1/M6A1-K Dual Combo kit. Of course, I didn't know it existed until I got home
and looked for the kit # on the Seiran to order it. * sigh * Oh, well. Story of
my life. Anyway, let's get to the meat of the matter.
This kit has
sat across from the proprietor's cubby for years. I always see it as I squeeze
by (Can you say very narrow aisles? I knew that you could. I think Scott can
back me up on this.) to the main aircraft kit section. I have the 1/48 Seiran,
but I'm pretty sure I'll never see this in 1/48. I like trainers and the price
was right, so I knew I had to give it a good home. I'll have to look for the
1/72 Seiran to put next to it. It's unfortunate that he didn't have the
M6A1/M6A1-K Dual Combo kit. Of course, I didn't know it existed until I got home
and looked for the kit # on the Seiran to order it. * sigh * Oh, well. Story of
my life. Anyway, let's get to the meat of the matter.
Upon opening the box, one finds the typical Tamiya grey plastic. As you would expect from Tamiya, the plastic is flash-free and not a sink hole in sight. It has engraved panel lines and a very smooth finish on the plastic. A look at the box art will show what a nice paint job can do. The cockpit is very well appointed, with nice sidewall detail and a seating arrangement better than some 1/48 kits I've seen. There are seat belts on the decal sheet if you care to use them. Since there are no floats, there is a smaller sprue for the landing gear. The lower wings are full span, which I've always considered a plus as there are no worries on getting the dihedral wrong. The holes for the landing gear will give you a solid hold. The exhausts are also separate, so you can paint them and save them for the final bits section. The clear bits are fairly thin and the cockpit innards should be easy to see. I must admit I was thrown by the inclusion of the bomb and its cradle as they are nowhere shown in the instructions. Then it dawned on me that these were probably for the Seiran. There are two windscreens as well, one with a hole for a gunsight, no doubt also for the Seiran. The instruction sheet is standard Tamiya although it lacks the usual sprue schematic.
Oddly
enough, all color (or colour for you non-colonials) call-outs are for Tamiya
paints, although substitutes shouldn't be too hard to find. There are two paint
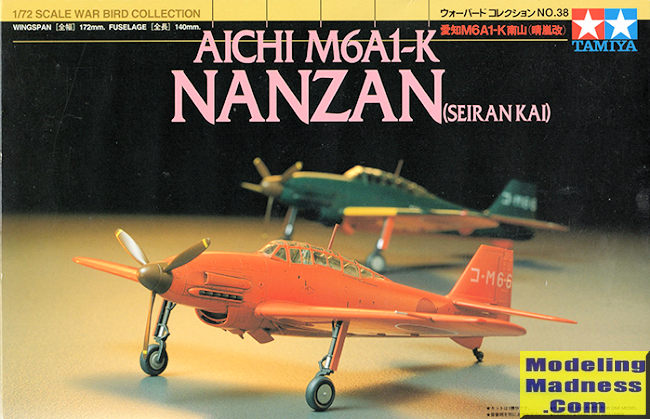
schemes: early-war overall prototype orange** (Actually the instructions call
for 20:1 orange:red brown.) or late-war IJN green over prototype orange. One
quickly learned that flying around in a bright orange plane in the presence of
marauding Allied fighters was not a good idea. The interior is primarily XF-22,
called RLM Grey, which I believe is RLM 02. Thus the decals are good for either
scheme. Also include d are the wing ID panels for the IJN green scheme, those for
the instrument panels, front and back, and the propeller stripes. I'm no decal
maven, but these look like they'll go down well. Last but not least are those
wonderful little poly caps that make putting the propeller on last such a
breeze. I've really been thinking about ordering a bunch of these for both 1/72
and 1/48 kits. It's really not all that hard to scratchbuild some sort of
container for them for kits that leave you with no choice but to install the
prop before painting.
d are the wing ID panels for the IJN green scheme, those for
the instrument panels, front and back, and the propeller stripes. I'm no decal
maven, but these look like they'll go down well. Last but not least are those
wonderful little poly caps that make putting the propeller on last such a
breeze. I've really been thinking about ordering a bunch of these for both 1/72
and 1/48 kits. It's really not all that hard to scratchbuild some sort of
container for them for kits that leave you with no choice but to install the
prop before painting.
** One site, http://www.carrotmuseum.co.uk/carrotplane.html, commented that with its original overall prototype orange and the general carrot shaped fuselage, the plane quickly acquired the nickname ninjin, the Japanese word for carrot.
| CONCLUSIONS |
If you have the old MPM/CMK kit, give it the ol' heave ho or to someone who likes a <ahem> challenge. As you can see, this kit is not parts intensive, the price is right. It should be a relatively quick build and has that sleek liquid-cooled engine look. I'd go with with the over-all orange. Not only will it stand out, you can impress your friends when answering the inevitable question, "What happened to the tail?"
| REFERENCES |
The instructions
Japanese Aircraft of the Pacific War, René J. Francillon, pp. 292,294, Naval Institute Press (March 1987)
https://en.wikipedia.org/wiki/Aichi_M6A Only three sentences at the bottom of the 'Design and development' section. Just about every other mention I found was a copy or rewording of this.
Kevin Dolin
September 2017
Copyright ModelingMadness.com
If you would like your product reviewed fairly and fairly quickly, please contact the editor or see other details in the Note to Contributors.
Back to the Main Page Back to the Review Index Page Back to the Previews Index Page