Hobby Boss 1/72 Me-163B
|
KIT #: |
80238 |
|
PRICE: |
$ (It has to be $10 or less. Ed) |
|
DECALS: |
Two Options |
|
REVIEWER: |
Nathan Stevens |
|
NOTES: |
Quick Build is an understatement |
www.google.com
 Yet
another fine example of Hobby Boss thinking.
These 1/72 HB kits are known for quick building, reasonably detailed
exteriors, basic (at best) interiors and sometimes lacking accuracy.
This one just blends right in.
You get the basic formed parts tray with everything neatly separated
and organized.
I’m convinced this is meant to appeal to the TV-dinner type crowds though I
can’t say I’ve yet had the urge to toss one into the microwave (it does make for
an interesting metaphor, though.)
Yet
another fine example of Hobby Boss thinking.
These 1/72 HB kits are known for quick building, reasonably detailed
exteriors, basic (at best) interiors and sometimes lacking accuracy.
This one just blends right in.
You get the basic formed parts tray with everything neatly separated
and organized.
I’m convinced this is meant to appeal to the TV-dinner type crowds though I
can’t say I’ve yet had the urge to toss one into the microwave (it does make for
an interesting metaphor, though.)
You also get the basic two-fold instruction
sheet which is cleverly narrowed into 3 steps, the most complicated involving 7
pieces!
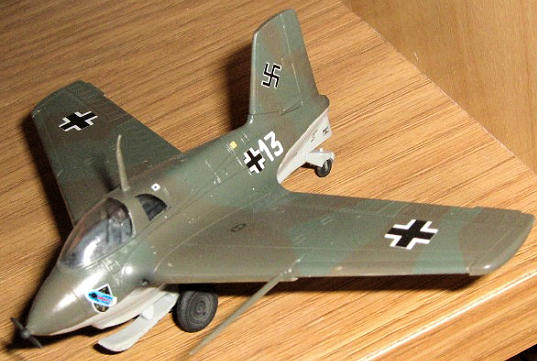
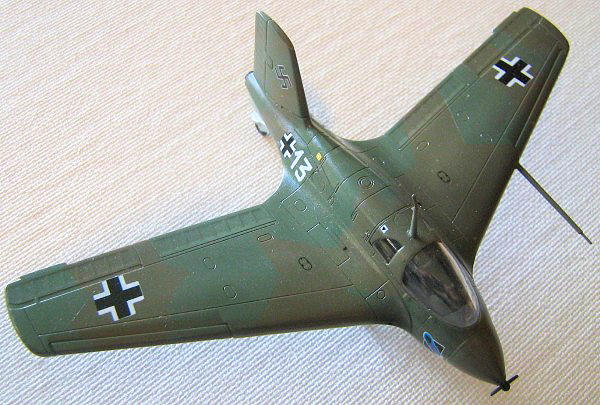
Decals are limited to two schemes, one each German and British markings.
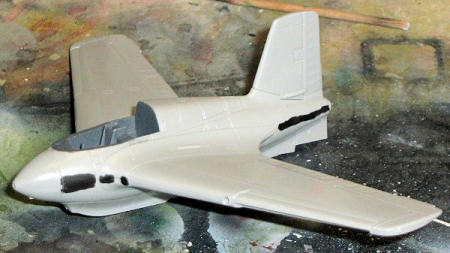
Recessed panel lines, better-than-expected surface detail, so-so
cockpit with no instrument panel, well molded light gray plastic, and optional
tail wheel/struts, etc.
All of what we’ve come to expect from Hobby Boss.
 Glue
top to bottom, add vertical stab and nose cone, paint.
That’s the basic process here.
The wing/upper fuselage is molded as one piece with the lower being
little more than an insert.
Glue
top to bottom, add vertical stab and nose cone, paint.
That’s the basic process here.
The wing/upper fuselage is molded as one piece with the lower being
little more than an insert.
The one piece in between is the wheel well, or
skid well, thing, whatever you call it.
There’s NO guide here and the piece is a lot smaller than the gap it
fills. If I
were to do it again, I’d scratch this from sheet styrene.
The problem is that this sets up the skid struts (which are pretty
sub-standard as well).
Off a little front, back, left, or right and nothing wants to fit
later. This
is the one slap in the face from the whole build (I tend to get a black eye from
Tamiya kits, so this is pretty good).
There was a touch of filling to be done along
the sides and light sanding up front.
The mating surface under the wings, while exposing a small gap was
just within my standards so I left it alone.
The fit of the rest of the exterior, including the nice clear canopy
was up to code for me so WOW, look at the time.
It usually takes me longer than this to get a cockpit ready to
install!
Your options here are an 81/82/76 splinter scheme of
II/JG400 or 81/82/orange in captured British markings (Werk #191060 by the
instructions.)
Color callouts for individual parts are spotty but a little research at
everyone’s favorite modeling website provided
 guidance.
Interior RLM 66, RLM02 for the wells and gear, black wheel hubs,
silver prop.
OK, that was easy too.
I chose to stick with the kit markings as it’s usually what I do the
first time a build a particular kit.
I sprayed the RLM76, strung out a little silly putty for the
demarcation line and proceeded with my typical Scotch tape splinter scheme,
sealed in with future.
guidance.
Interior RLM 66, RLM02 for the wells and gear, black wheel hubs,
silver prop.
OK, that was easy too.
I chose to stick with the kit markings as it’s usually what I do the
first time a build a particular kit.
I sprayed the RLM76, strung out a little silly putty for the
demarcation line and proceeded with my typical Scotch tape splinter scheme,
sealed in with future.
I’ve had great luck with HB decals in the past
and this was no exception.
They hold up well, are generally in register, settle in nicely with a
bit of ModelMaster solvent and are opaque enough to handle contrasting colors.
My gripe here is the stencils.
Several are provided but not enough to even cover the instructions and
the numbers don’t match.
I don’t knew who’s Monday morning mishap this was but it’s a touch
ridiculous.
That aside, the provided 2-piece swastikas were added.
‘Fractured’ markings are fine with me, as long as I don’t have to dig
through my stash to find some that fit.
Everything set, I sealed them in with another coat of Future.
Weathering was kept to a minimum as the Komets didn’t see a lot of
action and ‘wear and tear’ usually met with disaster.
The skid and outer wing bumpers were scuffed and dry brushed with
silver to prove at least one successful flight was managed.
The glossy finish of the Future was accurate enough for me to
represent the polished surfaces of these aircraft at work.
On to the finishing touches.
I attached the dolly and set on the shelf.
OK, done.
It took about as long to write this up as it did to
finish this plane.
Anyone out there looking for a little stress relief or just want to
get something finished, start here!
Thanks again, Hobby Boss.
Keep ‘em coming!
Review section of Modeling Madness and my own imagination.
Nathan
Stevens
September 2008
If you would like your product reviewed fairly and quickly, please
contact
me or see other details in the
Note to
Contributors.
Back to the Main Page
Back to the Reviews Index Page