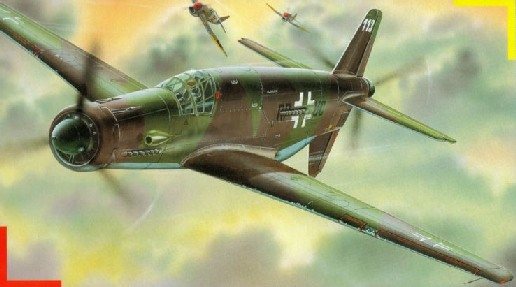
Revell 1/72 Do 335 P Pfeil
|
KIT: |
Revell 1/72 Do 335 A-1 Pfeil |
|
KIT # |
04324 |
|
PRICE: |
20 DM (ca. $9.00) |
|
DECALS: |
Two aircraft |
|
REVIEW
& |
Review: Martin SczepanPhotos: Detlef "Det" Hoffmann |
|
NOTES: |
Conversion to civil variant, using parts from an Italeri Ju 52 |
|
HISTORY |
The civil Do 335 - an (almost) forgotten story
In September 1944 it becomes more and more difficult for the German 'Lufthansa' airline to operate the remaining lines. Despite their large civilian markings more and more often the planes of the airline fall prey to the allied fighters. The only solution for this problem would be a plane fast enough to escape the enemy fighters... In this situation the Lufthansa remembers its successes in the thirties with converted military planes (He 70, He 111, Ju 86 and Fw 200) and orders prototypes of civil conversions of the Do 335 and Ar 234 from Dornier and Arado respectively. Due to the shortness of the available time only minor modifications were possible. After intensive flight testing, the Lufthansa decided to order five Dornier Do 335 P civil conversions. Although the Arado 234 offered better performance, the decision fell on the Do 335 since supply of spare parts and maintenance could not be ensured for the Arado jet.
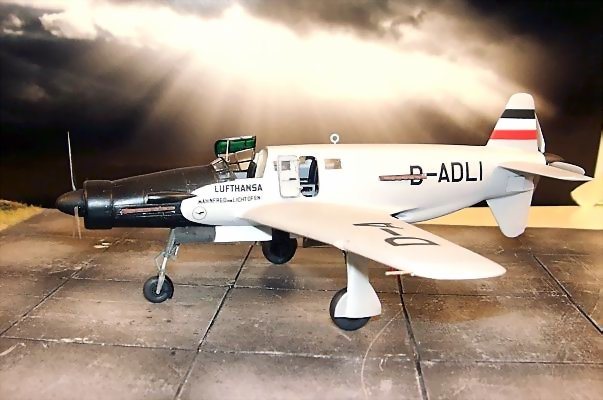
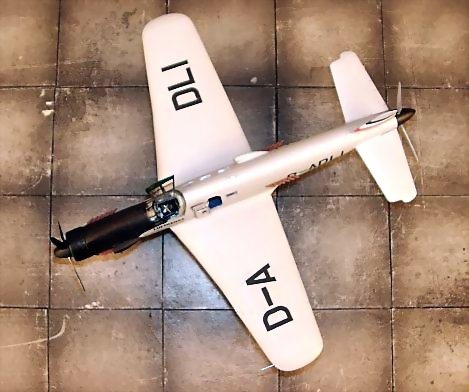
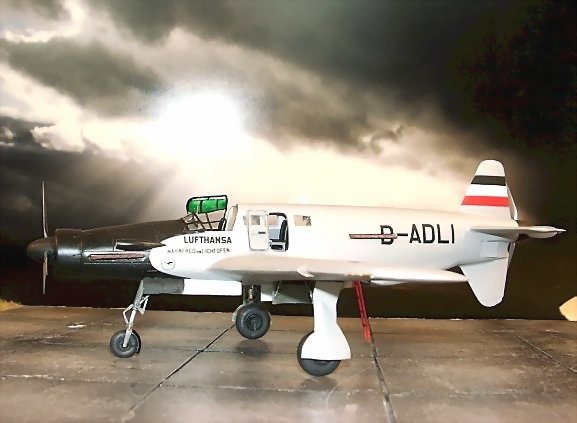
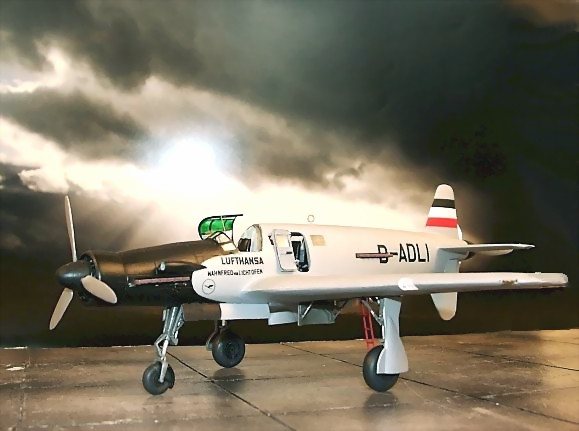
Most modifications on the Do 335 were applied to the fuselage behind the cockpit, which remained unchanged except the deletion of the gunsight and the exchange of the ejection seat with a more comfortable conventional seat. The large fuselage tank behind the cockpit was removed and a passenger cabin with four seats was installed. Obviously comfort was limited in the narrow cabin but much better than to lie on stretchers in the bomb bay of a bomber. To achieve the necessary range, a tank was fitted in the bomb bay and provisions for mounting drop tanks under the wings were made. The armament was completely removed. To avoid confusion with military planes, the aircraft were repainted in a livery reminiscent to the pre war Lufthansa scheme - overall silver grey with black engine area.
Beginning in February 1945 the flight operations with the Do 335 P started,
serving the Berlin-Stockholm, Berlin-Zürich and Berlin-Madrid destinations.
Some days later two of the five planes were destroyed in an allied air raid on
Berlin. Despite these losses, the Lufthansa managed to keep the remaining three
machines - D-ADIK ('Max Mümmelmann'), D-ADIL ('Wahnfred von Lichtofen') and D-ALDI
('Oswald Kolle') - in flying condition and to operate the lines until mid April.
Often the Lufthansa pilots needed all their skills to escape the enemy fighters.
During one engagement on March, 31st Flugkapitän Wilfried R. Ledigt managed to
outmanouvre two American P-61 fighters. Since the pilots lost orientation, the
planes collided.
With the advance of the Russian armies, the flight operations stopped in mid
April 1945. One of the Dorniers was transferred to the Schönwalde airfield near
Berlin with the intention to convert it for the escape of the Führer and his
wife Eva Braun. For this purpose two ejection seats and additional fuel tanks
were to be installed. It is not clear, if the conversion was ever done.
With the end of the war the remaining planes were probably scrapped. Rumors say that at least the wings of one of the planes were seen in Schönwalde after the war.
After the publication of this text in German, a fellow modeler pointed out, that there is some information about the plane in Hitler's diaries (published by a German magazine in the mid 1980's). According to this information Hitler was able to escape from Berlin in one of the Do 335 P's and underwent plastic surgery to alter his face after the war. In volume 0104 he writes that he escaped from Berlin in a Do 335 taking off from a meadow in the Tiergarten park. Taking off was quite difficult because the passenger compartment was loaded with heavy crates containing the panels of the legendary 'Bernsteinzimmer' (The Amber Room).
|
THE KIT |
The basis for my conversion was the Revell/Germany kit No. 04324 which is in fact a reissue of the Dragon/DML kit with the photoetched parts replaced by injected plastic. The kit has all the typical Dragon 1:72 kit properties - somewhat soft plastic with small amounts of flash an a pebbly surface texture. On the upper surface of the flaps are some sink marks. Decals are provided for two 'Luftwaffe' aircraft and show the nice printing quality found with most of the recent Revell decal sheets. The instructions are in the typical Revell style - one third is devoted to safety instructions in at least eighteen languages. The rest is quite usable except the fact that it is printed on three separate sheets of paper - so each time I was looking for the instructions I came up with the wrong sheet while the right one disappeared somewhere on my messy desk... Color callouts are given for Revell colors and with RLM numbers. Additional parts for my civil conversions came from an Italeri Ju 52 or were built from scratch.
|
CONSTRUCTION |
Some wise modeler
once told me that Dragon kits are actually not designed to be built but rather
to be admired in the box. This holds true especially for the 1/72 line and the
Do 335 is no exception. Having worked with some of these kits before I knew what
I could expect and so the first step was to find a strategy to built the kit
with the smallest amount of putty. Well, it turned out that there is no such
strategy - you can only choose where you want to apply the putty. But more on
that later.
Construction started with the cockpit tub which I built as per kit instructions,
leaving out the seat and control stick.. I painted the cockpit light grey with
flat black instrument panels and side consoles. The instrument panel was
drybrushed with light grey and for the side consoles the kit supplied decals
were used.
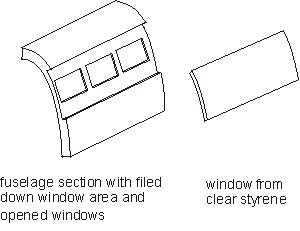 The next step was to build a cabin interior.
Seats were taken from the Italeri Ju 52 and the floor was built from plastic
sheet. Everything was painted in the appropriate colors (grey for the cabin
walls, black for the seats and dark blue for the floor). For easier
assembly, the cover over the area behind the cockpit was divided at the top and
after opening up the windows and door glued to the fuselage halves. The windows
were made from clear polystyrol sheet (evergreen). For this purpose the fuselage
walls were filed thinner at the window position and a strip of clear styrene was
inserted (see my little drawing). With this method the seams are some
millimeters away from the windows which makes filling and sanding easier. With
thin material this should work fine. My styrene was a little bit to thick, which
resulted in some micro-cracks in the windows. It would have been a good idea to
pre-bend the material before under gentle heating... For front and rear
bulkheads of the passenger cabin the kit parts were used.
The next step was to build a cabin interior.
Seats were taken from the Italeri Ju 52 and the floor was built from plastic
sheet. Everything was painted in the appropriate colors (grey for the cabin
walls, black for the seats and dark blue for the floor). For easier
assembly, the cover over the area behind the cockpit was divided at the top and
after opening up the windows and door glued to the fuselage halves. The windows
were made from clear polystyrol sheet (evergreen). For this purpose the fuselage
walls were filed thinner at the window position and a strip of clear styrene was
inserted (see my little drawing). With this method the seams are some
millimeters away from the windows which makes filling and sanding easier. With
thin material this should work fine. My styrene was a little bit to thick, which
resulted in some micro-cracks in the windows. It would have been a good idea to
pre-bend the material before under gentle heating... For front and rear
bulkheads of the passenger cabin the kit parts were used.
Before joining the fuselage halves, the openings for the exhausts were blanked off, since I didn't install the engines provided in the kit. The cockpit tub was glued to the front gear well insert. After closing of the fuselage it became apparent, that there is not enough spacing between the parts so neither the rear cockpit bulkhead nor the wheel well insert fit very well. I decided to have the large gap in the wheel bay and closed the small gap on the cockpit rear wall with a strip of styrene. Now the engine deckings on the front and rear fuselage and the air scoops were mounted. The gun openings on the front fuselage were sanded and filled. Before gluing the front radiator in place appropriate weighting to keep the nose down was installed in form of lead shot.
Now it was time to start with the wing. The inner parts of the leading edges are given as separate inserts to make a cannon armed version possible. Foreseeing fit problems with the construction sequence proposed in the kit instructions I first glued the leading edge upper and lower parts to the upper and lower wings respectively before joining upper and lower wing parts. So I could avoid to have a step between leading edge and rest of the wing. Filling and sanding was the next step in which also the sink marks on the trailing edge of the wing were removed. When I mounted the wing to the fuselage I realised that the price I had to pay for the good leading edge fit was a horrible wing to fuselage joint. I aligned the wing with the fuselage so that at least the upper sides were more or less usable, leaving a step of more than 1.5 mm at the underside. Well, I abandoned the practice of squeezing the putty from the tube directly to the model surface when I was fifteen. Now it was time to revive this old method to get enough filler to the 'joints'...
After spending a considerable amount of my tube of Tamiya putty, every gap was filled and after some days (Tamiya putty tends to dry slowly and to show some sinking in the first days) sanded. To my surprise this revealed some pinholes in the filler which I never encountered before with this brand of putty - probably the tube was a little bit to old... Time to get out my Mr Surfacer 500 and to fill these holes. After some successive filling and sanding procedures everything was to my satisfaction and I masked the windows, the cockpit area and the door opening with Scotch tape and airbrushed the model with a coat of Mr Surfacer 1000. Now it was time to rescribe the lost panel lines.
|
PAINT AND DECALS |
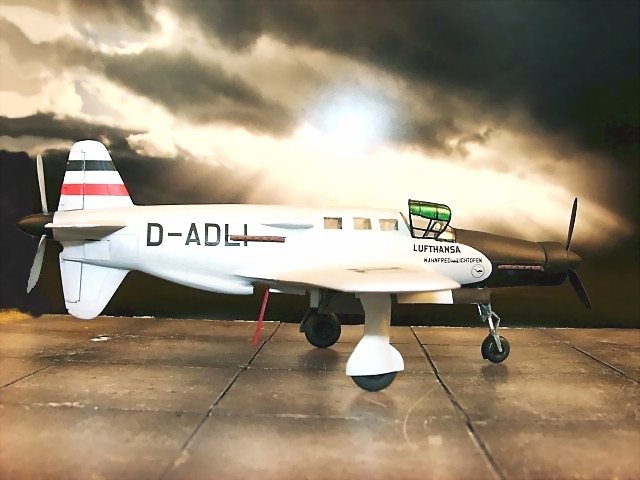
First the kit was airbrushed with aluminum paint (Testors aluminum mixed with 10 percent flat white). After masking with masks cut from Post-It paper this the engine area was airbrushed black. Then the whole model was oversprayed with a coat of Revell clear varnish. Now it was time to apply the decals. The Lufthansa decals from the Italeri Ju 52 came in handy here. Some cutting of the registration letters was necessary because the Italeri kit comes with decals for a modern 'museum' plane (still operated by the Lufthansa) which has different registrations for wings (historic) and fuselage (contemporary). Also the 'Manfred von Richthofen' inscription had to be changed to yield 'Wahnfred von Lichtofen'.
After all decals were applied, the model was airbrushed with a second coat of
Revell gloss, followed by a coat of Humbrol matt varnish.
|
CONSTRUCTION CONTINUES |
The landing gears and small parts were attached next. The propellers are of the infamous single blade type and - since no alignment pins are given, it's difficult to get the angles right. Moreover, it seems, that each of the blades looks different. At least you get four blades for each propeller, which gives you the opportunity to sort out the worst of the bunch... The door for the passenger compartment was built from styrene and brush painted. The landing gear wells, landing gear legs and doors were painted grey green (somewhere between RLM 02 and 66). The seat for the pilot (modified Ju 52 passenger seat with lap belts from lead foil) and control column were mounted to the cockpit. Due to the fit problems the only option was to mount the cockpit hood in the open position. The struts were replicated with strips of black decal. The last step was to mount the ladder (painted red), the door for the passenger compartment and the exhaust manifolds (painted with Humbrol rust followed by special treatment with pastel chalks).
|
CONCLUSIONS |
If you really want to have a Do 335 in 1:72 this kit (in its various DML/Dragon/Revell incarnations) is the only game in town (except for the long discontinued Frog kit). But be prepared for a lot of dry fitting, filling and sanding work. The kit has some really bad fit problems which cannot be avoided by careful planning. Otherwise it has a good level of detail and looks like a 'Pfeil' when completed.
If you can wait, I think there are good chances that Tamiya will scale down their 1:48th scale effort somewhere in the future...
|
REFERENCES |
Dum M. Schwätzer:
"Hitlers Hilfspiloten - Die Geschichte der deutschen Zivilluftfahrt in den
Kriegsjahren 1941-1945"
Hitlers diaries, published in "Stern" around 1983
"Stonk" - German movie from around 1990 (nice movie, mostly about the "discovery" of the bogus Hitler diaries)
April, 2001
If you would like your product reviewed fairly and quickly by a site that averages over 2,200 visits a day, please contact me or see other details in the Note to Contributors.