Dragon 1/48 Me-262A-1a
| KIT #: | 5507 |
| PRICE: | $30-35 on the second hand market |
| DECALS: | Two options |
| REVIEWER: | Jonathan Prestidge |
| NOTES: | Includes a p.e. fret and vinyl tires |
| HISTORY |
 insistence on the Me 262 being used as a bomber. These setbacks were minor
compared to the slow development of reliable jet engines. More than any other
factor, poor-performing, unreliable engines kept the Me 262 (and all other early
jet fighters) from being a deciding factor in the outcome of WWII.
insistence on the Me 262 being used as a bomber. These setbacks were minor
compared to the slow development of reliable jet engines. More than any other
factor, poor-performing, unreliable engines kept the Me 262 (and all other early
jet fighters) from being a deciding factor in the outcome of WWII.
| THE KIT |
This kit originated in the 1980s. Released by
Trimaster it was one of the first “wonder kits” complete with photoetched
details, vinyl tires, engraved detail and comprehensive decals. The price when
released was extravagant, making it somewhat of a “Holy Grail” of models. Dragon
picked up the molds
 after Trimaster went belly up and released the Me 262 as one
of their “Master Series” of kits in the early 1990s.
after Trimaster went belly up and released the Me 262 as one
of their “Master Series” of kits in the early 1990s.
How does it hold up today? The engraved detail is
okay, but not as refined or extensive as that of an Eduard kit. There is minimal
flash, and the clear pieces are of good quality. The photoetched details are
thick. This thickness is good for antennas and structure, but difficult to work
with on the small parts. The kit decals are thin, opaque and in register. Nicely
appointed and detailed, the cockpit is really good. Vinyl tires are a nice
touch.
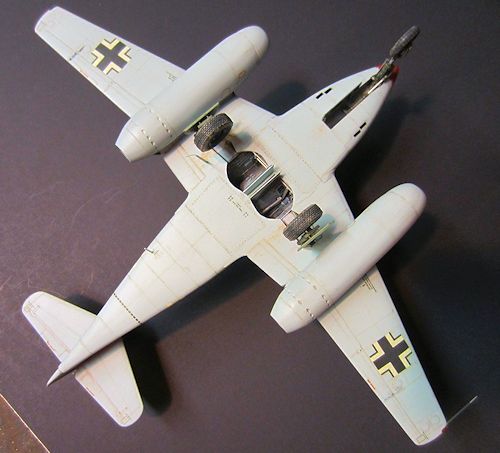
| CONSTRUCTION |
Per the usual, construction began with painting and
detailing the cockpit. As mentioned earlier, the RLM 66 was already painted
throughout. I brush painted the cockpit details and gave the interior a thin
black wash. Once the wash had dried, I drybrushed the interior with a slightly
lighter shade of gray. I added the photoetched seatbelt for the pilot’s seat.
Because of the paint interacting with the Tenax, I had d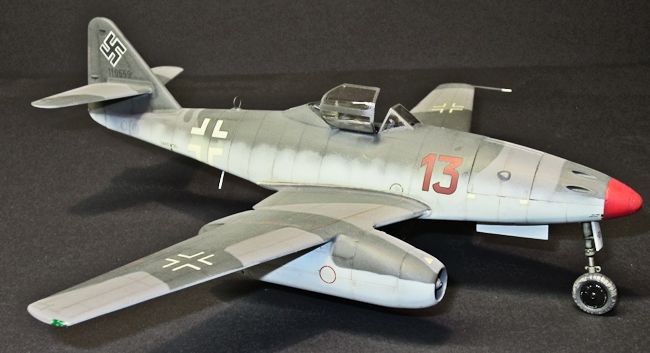 ifficulty getting the
interior bits to hold together. Perseverance prevailed and I closed up the
fuselage. Though fit is not the best, the rest of the airframe built up without
drama. Several sessions of adding putty, Mr. Surfacer and sanding followed.
ifficulty getting the
interior bits to hold together. Perseverance prevailed and I closed up the
fuselage. Though fit is not the best, the rest of the airframe built up without
drama. Several sessions of adding putty, Mr. Surfacer and sanding followed.
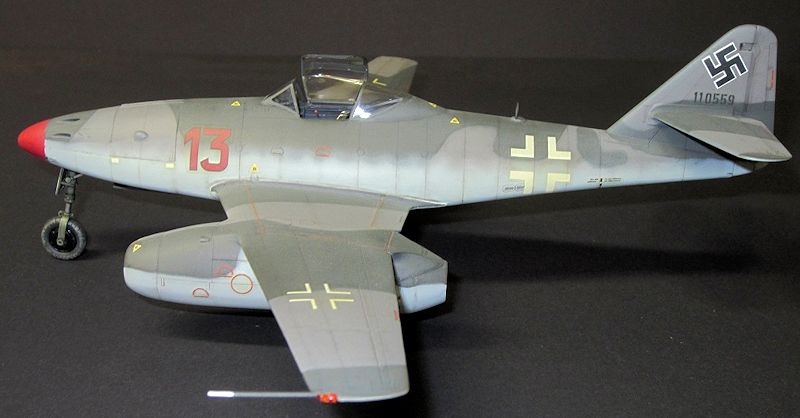
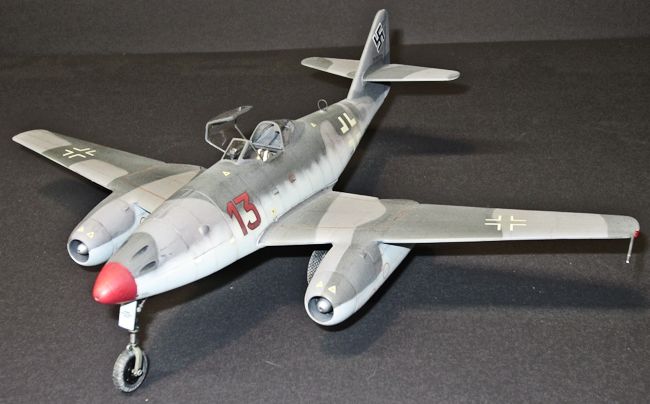
| COLORS & MARKINGS |
Oberstleutnant Heinz Bar was a jet ace with 16
“kills” to his credit while flying the Me 262. There are well circulated black &
white photos of Bar’s “red 13”. There are also countless reviews showing it in
late war camouflage of RLM82 and RLM83 over RLM84 (a late-war version of RLM76).
While this may be the case, there is evidence that Bar’s plane was an early
version and would have been painted in RLM74 & RLM75 over RLM76. Evidence
includes: the airframe serial number (earlier aircraft), lack of pilots head
armor (clearly visible in the photos), and lack of gun blisters on the nose. I
chose to finish my Me 262 in the earlier camo scheme (it is a good looking bird
either way).
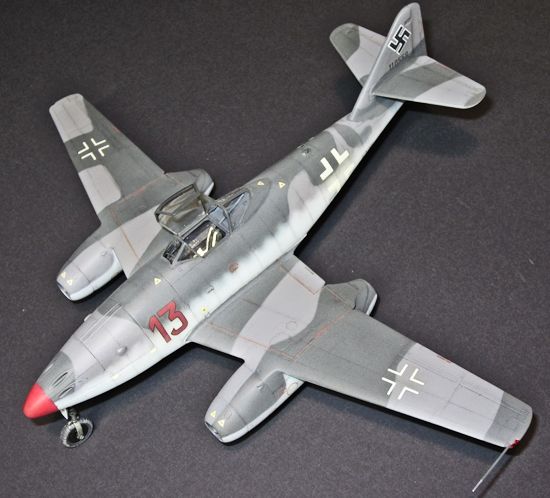
 followed by RLM 02 on the gear doors and landing gear. The RLM 74, 75, &
76 were added in several painting and masking sessions.
followed by RLM 02 on the gear doors and landing gear. The RLM 74, 75, &
76 were added in several painting and masking sessions.
| CONCLUSIONS |
There are many reviews of the
Dragon/Trimaster Me 262 out there. Most agree that it is still a good kit that
turns out nicely. There are two areas where this kit falls a bit short of
current off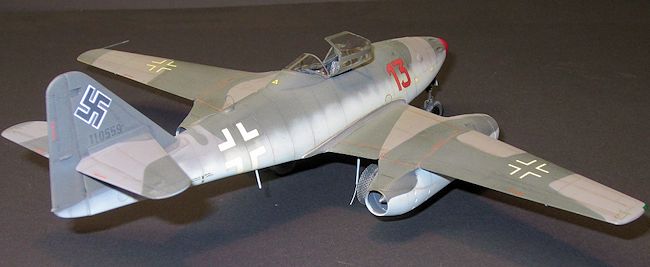 erings. When compared to Tamiya and Hobby Boss Me 262s, the
finesse/amount of the engraved detail and the fit of some parts in the Dragon
kit is a bit crude. Though it looked a little rough in the box, I’m impressed
with the end result. The airframe builds up relatively easily, the photoetched
structural parts are straightforward to install, and the level of detail they
add is really nice. The clear parts are okay and the decals work well. Due to
the multimedia nature of the kit, the higher parts count, and the sometimes
fiddly construction, I would recommend the Dragon Me 262 for those modelers with
some model building experience.
erings. When compared to Tamiya and Hobby Boss Me 262s, the
finesse/amount of the engraved detail and the fit of some parts in the Dragon
kit is a bit crude. Though it looked a little rough in the box, I’m impressed
with the end result. The airframe builds up relatively easily, the photoetched
structural parts are straightforward to install, and the level of detail they
add is really nice. The clear parts are okay and the decals work well. Due to
the multimedia nature of the kit, the higher parts count, and the sometimes
fiddly construction, I would recommend the Dragon Me 262 for those modelers with
some model building experience.
December 2013
Thanks to for the review kit. You can find this one at your favorite hobby shop or on-line retailer.
If you would like your product reviewed fairly and fairly quickly, please contact the editor or see other details in the Note to Contributors.