ProModeler 1/48 Ju-88v6 (Conversion)
|
KIT #: |
? |
|
PRICE: |
$? |
|
DECALS: |
? |
|
REVIEWER: |
Greg Goheen |
|
NOTES: |
Conversion |
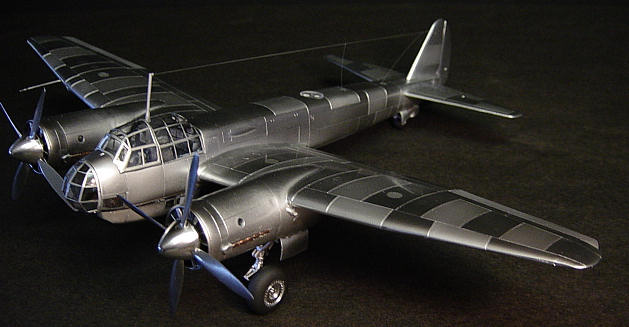
Inspired by Ken Merrick’s photographs of the
Junkers Ju 88V-6 shown in Luftwaffe Colors – Volume 1, I wanted to replicate
this bare metal bomber and started with the 1/48th scale Pro Modeler
Ju 88A-4 kit and began to backdate it accordingly.
No information supplied
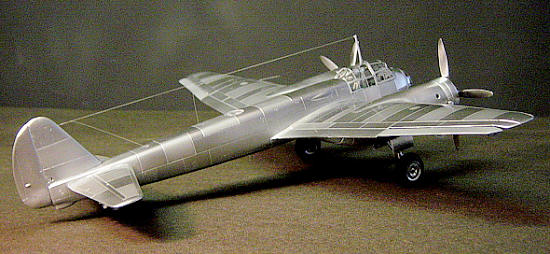 For
starters, the Ju 88V-6 shown was not only has a bare metal airframe prior to any
paint being applied to her but round nacelles until those furnished in the A-4
kit as well as four bladed propellers.
Likewise, the V-6 prototype that later became the A-1 production model
featured a shorter wingspan as well as slightly different tail. All of these,
with the exception of the propellers, were easy enough to accomplish with the
addition of the MDC resin conversion kit (#CV48019).
The kit includes fully rounded nacelle halves, shorter wingtips,
replacement ailerons, engine faces, rudder and tail section as well as the
single gun clear housing for the gondola.
Fit of the replacement nacelles was extremely difficult in that the resin
is exceptionally thinly molded and I wound up splitting both nacelles.
Still, with some effort and patience, as well as plenty of putty and
elbow grease the desired fit can certainly be attained.
Construction of the kit and resin
components is fairly straightforward yet the real challenge was the four bladed
VDM propellers. The photographs
used for this build suggest the spinner was slightly larger than the standard
spinner but that the blades were typical for an A-1.
I finally decided a bit of ingenuity along with readily accessible resin
parts might solve the problem. I
found that the Typhoon resin prop replacements from Ultracast (#48074) had the
right shape I was looking for in the spinner.
The problem, however, is that the resin propellers were far too thick
and, even worse, I didn’t realize that the blades were chamfered it such a way
as they would be oriented for spinning clockwise, rather than counter-clockwise
as the BMW radial on this bomber was to show.
Luckily the MDC resin conversion does include the proper thin-style VDM
blades so I then had to cut and shape the Ultracast blades accordingly so they
would look right. This, of course,
left quite a bit of gapping at the point of connection of the blade into the
spinner housing that was solved with GSI/Creos Mr. Putty and plenty of wet
sanding.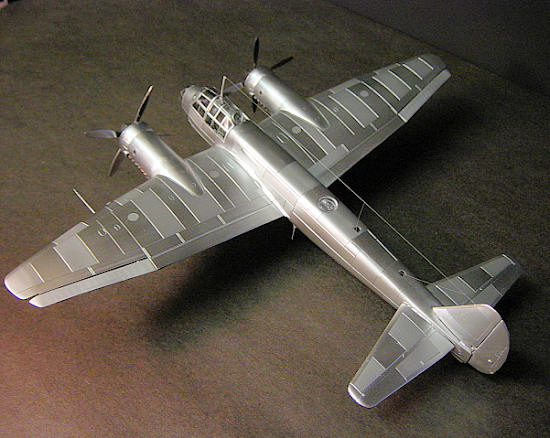
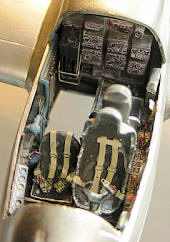 The
interior was dressed up with Eduard PE details and painted with GSI/Creos Mr.
Color. As this was a prototype
aircraft I kept the interior fairly clean other than a few scuff marks here and
there and no need for a wash at all.
The exterior, however, received the most attention as painting any bare
metal aircraft requires two things…time and patience to achieve a realistic
finish. This means that any and all
blemishes or seams will be accentuated by the viewer and liken your work to a
plastic model with silver paint instead of a true miniature replica.
The
interior was dressed up with Eduard PE details and painted with GSI/Creos Mr.
Color. As this was a prototype
aircraft I kept the interior fairly clean other than a few scuff marks here and
there and no need for a wash at all.
The exterior, however, received the most attention as painting any bare
metal aircraft requires two things…time and patience to achieve a realistic
finish. This means that any and all
blemishes or seams will be accentuated by the viewer and liken your work to a
plastic model with silver paint instead of a true miniature replica.
Once the majority of the
construction was complete I began with the preparation of the surface by
rescribing all panel lines. This is
tedious work, yet necessary as the faintly engraved panel lines of this trusty
old kit needs a little work. Then I moved on to preparing the surface by
shooting the model with several light coats of GSI/Creos Mr. Surfacer
1000.
After this cured I wet sanded the surface with MicroMesh 4000 grit
sanding cloth and working my way up to 8000 grit.
I then applied GSI/Creos Mr. Surfacer 1200 in two light coats over the
airframe before wet sanding again with 6000 grit and working up to 12000 grit
sand cloth. The surface was ready,
as it had a high luster sheen to it and was as free of blemishes as she could
be. One thin, even coat of GSI/Creos
Mr. Color gloss black lacquer was applied over the entire surface and allowed to
cure before I applied a thin coat of Future for added insurance not to burn
through the black paint.
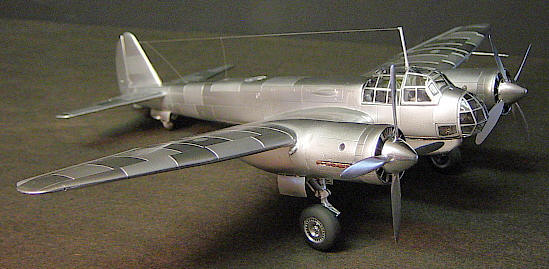 Now
it was a matter of applying the various tones of metal to this build.
Alclad II lacquers were used and I began with several light mists of
Polished Aluminum (#105) as my base color.
Then began the truly fun part of masking random panels and applying other
tones from Aluminum (#101) to Duraluminum (#102) to Dark Aluminum (#103) to
White Aluminum (#106) on the ailerons.
Masking all this was done in phases and is quite tedious but well worth
the effort to transform an otherwise mono-toned metal finish into a realistic,
multi-toned airplane. For some of
the round filler hatches I used my TechStar metal template (#TC2007) and cut out
a mask with a sharp blade onto Tamiya tape I’d laid out.
For the wheels I shot these entirely in gloss black lacquer before I lay
out Tamiya tape on my work surface and used a compass cutter for my paint mask.
I saved the circular plug so that after I’d airbrushed Alclad II to the
rim of the tire I could use this plug to protect my metal paintwork as I applied
clear flat lacquer over the tire for a more realistic look.
Completing this build revealed a very realistic
looking metal finish to this bomber.
I applied a light coat of Future over the Alclad to protect the finish
and give it that much more sheen before finishing off with the last fiddly-bits
of work.
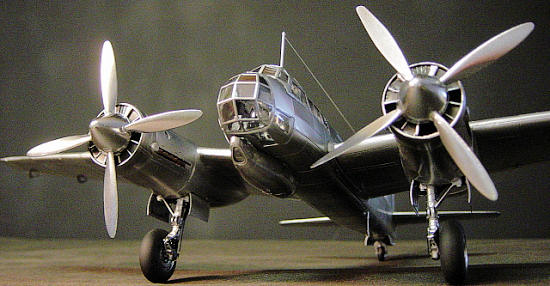 It was
necessary to apply the canopy with cyanoacrylate as the back portion where the
radio operator would sit was out of tolerance.
I had to tack one side and fix in place by applying CA accelerator before
I then applied a small bit of CA to the other side and gently stretched the
canopy with tweezers until the desired fit was achieved.
This too was quickly set in place with a squirt of CA.
The antennae mast was fit into place with CA and accelerator while I
stretched out a good length of sprue for the antennae wiring.
The backsides of the resin propellers were drilled out and fitted with a
small section of brass tubing to fit the engines accordingly.
28ga brass wiring that had been pre-painted flat black was cut, shaped
and glued into place for the hydraulic lines.
And lastly, the kit’s clear plugs used for the gauges housed on the sides
of the nacelles were thrown out in favor of applying Krystal Klear to these
small voids and allowing to dry accordingly.
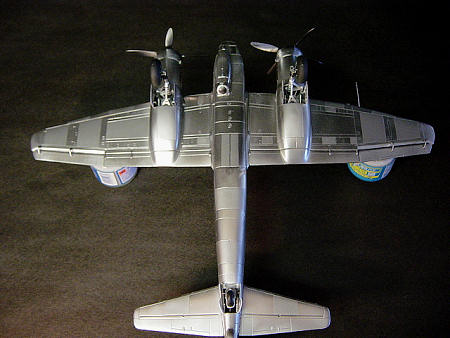 The
end result, as can be seen, is a striking replica of one of the prototype from
Junkers that truly started it all….the springboard for the Ju 88A-1, as well as
the extensive list of variants that saw the Ju 88 from the earliest stages of
the war right through to the Ju 388, seeing it’s service life reach all fronts
of the war.
Greg Goheen
June 2010
Copyright ModelingMadness.com. All rights reserved. No reproduction in part or in whole without express permission from the editor.
If you would like your product reviewed fairly and quickly, please
contact
the editor or see other details in the
Note to
Contributors.
Back to the Main Page
Back to the Review
Index Page 2023


 For
starters, the Ju 88V-6 shown was not only has a bare metal airframe prior to any
paint being applied to her but round nacelles until those furnished in the A-4
kit as well as four bladed propellers.
Likewise, the V-6 prototype that later became the A-1 production model
featured a shorter wingspan as well as slightly different tail. All of these,
with the exception of the propellers, were easy enough to accomplish with the
addition of the MDC resin conversion kit (#CV48019).
The kit includes fully rounded nacelle halves, shorter wingtips,
replacement ailerons, engine faces, rudder and tail section as well as the
single gun clear housing for the gondola.
Fit of the replacement nacelles was extremely difficult in that the resin
is exceptionally thinly molded and I wound up splitting both nacelles.
Still, with some effort and patience, as well as plenty of putty and
elbow grease the desired fit can certainly be attained.


 It was
necessary to apply the canopy with cyanoacrylate as the back portion where the
radio operator would sit was out of tolerance.
I had to tack one side and fix in place by applying CA accelerator before
I then applied a small bit of CA to the other side and gently stretched the
canopy with tweezers until the desired fit was achieved.
This too was quickly set in place with a squirt of CA.
The antennae mast was fit into place with CA and accelerator while I
stretched out a good length of sprue for the antennae wiring.
The backsides of the resin propellers were drilled out and fitted with a
small section of brass tubing to fit the engines accordingly.
28ga brass wiring that had been pre-painted flat black was cut, shaped
and glued into place for the hydraulic lines.
And lastly, the kit’s clear plugs used for the gauges housed on the sides
of the nacelles were thrown out in favor of applying Krystal Klear to these
small voids and allowing to dry accordingly.