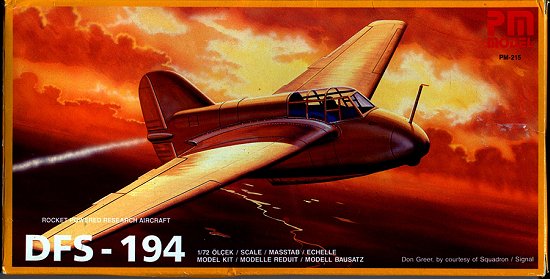
PM Models 1/72 DFS-194
|
KIT # |
215 |
|
PRICE: |
£4.85 MSRP |
|
DECALS: |
None |
|
REVIEWER: |
Alan Culpitt |
|
NOTES: |
I got it for £1.99 off eBay |
|
HISTORY |
Dr’s Lippisch and Walter were two of Germany's more prominent rocket propulsion pioneers, Lippisch designed the airframe and Walter the power plants. The DFS –194 was the first of their co-operative ventures and finally flew in early 1940 with Heini Dittmar at the controls. Dittmar was a brave man, a very… very brave man. The Walter rocket engines were what we would call today hypergolic that mean igniting easily. Effectively all the rocket engine did was to control an almighty great chemical explosion and fire the exhaust gases out of a tube at the back of the airplane. They were quite hair-raisingly dangerous and inclined to explode at the drop of a hat. The fuels called T stoff and Z stoff were lethal on their own and would explode when combined. There was not a millimetre of margin for error both on the part of the ground staff and the pilot.
Having said that, the DFS 194 was eventually developed into the ME 163 the only rocket-powered fighter to enter service during the Second World War. It’s a fascinating story both of the courage of the men who flew the aircraft, the ingenuity of the designers in the face of the pressures of warfare and the ultimate pointlessness of developing such a high tech fighter aircraft (for its time) that actually killed more German pilots that those on the side of the allies.
|
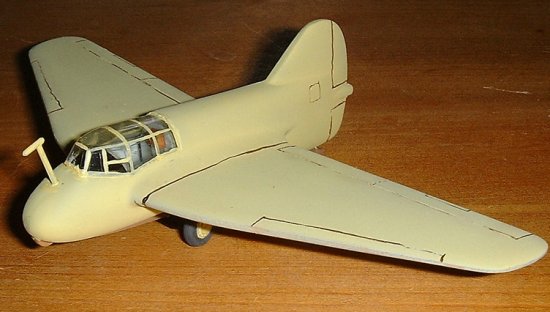
THE KIT |
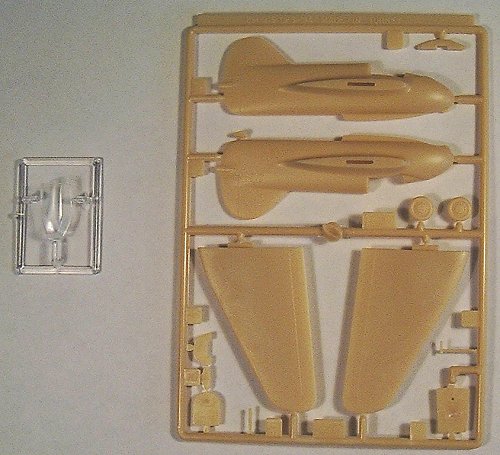
This is not a complicated kit. It consists of 12 parts (count them… 12) somewhat heavily moulded in cream coloured plastic and one transparent canopy. The mouldings aren’t brilliant but the parts fit together well. The biggest problem is the canopy, which is very thick, and the lines etched into the mould for the framing where all over the place. If the real canopy had had framing this thick the pilot would not have been able to see out! Its made by PM Models who hail from Turkey (don’t you just love the global economy!) and whilst not the state of the art in terms of multimedia artistry build up into a nice model, in a short space of time, and adds very nicely indeed to the model collection of anyone who is into Luftwaffe modelling and especially the stranger and more esoteric aircraft of the period. There are no decals and only one colour scheme because there was only one aircraft. The airframe was RLM 05 a rather fetching shade of cream and a nice change from the dark green on light green on pale blue camouflage that can weary even the most avid Luftwaffe fan!
I actually bought the kit via Ebay. For anyone who has not tried Ebay go give it a try its brilliant! I go to the UK site. Its basically a huge jumble sale (I don’t know what you chaps across the pond would call it) with thousands upon thousands of items for sale. They are organised into categories, the model aircraft come under the rather strange and confusing category heading of Toys, Bean Bag Plush:Plastic Models:Air You have to register and give a few details, and then you’re away. If you see something you want you can place an online bid for the item. Once you’ve bid Ebay will email you if you’re outbid and you can up your bid if you want. At the end of the auction you email the seller, they tell you how much you need to pay and where to send the cheque and once they receive the cheque you get the model. The site is fantastic both for picking up those out of production kits (I’m currently building an Italeri Gotha Go 242 that must be at least 20 years old) and for selling off stuff. So for anyone who’s wife says: “Either those kits go or I do!!!” Try Ebay!
|
CONSTRUCTION |
 After a recent titanic struggle with a
He 177 I decided that what I wanted was something nice and simple and
unchallenging, but something I finish to the absolute best of my abilities. I
have very few references for the DFS 194 except for a few pictures of the maiden
flight so I had no idea what the insides looked like. Anyway minimal detailing
was needed as its only 1/72 scale and the canopy is so thick you can’t see it
anyway! The main plan was to get the seams as smooth as smooth can be, the
colour even and clear and try hand painting the canopy framing instead of the
usual fiddly mask and spray technique.
After a recent titanic struggle with a
He 177 I decided that what I wanted was something nice and simple and
unchallenging, but something I finish to the absolute best of my abilities. I
have very few references for the DFS 194 except for a few pictures of the maiden
flight so I had no idea what the insides looked like. Anyway minimal detailing
was needed as its only 1/72 scale and the canopy is so thick you can’t see it
anyway! The main plan was to get the seams as smooth as smooth can be, the
colour even and clear and try hand painting the canopy framing instead of the
usual fiddly mask and spray technique.
I started with the usual washing of the sprue and priming of the interior parts. I painted the interior grey green, RLM 02 from the control stick and rudder ‘pedals’ (wedges really) black, the instrument panel RLM 02 grey green with black dials, the seat base and head restraint leather red/brown and the part over the instrument panel and under the canopy black. I have no idea if this is correct or if the seat was really in this configuration but then, does anybody? I used Humbrol paints. I use Humbrol partly for old times sake, (they were the colours I used when I was a kid) and partly because they brush paint and cover better in one coat than Hannants Xtracolour. They are also widely available in the UK, as we don’t have the luxury of all the manufacturers you have in the USA. Oh and by the way who on earth dreamt up the name Gunze Sankyo for paint! We have a word in the UK, gunge, which means messy and semi liquid like mud. It sounds like Gunze and if they sold their paint in the UK it would probably need a brand change!
Anyway, that done I let everything dry, and then fixed the cockpit sub assembly into the fuselage halves and left to dry. Does anyone else out there have trouble getting major components to stick together? I have experimented with all kinds of glues. I don’t like cyano-crylate as it smells horrible and mists over the canopies. I have tried mek-pak liquid glues but they’re not strong enough to fix together fuselage halves. I use Humbrol liquid glue in a little bottle with a very fine metal tube for application, which seems to work best. I still have trouble with areas that come under high stress, fuselage seams and wing roots, coming apart especially when sanding down filler. After the glue had dried here I fixed the wings in place and got to work filling and sanding down the seams. The parts actually fit quite well and they needed only a small amount of Milliput super fine white (another material I can’t get on with) and some rubbing down with wet and dry. I painted the instrument panel cover black and fitted in place the canopy. I then masked the canopy fully and sprayed over with primer. A little touching up of the seams and another coat of primer and that’s the construction done! All of two days work, exhausting!
|
PAINTING & MARKINGS |
 Again I used Humbrol number 74 cream for
the main fuselage and this actually needed two coats of paint to get a decent
covering. The ME 163 is an excellent model to paint as the rocket outlet pipe
makes a perfect place to put a cocktail stick in order to hold the model whilst
spraying! Don’t push too hard as I did however as you can split the two halve
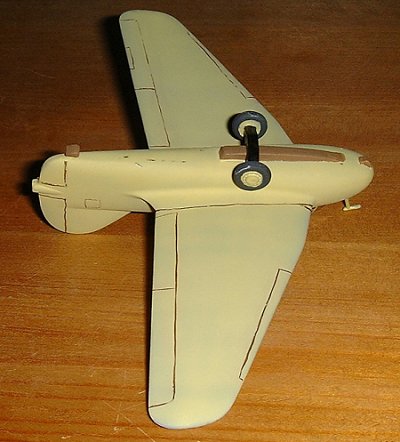
apart again (what was I saying about glue?) I sprayed the undercarriage dolly
black and brush painted the tyres very dark grey. The undercarriage skid and
rear tailskid I painted wood brown. That was after I managed to break off the
rear tail skid, that was integrally moulded into one of the fuselage halves,
and, whilst trying to clean up the seams and glue it back on again, it pinged
out of the tweezers and down through a hole in the floorboards grrrrrrrr!
Again I used Humbrol number 74 cream for
the main fuselage and this actually needed two coats of paint to get a decent
covering. The ME 163 is an excellent model to paint as the rocket outlet pipe
makes a perfect place to put a cocktail stick in order to hold the model whilst
spraying! Don’t push too hard as I did however as you can split the two halve
apart again (what was I saying about glue?) I sprayed the undercarriage dolly
black and brush painted the tyres very dark grey. The undercarriage skid and
rear tailskid I painted wood brown. That was after I managed to break off the
rear tail skid, that was integrally moulded into one of the fuselage halves,
and, whilst trying to clean up the seams and glue it back on again, it pinged
out of the tweezers and down through a hole in the floorboards grrrrrrrr!
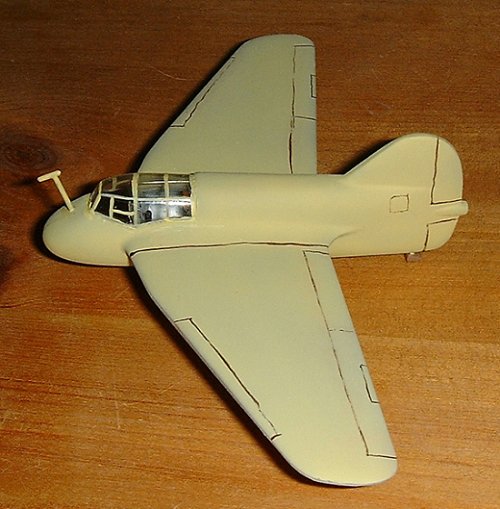
I may not be the greatest scratch builder in the world but if this keeps on happening my skills can only keep on improving! A little chopping, sanding and drilling later, I had a new scratch built tailskid in position. After that minor setback I removed the canopy mask and painted in the framing details freehand, by brush. It’s actually not too difficult if you have a steady hand. Not too much coffee beforehand, and remembering to breath helps! Make sure you paint the edges of the canopy where they join the fuselage and blend in the paint with the sides and it doesn’t look too bad. Finally I fixed in place the immense Pitot tube, (why was it so big?) With hindsight I could have used my nascent scratch building skills to make a much finer version than the rather coarse and stubby one provided with the kit. To scale the kit version would have been like a length of drainpipe on the front of the aircraft! The final touch was fitting the dolly to the wooden landing skid.
As for markings: there weren’t any! In addition, Humbrol paint is matt so I didn’t even need to matt varnish the model to finish it and seal in the decals
|
CONCLUSIONS |
As they say in my part of the world a canny wee kit! A corker for a beginner, a good one for anyone who likes unusual Luftwaffe subjects and a fine piece of modelling therapy for anyone who has just completed something, big and complicated that didn’t go exactly according to plan.
|
REFERENCES |
Warplanes of the Third Reich by Williams Green (a fantastic reference book that now out of print, if you see a copy in a second hand shop buy it!) (Editor's note: the William Green book is indeed a super reference. It is also nearly 50 years old so its information should not be taken as gospel. Research in the convening years has proven some of his material to be incorrect and misleading so a second and more modern opinion is a wise course when researching a particular subject.)
Copyright ModelingMadness.com. All rights reserved.
If you would like your product reviewed fairly and fairly quickly, please contact the editor or see other details in the Note to Contributors.
Back to Reviews Page 2020