Dragon 1/48 Ju-88G-10
|
KIT # |
5521 |
|
PRICE: |
$45.00 CDN |
|
DECALS: |
One aircraft |
|
REVIEW : |
Mike Beswick |
|
NOTES: |
Kit currently OOP |
|
HISTORY |
The G series of the Ju-88 where designed to be night fighters. Production began in 1943 with the G-1. On the G series of night fighters the curved tailplanes on the Ju-88 were replaced by an enlarged square tipped one. The nose gondola was also removed and replaced by a belly pod containing four 20mm cannons.
The Ju-88 G-10 was designed as a long-range high performance night fighter. The basis of the Ju-88 G-10 was the Ju-88 G-6 which was modified by extending the fuselage 8’ 11 3/4” to accommodate the additional fuel tanks.
|
THE KIT |
The modeler has the choice of either building the G-1 or the G-10. All of the sprues contained in the box come individually wrapped. Photo etch is included .The decals provided are for three aircraft (two G-1’s and a G-10). The instruction sheet is typical Dragon, easily viewed illustrations .The painting guide is for Gunze Sanyo Aqueous and Italeri paints.
|
CONSTRUCTION |
 This kit was entirely built
out of the box. I did not follow the instructions as outlined by Dragon. I built
the fuselage and wing assemblies first and later on assembled and painted the
sub assemblies.
This kit was entirely built
out of the box. I did not follow the instructions as outlined by Dragon. I built
the fuselage and wing assemblies first and later on assembled and painted the
sub assemblies.
I started by assembling as instructed by step 3, 4 and 5. This is the stage where you slice through the fuselage and where the fuselage extension piece is placed later. The fuselage extension is not of the same diameter when glued on so you will need some filler and a flex sander to get the proper surface contour. Quite a few panel lines will have to be rescribed after this process .The clear parts #G-5 do not fit in their holes so before joining the extension piece to the rear fuselage one should provide a base of styrene strip for support .I had assembled mine completely and I had to get that accomplished by going through the rear wheel well.
I then glued the wings together as per step 11. I did not insert the wheel wells as suggested at this point. I followed step’s 7&8 and put together the engine cowlings and the propeller assemblies. I did not attach the flame dampeners at this stage. There is some minor filling, sanding, and panel lines to be re-scribed .The propeller assembly is over engineered and is not accurate other than the blades themselves. I would rather have had one complete molded propeller assembly then individual blades. I then assembled the cockpit by pre-painting the sub assemblies and dry brushing . I then glued the final cockpit assembly to the fuselage. Some filling and sanding is required to get a uniform fit between the front cockpit assembly, rear fuselage and part #C11 together.
 I then glued the wings to
the fuselage as outlined in step # 16. Some sanding and filing is necessary to
get a flush fit but then no filler is required after those seams are glued
together .I did not glue the gun pod, antenna, rear wheel assembly or wheel
covers at this point .The crew access door was glued into the closed position.
The fit of the door is not even with the fuselage. This area will require
filling and sanding to get a flush contour. The panel lines and the outline of
the hatch will have to be rescribed. I then glued in the wheel wells as outlined
in step # 11 & 12. I did not glue on the wheel well covers at this point. Next,
I glued on the engines as outlined in step # 13. The area where the engines
attach to the wings will require filling. I used Milliput to fill in these
areas. It is workable for up to two hours or more and is easy to shape or
conform to the model surface. This area did not require sanding but there where
gaps and recesses to fill so Milliput worked well for that purpose.
I then glued the wings to
the fuselage as outlined in step # 16. Some sanding and filing is necessary to
get a flush fit but then no filler is required after those seams are glued
together .I did not glue the gun pod, antenna, rear wheel assembly or wheel
covers at this point .The crew access door was glued into the closed position.
The fit of the door is not even with the fuselage. This area will require
filling and sanding to get a flush contour. The panel lines and the outline of
the hatch will have to be rescribed. I then glued in the wheel wells as outlined
in step # 11 & 12. I did not glue on the wheel well covers at this point. Next,
I glued on the engines as outlined in step # 13. The area where the engines
attach to the wings will require filling. I used Milliput to fill in these
areas. It is workable for up to two hours or more and is easy to shape or
conform to the model surface. This area did not require sanding but there where
gaps and recesses to fill so Milliput worked well for that purpose.
I use an Xacto knife to fill the gaps and recesses and afterwards I use a wet cloth and rub the Milliput flush .Any recessed areas like rivet detail or panel lines in the surrounding area are easily cleaned out with the damp cloth also. It works great for filling gaps in this way and when dry it does not require sanding. It can also be scribed if necessary.
The main aircraft is ready for painting. All of the sub assemblies that where by- passed during the main assembly are now completed and painted. They will all be installed after the main aircraft is painted and decaled.
|
PAINT & MARKINGS |
 I used the following Polly
Scale acrylics:
I used the following Polly
Scale acrylics:
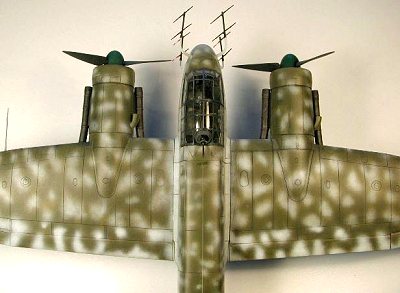
RLM 02: for the wheel wells and landing gear.
RLM 66: for the cockpit, cockpit glazing frames, and radar antennas.
RLM 70: for the props.
RLM 75: for mottling.
RLM 76: For the entire fuselage and wings.
RLM 82: for the upper camouflage.
White-Grey (sometimes called RLM 77. Humbrol 168 is a good match. Ed) (mixed my own): for the stabilizers, ailerons, flaps, and the fairings of the wing fuselage joints.
Gloss and Flat finish
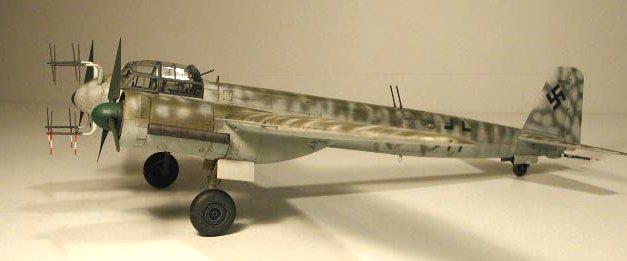
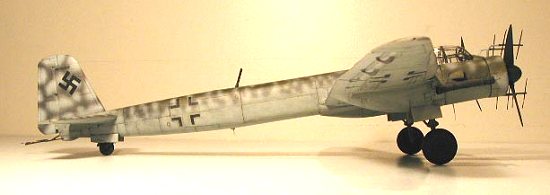
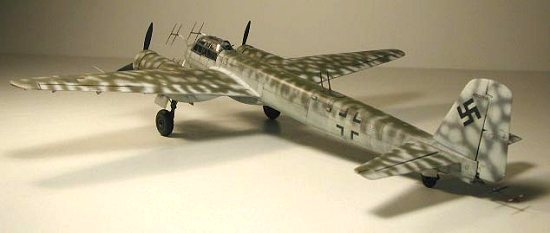
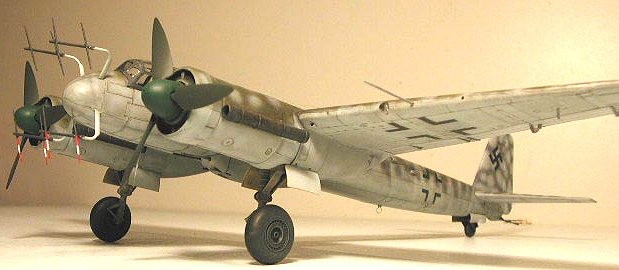
The camouflage I chose to interpret was a late war scheme as described and outlined in the AJ Press book Camouflage and Markings pt 4 by Robert Michulec. I liked the photo of the Ju-88 that was in the back of the hanger on page 7 & 8 of that book .My scheme is based on that style of Camouflage as seen on that aircraft.
The decals were kit supplied other than the swastika, which are made by Scale Model Products Canada Inc. A must have Decal sheet since Dragon kits do not have swastika included .I used nine decals from the kit supplied sheet and two aftermarket for a grand total of eleven. This was a quick process other than waiting a day for the gloss finish to dry and set.
The decals where applied following the gloss base / decal setting solution steps and recessed as required just fine. The SMP decals are really quite thin and great to work with (recommended).
I used liquid mask for the cockpit glazing. I paint the mask on with a brush and after painting, I just soften it by getting it wet again. It is easily removed by using a toothpick and brush. Some edges will require touching up when you are finished removing the mask.
|
CONCLUSIONS |
I enjoyed building this kit and especially doing the reference reading on late war camouflage. It was an interesting process to think about the different camouflage possibilities and to finally decide on one approach.
I have another four Dragon Ju-88 versions to build at some point and I look forward to doing just that. Other than a few problems /dislikes encountered with the prop and radar assemblies, and the obligatory but minimal filling and sanding it should not be difficult for any modeler. I would recommend this build to any modeler interested in Ju-88’s.
|
REFERENCES |
Camouflage and Markings pt. 4, by R. Michulec
The Official Monogram Painting Guide to German Aircraft 1935-1945, by K.Merrick and T.Hitchcock
Copyright ModelingMadness.com. All rights reserved. No reproduction in part or in whole without express permission from the editor.
If you would like your product reviewed fairly and fairly quickly, please contact the editor or see other details in the Note to Contributors.