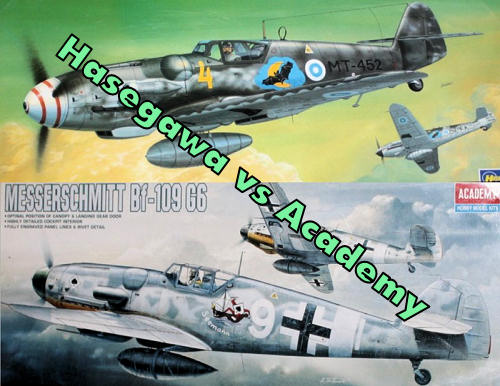
Hasegawa vs Academy Bf-109G-6
| KIT #: | 00916 and 1670 |
| PRICE: | $24.99/12.99 |
| DECALS: | Three options per kit |
| REVIEWER: | Nathan Stevens |
| NOTES: | A solid one on one showdown |
| HISTORY |
From Academy
instructions:
 In an attempt to improve on the
Luftwaffe capabilities back in the 1930’s, Professor Willy Messerschmitt
developed the Bf109.
The proving ground for this agile aircraft was in
In an attempt to improve on the
Luftwaffe capabilities back in the 1930’s, Professor Willy Messerschmitt
developed the Bf109.
The proving ground for this agile aircraft was in 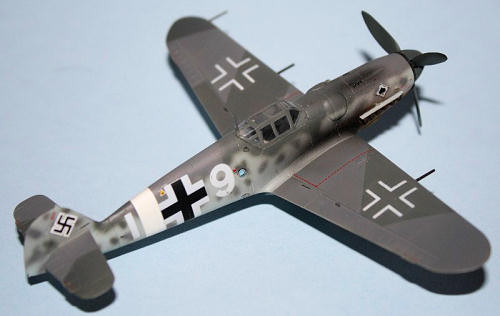 after the
war, and was also used by the Israeli Air Force.
after the
war, and was also used by the Israeli Air Force.
The Finnish government started
negotiation for the contract for Messerschmitt Bf109G fighters late in 1942.
Following first delivery for 30 G-2’s, the delivery
for G-6’s was started in March 1944 and the Finnish Air Force received a total
of 111 G-6’s.
The Messerschmitt BF109G-6 showed a remarkable improvement
over the previous fighters employed by the Finnish Air Force.
It was superior to all the Russian fighters as to
performance and could outmaneuver the La-5 and the Airacobra fighters employed
by the Soviet Air Force against Finland though it showed a few shortcomings due
to the poor manufacturing standard later in the war and the continuous engine
problems due to the low oil pressure.
Finnish pilots flying Bf109G’s scored 663 victories
while 27 Bf109G’s were downed during 1943-44 conflicts.
After the war Bf109G was used as a standard fighter
by the Finnish Air Force till the last ones were phased out in 1954 with some
converted into night fighters recognized by the “Moon and Bat” emblem.
There were eight pilots scored 20 or more victories
while they were flying BF109G’s in the Finnish Air Force.
The most successful pilot was Warrant Officer
I.Juutilainen who scored 58 victories with Bf109G in a total of 94 victories in
his carrier.
| THE KITS |
Hasegawa:
 included), separate prop blades,
separate exhaust and fairings, separate upper cowl, tiny aileron horn balances,
and machined wheels.
The antennae mast appears to be somewhere between
the short and tall version and the elevator trim tabs also appear to be a
compromise in width.
The DF loop is appropriately small though a touch
thick (a difficult hurdle in this scale.)
Cowl bulges as usual aiding in backdating if one is
inclined to do so.
included), separate prop blades,
separate exhaust and fairings, separate upper cowl, tiny aileron horn balances,
and machined wheels.
The antennae mast appears to be somewhere between
the short and tall version and the elevator trim tabs also appear to be a
compromise in width.
The DF loop is appropriately small though a touch
thick (a difficult hurdle in this scale.)
Cowl bulges as usual aiding in backdating if one is
inclined to do so.
A Trop of 7/JG 27, Oblt. Emil Klade,
January
| CONSTRUCTION |
Both kits are comparable all through the construction process so I’ll skip the obvious and get straight to the gory details. The fit of both kits comes well within the range of what one might expect upon opening the box. The detail is well done as is the fit. Very little filler was needed on either.
 chord but this could simply
be a difference in the amount of seam sanding required.
The Hasegawa supercharger intake slightly fatter but
both look fine to me.
The Academy cowling didn’t fit particularly well and
needed some filler.
Fit-wise this is the kit’s weak point.
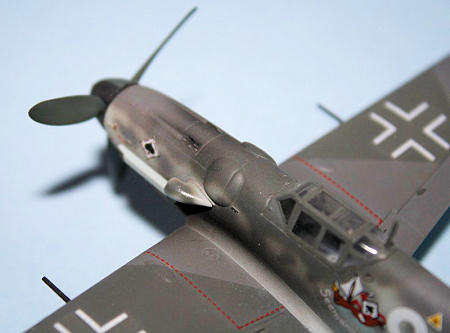
The cannon breech bulges differ greatly between the
two.
Academy’s is of larger diameter, covering more surface area
but is relatively thin and the profile is a bit squared off particularly towards
the front.
Hasegawa’s bulges are almost perfectly round, smaller and
look a bit inflated.
Neither fit perfectly so a touch of thin filler
would be welcome on both kits.
I chose not to for the purpose of photo clarity.
Academy’s exhaust stacks are more pronounced and
protrude more making the less detailed Hasegawa offerings look more accurate.
chord but this could simply
be a difference in the amount of seam sanding required.
The Hasegawa supercharger intake slightly fatter but
both look fine to me.
The Academy cowling didn’t fit particularly well and
needed some filler.
Fit-wise this is the kit’s weak point.
The cannon breech bulges differ greatly between the
two.
Academy’s is of larger diameter, covering more surface area
but is relatively thin and the profile is a bit squared off particularly towards
the front.
Hasegawa’s bulges are almost perfectly round, smaller and
look a bit inflated.
Neither fit perfectly so a touch of thin filler
would be welcome on both kits.
I chose not to for the purpose of photo clarity.
Academy’s exhaust stacks are more pronounced and
protrude more making the less detailed Hasegawa offerings look more accurate.
The canopies are near matches, both fit the same with the square cut at the lower forward edge and both would need some filler at this point to look correct. Nearing the end, I found the fit of the Academy tail superior to Hasegawa’s requiring no filing or sanding to get proper fit. The Academy tail itself appears a bit too long in chord and/or too short in height compared to the Hasegawa which also offers a more realistic tail wheel with a well molded dust cover. One fault I picked up right away in the Academy offering was the shape of the stabilizers. They looked far too squared off so I took to sanding them into shape. In retrospect I can see I overdid it but it still looks better than before. These pieces are also slightly deeper in chord then the Hasegawa version. They still don’t look quite right but they’ll do.
Side note:
Now, some of you may notice none of my kits have aerial wires. With my limited available space, kits get moved around and reorganized regularly. As most of you know, the wire is among the first to go so I leave it off. It will be a simple enough task to add the wires when I’m rich and famous and have plenty of room a few years down the road, right?
| COLORS & MARKINGS |
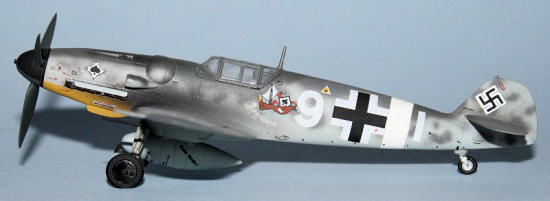
 I choose to go with the kit markings
in the Academy kit.
For my first 109 I figured it would be best to start
with a 74/75/76 scheme and the JG 53 scheme fit the bill just fine.
I choose to go with the kit markings
in the Academy kit.
For my first 109 I figured it would be best to start
with a 74/75/76 scheme and the JG 53 scheme fit the bill just fine.
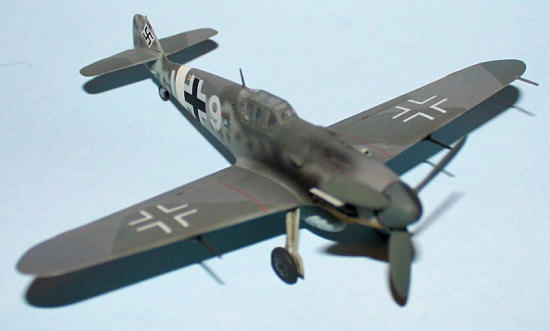
The colors are as standard as it gets. I painted the white tail band and yellow nose first, masked for the RLM 76 and then shot the 74/75 though scotch tape masks for the splinter. The mottle using was done freehand using my old Iwata airbrush. The decals are typical of Academy quality. Every little tiny stencil is supplied dragging the project on for hours. They’re a bit translucent so the white doesn’t match well with the tail band I painted but they settle into nooks and crannies just fine. Where the effort comes in is getting rid of the silvering which I always seem to fight with Academy decals.
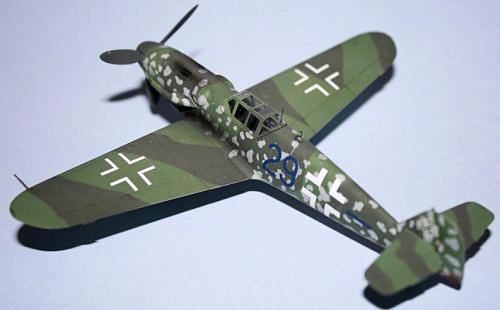
I want a good supply of Luftwaffe
birds across my display before I jump into axis/allies so I rounded up the
beautiful Eagle Strike 72012 sheet.
It contains markings for 6 109’s and only one in
standard 74/75/76.
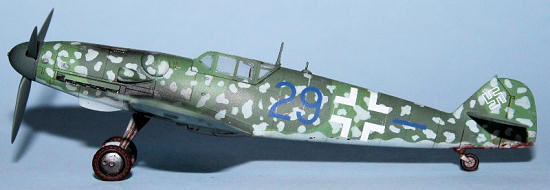
I went for a G-6 of unknown unit in the spring of
’45 camouflaged in 82/83 over 76.
It may be the Model Master paints I use but the 83
light green makes the 82 dark green look too
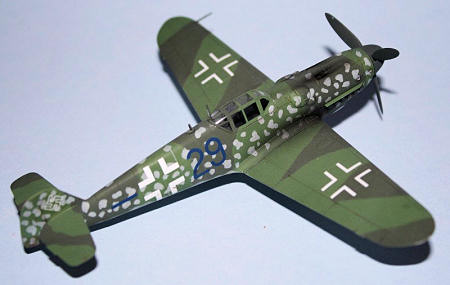 brown in my eyes.
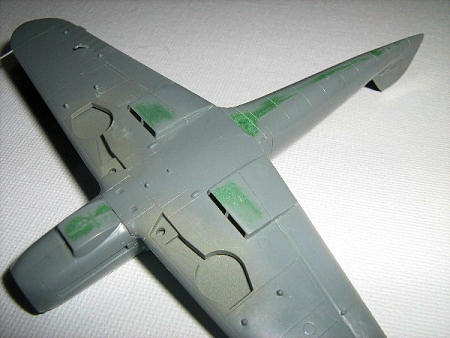
I sprayed most of the plane in 76 and then applied
liquid mask for the ‘splotching’ on the fuselage sides.
The instructions weren’t clear on the point but I
found it unlikely that the mottle would cover the upper wings.
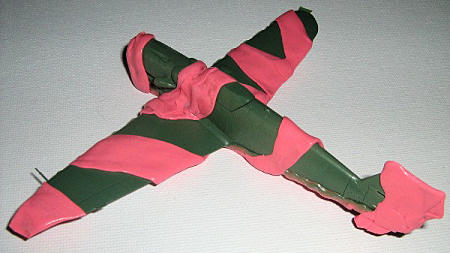
I brought forth my beloved silly putty for the tight
demarcation lines and worried little about overall quality as this was obviously
field-applied.
When I tried to remove the liquid mask it choose to
pull the underlying 76 with it.
So that was an entertaining waste of time and it was
back to little bitty paint brushes to reapply the splotches by hand.
In hindsight, I should have doused the RLM 76 with
Future giving the liquid mask a smooth surface that it wouldn’t so easily bind
too.
It’s worked well for me over smooth Alclad so that will be
an experiment for the future (so to speak).
The decals were far easier to apply.
They reacted perfectly to MM setting solution,
requiring no solvent and no struggle.
As a bonus, being field applied camo I rejected all
the stencils and just went for the basics.
brown in my eyes.
I sprayed most of the plane in 76 and then applied
liquid mask for the ‘splotching’ on the fuselage sides.
The instructions weren’t clear on the point but I
found it unlikely that the mottle would cover the upper wings.
I brought forth my beloved silly putty for the tight
demarcation lines and worried little about overall quality as this was obviously
field-applied.
When I tried to remove the liquid mask it choose to
pull the underlying 76 with it.
So that was an entertaining waste of time and it was
back to little bitty paint brushes to reapply the splotches by hand.
In hindsight, I should have doused the RLM 76 with
Future giving the liquid mask a smooth surface that it wouldn’t so easily bind
too.
It’s worked well for me over smooth Alclad so that will be
an experiment for the future (so to speak).
The decals were far easier to apply.
They reacted perfectly to MM setting solution,
requiring no solvent and no struggle.
As a bonus, being field applied camo I rejected all
the stencils and just went for the basics.
| CONCLUSIONS |
April 2009
If you would like your product reviewed fairly and quickly, please contact me or see other details in the Note to Contributors.