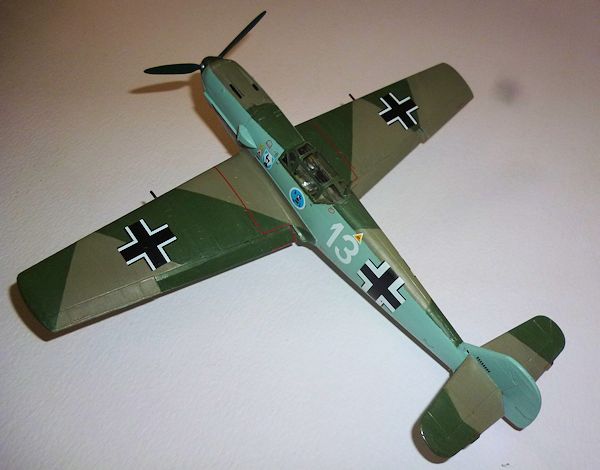
Academy 1/48 Bf-109E-3
| KIT #: | 12216 |
| PRICE: | $35.00 |
| DECALS: | One option |
| REVIEWER: | Francisco Santoro |
| NOTES: |
Cartograf Decals, nicely done wheels, nice cockpit. |
| HISTORY |
I will focus on the E-3 variant: The Bf 109E-3 was a development of the E-1 with
the DB 601Aa inverted-Vee engine rated at 1175hp for take-off, and included
provision for the inclusion of one 20mm MG FF/M fixed forward-firing cannon in a
moteur-cannon installation (if the machine-gun ammunition was reduced in
quantity, a revised canopy and, for the first time in any Bf 109 variant, armour
protection for the pilot.
| THE KIT |
The kit comes in a top-opening box, the boxart having the Bf 109E-3 White 13
from Heinz Bar fighting against a Hawker Hurricane. At the bottom of the box
there are four black and white images of Academy´s 1:48 Modern Aircraft Series.
There are three sprues molded in blue plastic and one very clear canopy. The two
big sprues contain the
 fuselage, upper wings, tailplanes, wheels, cockpit parts.
Also In the kit are a fuel tank, a tropical sand filter and a bomb, seems that
Academy planned to release a series of Bf 109E-4/7s in the Trop and Jabo
versions.
fuselage, upper wings, tailplanes, wheels, cockpit parts.
Also In the kit are a fuel tank, a tropical sand filter and a bomb, seems that
Academy planned to release a series of Bf 109E-4/7s in the Trop and Jabo
versions.
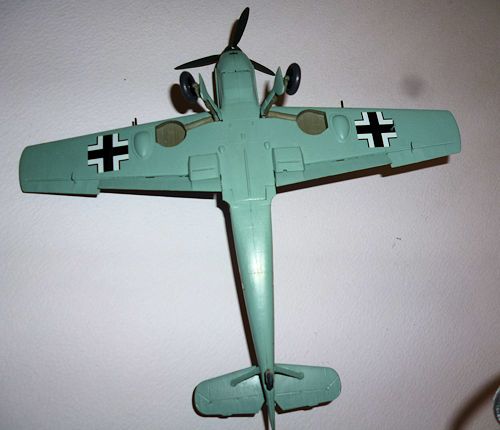
The smaller blue sprue has the one piece lower wing, separate flaps and the
bulges that are characteristic to the E-3 onwards variants of the Bf 109E. The
clear sprue has a canopy, which comes in the closed position, and the gunsight.
The instructions come in a folded paper, with six pages, with the exploded view
of the assembly of each part in the 6th page. The painting guide is
in the front of the instructions sheet and gives codes for paints such as Aqueus
Hobby Color, Mr. Color, Life Color, Humbrol and TESTOR/MODEL MASTER paints. In
the left side of the paint chart, there are two photos of the completed model
(preview image maybe, there are missing details).
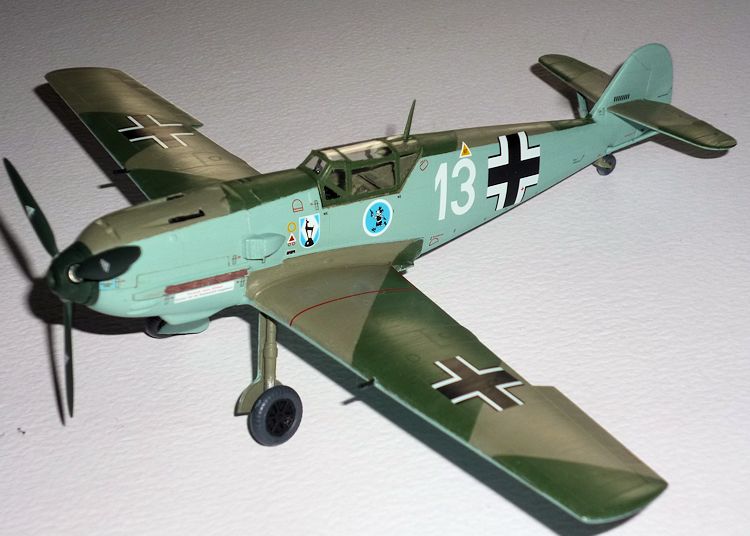
About the paint scheme, only one is provided: Bf 109E-3/4 RLM 02, RLM 71 and RLM
65 splinter pattern. Also, if you don’t want to paint the wings and fuselage,
there are decals for that, which cover the wings, tailplanes and back of the
plane.
The decals are from Cartograf from Italy, and I am glad about that, since I
built a Bf 109E-4 from Academy in 1:72 in the past, and their decals were Out Of
Register.
I have read wonders about Cartograf, I hope I can share the same words.
| CONSTRUCTION |
I started by brushing in the sprues the cockpit parts (seat, bulkhead, side
panels, fuselages) in RLM 02, the trim wheel and rudder pedals where painted in
silver and the control panel and gunsight were painted in black. The control
column was painted with brown in its base, RLM 02 for the stick, and in black
for the grip.
When the side panels were dried, I added some detail by painting the Oxygen
bottle in silver, some dials and other things were painted in black, the seat
was painted in brown in its base and the seatbelts were painted using a
toothpick with light grey on it. Buckles were painted in silver.
 After that, I used Revell CONTACTA to glue the different parts, seat first, side
panels after rudder pedals with the bulkhead, and finally the control panel (try
to align it well, I couldn´t.
After that, I used Revell CONTACTA to glue the different parts, seat first, side
panels after rudder pedals with the bulkhead, and finally the control panel (try
to align it well, I couldn´t.
I turned to the fuselage halfs, painting the interior in RLM 02 with the
radiator in black. When dried, the cockpit was glued, maybe with luck, since
it´s a complicated fit, take your time.
Don´t glue the radiator for now, it will be better to wait for the fuselage to
be glued together, and then add the radiator.
The next step is the machinegun/cowling assembly and propeller assembly. In
regards of the cowling, don´t glue the machineguns, leave them in their sprue
and paint the as a separate item. Something which I also recommend is gluing the
propeller shaft to the prop retainer, leaving it to dry, removing it, and leave
it for a future assembly stage. Thanks to the tight fit of the cowling in its
place, there is no need to glue it, you can paint the entire plane, remove it
add the machineguns, add the propeller, and leave it like that.
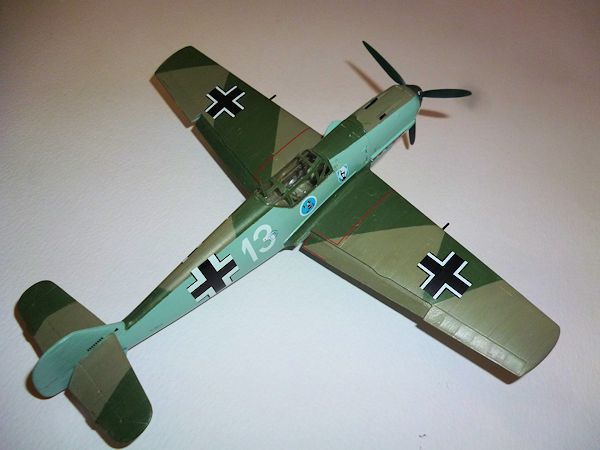
On to the wings: something that distinguished the E-3 from the E-1 were the
heavy machinegun bulges on the undersides of the wing. Since those do not come
with any alignment pins, you will have to eye-ball the proper location for them,
and try to put them at the same level. The wing machineguns need to have holes
opened for their attachment, these are flashed areas on the wings. Before gluing
the wings together, paint in RLM 02 the parts of the upper wings that are over
the wheel wells, and glue the radiators to the one piece wing (one of them may
not fit and will have to be lightly trimmed).
 With the wings glued and dried, it is time to glue them to the fuselage.
Remember that I wrote that the cockpit was of a tricky fit? I couldn´t manage to
get it to be straight and the bulkhead in which the rudder pedals are glued
wasn´t leaving me to glue the wings properly, so I sanded the bulkhead until the
wings could be fitted with no problems.
With the wings glued and dried, it is time to glue them to the fuselage.
Remember that I wrote that the cockpit was of a tricky fit? I couldn´t manage to
get it to be straight and the bulkhead in which the rudder pedals are glued
wasn´t leaving me to glue the wings properly, so I sanded the bulkhead until the
wings could be fitted with no problems.
The landing gear was next and I painted the wheels in Revell Tank Grey 78 for
the tires and black for the wheel itself, the landing gear covers were painted
in RLM 02 in the interior and RLM 65 on the outside, while the landing gear and
the axle scissor was brush painted in RLM 02 and its axle in silver. The landing
gear set was then glued together.
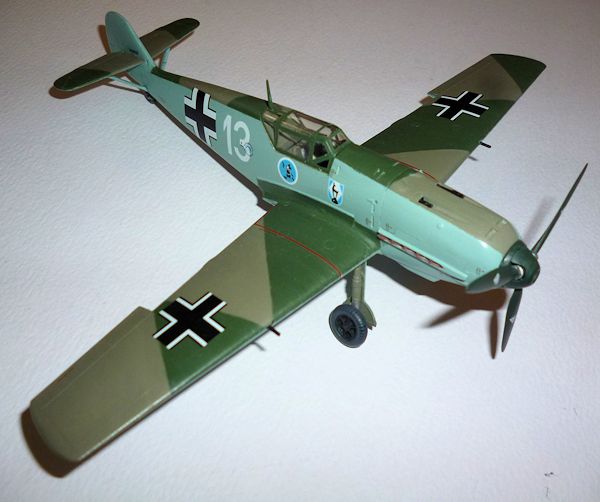
The flaps were then glued in a drop position (as seen in all of the Bf 109
photos), which was a tad difficult thanks to not having a solid surface to glue
them, except for the little contact point between the flaps, the lower wing and
the fuselage.
After all that, it is PAINTING TIME!
| COLORS & MARKINGS |
Although there are decals for the camouflage, I painted them. First of all, the
wings, fuselage (with the cowling in place but not glued) and tailplanes were
masked for painting. First came the RLM 02 (Revell Matt 45), several coats of
thinned paint were added with my brush. The wheel wells were also painted in RLM
02. When there weren´t any remnants to be painted in RLM 02, I masked that
colour and began with the RLM 71 (Revell Matt 39), with several thinned coats of
it to avoid a lot of paint ridges. After everything dried, the wings and upper
part of the fuselage were masked and the undersides painted in RLM 65 (Revell
Matt 49), having some problems with that colour covering the fuselage (maybe the
blue plastic).
After that, I glued the tailplanes to the fuselage first, waited for them to
dry, and then I glued the struts, which were; longer than they should be, so I
cut them, and had locating holes at different levels.
After the painting, the machineguns which were left from before were glued to
the cowling, the propellers and nose cone painted in RLM 70, and they were glued
to the propeller shaft (it spins).
 Then, the most tedious part began, which was sanding all those paint ridges that
the brush left. Using a wet sandpaper of 1200 grade, I started going through the
ridges lightly, when I was satisfied about how they were, I made all necessary
touch-ups, the plane was gloss-coated (to give an even finish to the paint) and
it was time for the decals.
Then, the most tedious part began, which was sanding all those paint ridges that
the brush left. Using a wet sandpaper of 1200 grade, I started going through the
ridges lightly, when I was satisfied about how they were, I made all necessary
touch-ups, the plane was gloss-coated (to give an even finish to the paint) and
it was time for the decals.
Decals were next, they worked as nothing I have seen before, they didn´t need
anything to conform to the surface of the model. I moved every decal to its
proper place with a toothpick.
Finally, the landing gear was attached. The fit of them is a bit loose, so glue
one, let dry and then add the other, since you might end with one gear more
forward than the other (it happened also with a HA 1112).
The model was then coated with a matt coat and it was finished.
| CONCLUSIONS |
A nice and simple kit which will end in a fine replica of the Bf 109E-3. I would
definitely buy it again, along the D version. Just be careful with the landing
gear.
| REFERENCES |
“An illustrated Data Guide To World War Two Fighters” by Christopher Chant.
A profile with Heinz Bar´s White 13 with the Yellow nose and rudder can be found
here:
http://www.markstyling.com/bf109es3.htm
June 2014
If you would like your product reviewed fairly and fairly quickly, please contact the editor or see other details in the Note to Contributors.