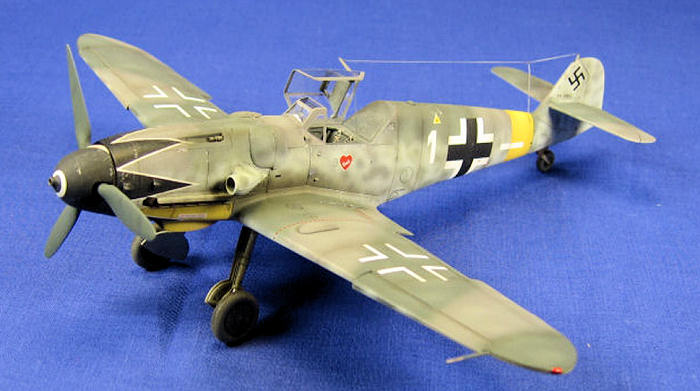
Hasegawa 1/48
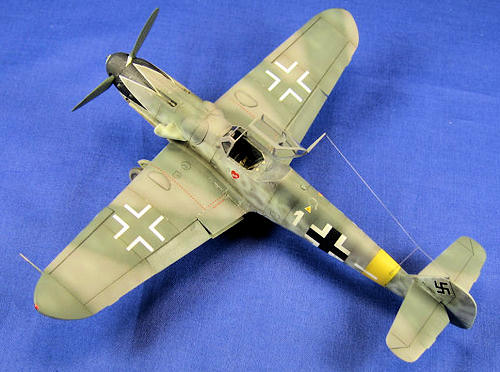
Messerschmitt Bf 109G-6
| KIT #: | 09147 |
| PRICE: | around $30.00 |
| DECALS: | Two Options |
| REVIEWER: | Scott Lyle |
| NOTES: |
Decals used:
Aeromaster Decals #48-706, Aces of Aces, Erich
Hartmann |

| HISTORY |
One of the truly great fighters ever produced, the Bf 109 also stands as the most widely produced fighter in aviation history and the mount of the most prolific aces of World War Two. In continuous frontline service from the beginning to the end of the war, the Bf 109 began life with such advanced features as all-metal, flush-riveted, monocoque construction, a closed canopy, automatic leading edge extensions, and retractable landing gear. Various attempts to replace it always fell short, and the Bf 109 could more than hold its own in the hands of a competent pilot at the end of the war, despite the fact that its basic design was at least a decade old at that point.
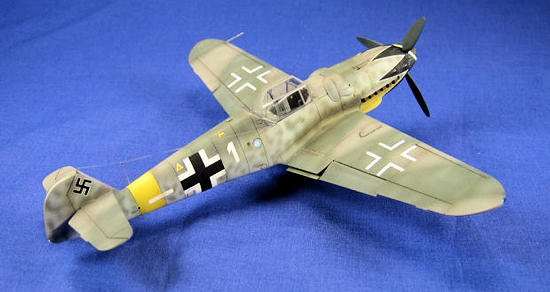 Early versions saw action over Poland in 1939,
and then became the chief nemesis of the RAF during the bitter fighting over
the English Channel during the summer of 1940.
But it would be over the skies of the
The most widely produced variant of the Bf 109 was the Bf 109G-6. Erich Hartmann flew several different G-6s over the “Ostfront”, always labeling them with an affectionate nickname for his fiancé. Hartmann’s life story is truly amazing; in some ways his aerial exploits during the war are less interesting than his harrowing, ten year period of captivity in the postwar Soviet Union as well as his reinstatement in the jet-equipped Luftwaffe following his release.
| THE KIT |
Hasegawa’s 1/48 Bf 109G-6 is a well chronicled model, so I’ll spare the details. Suffice to say that the model is molded in light gray plastic and is of very high quality with finely recessed panel lines and a nicely detailed cockpit.
| CONSTRUCTION |
Construction
of this kit was quick and smooth.
I added a few parts to the model to increase the
level of detail.
I used an Eduard Zoom Color Photo Etch set to
enhance the instrument panel and cockpit area.
An “Erla Haube” canopy was sourced from
Squadron, and an Eagle Parts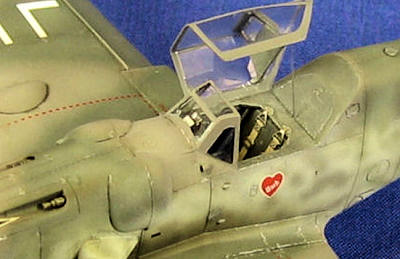 resin spinner was added.
I also used a set of resin exhausts from
Ultracast.
While these additions were relatively minor and
inexpensive, this model quickly became one of the most severe cases of AMS
I’ve had since I built (and still haven’t finished) my latest 1/35 M3 Stuart
project.
| COLORS & MARKINGS |
I
sprayed a primer coat of Mr. Surfacer 1000 onto the aircraft and then
checked for any seams that needed to be touched up.
I then airbrushed Testors Acrylic RLM 66 over
the masked clear canopy parts to replicate the dark gray of the inside of
the canopy frames.
During the same session I pre-shaded the panel
lines as well.
Next I airbrushed Testors Acrylic RLM 04 on the
undersides of the wingtips, underneath the cowling, and the band around the
rear fuselage.
These parts were then masked off with Tamiya
Yellow Tape.
The underside was airbrushed with Testors
Acrylic RLM 76 Light Blue, and then I applied the RLM 74/75 pattern to the
wings and upper fuselage, spraying it all by hand.
I masked off the root areas of the wings and
horizontal stabilizers, and then sprayed the RLM 76 on the fuselage sides,
being careful not to overspray the RLM 74/75 on the upper fuselage.
Once this had dried I applied the RLM 74/75
splotches and spots on the fuselage sides, and then lightened the mix of
each and sprayed some random patches on the wings and upper fuselage to
simulate fading.
The exhausts were hand-painted Testors Rust, and
then the machine guns, prop hub, and tires were hand-painted Tamiya XF-69
NATO Black.
Both the exhausts and the machine guns were
lightly dry-brushed with Testors Steel.
The prop blades were
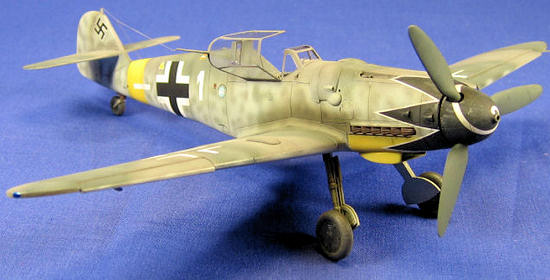 painted
Testors RLM 70 Black-Green, and the wheel wells and landing gear were
painted Testors RLM 02.
I painted the sides of the wheel well Testors
Leather to simulate the leather covers that were often fitted to those
areas.
Future was then airbrushed onto the whole model in
preparation for the decals.
painted
Testors RLM 70 Black-Green, and the wheel wells and landing gear were
painted Testors RLM 02.
I painted the sides of the wheel well Testors
Leather to simulate the leather covers that were often fitted to those
areas.
Future was then airbrushed onto the whole model in
preparation for the decals.
The Aeromaster decals worked just fine with Walthers Solvaset; no bubbling or other annoying behaviors arose (the same cannot be said of me after eating pizza…)
I airbrushed a coat of Future over the whole model again to seal the decals. After that had cured for a couple of nights I applied a wash of 50/50 Lamp Black/Raw Umber oil paint to all of the recessed panel lines. I then airbrushed a coat of Testors Lacquer Flat Finish over the whole model, and then airbrushed a very thin 50/50 mix of Tamiya Black/Red Brown over the panel lines, exhaust areas, and behind the machine guns.
Next I added some paint chips around the nose
cowling, cockpit area, and wing roots using a Silver Berol pencil.
My final weathering step was to airbrush a bit
of Tamiya Desert Yellow on the tires to simulate some dust and dirt.
I painted the wingtip lights, glued on the
prop, pitot tube, and canopy, and then completed the model by adding the
antenna wire using “EZ-Line” from Bobe’s Hobby House in
| CONCLUSIONS |
If you haven’t tried Hasegawa’s
1/48 Bf 109G-6 yet there is nothing to fear.
It is a rapid, pleasant build that presents no
problems.
I can see why it such a popular kit, and also why many
modelers enjoy building their own Gruppe of Bf 109s!
| REFERENCES |
 -
Osprey Publications, Aircraft of the Aces #37,
“Bf 109 Aces of the Russian Front”
-
Squadron/Signal Publications, Aircraft in Action
#57, “Messerschmitt Bf 109 in Action, Part 2”
- Squadron/Signal Publications, Aircraft Walk Around #43, “Messerschmitt Bf 109G”
December 2008
If you would like your product reviewed fairly and fairly quickly, please contact the editor or see other details in the Note to Contributors.