|
KIT: |
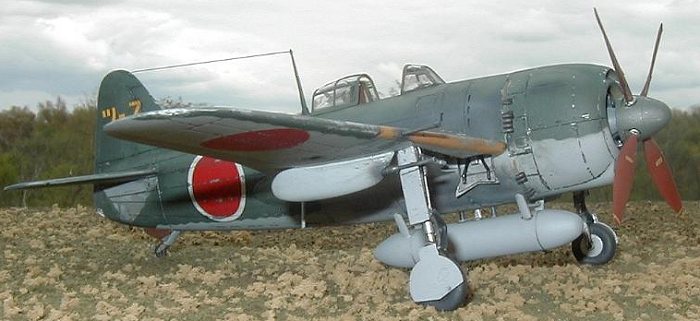
Tamiya 1/48 N1K1-Ja Shiden type 11 |
|
KIT # |
61036 |
|
PRICE: |
$23.75 |
|
DECALS: |
Three Aircraft |
|
REVIEWER: |
|
|
NOTES: |
|
HISTORY |
The N1K1-Ja was a privately funded successor to the N1K1 Kyufu floatplane. I do not have additional historical information that I can document; the kit instructions having already been discarded by this time. I do recall, however, reading that the long landing gear, made necessary because of the mid-mounted wing and large diameter propeller, was quite troublesome. The Shinden did reach active duty, but was quickly and willingly replaced by the completely re-designed N1K2 “George”.
|
THE KIT |
 The kit consists of roughly 35 gray and 4 clear
styrene parts; 2 poly caps (for the propeller). The styrene came bagged with two
sprues per bag, back to back to prevent undue scratching. The clear parts were
bagged separately. The plastic has fine recessed scribing and delicately molded
panel attachment “dzus” fasteners. Control surfaces are more deeply scribed, as
would be expected, with the fabric treatment quite acceptable.
The kit consists of roughly 35 gray and 4 clear
styrene parts; 2 poly caps (for the propeller). The styrene came bagged with two
sprues per bag, back to back to prevent undue scratching. The clear parts were
bagged separately. The plastic has fine recessed scribing and delicately molded
panel attachment “dzus” fasteners. Control surfaces are more deeply scribed, as
would be expected, with the fabric treatment quite acceptable.
The clear parts are exceptionally thin and optically clear. All canopy parts have only slightly noticeable raised framing lines; those on the sliding portion of the canopy are quite narrow in dimension. With the small number of pieces in the kit, as expected, it was a quick build.
One caveat: I built this kit several months ago, so the construction details are a little fuzzy.
|
CONSTRUCTION |
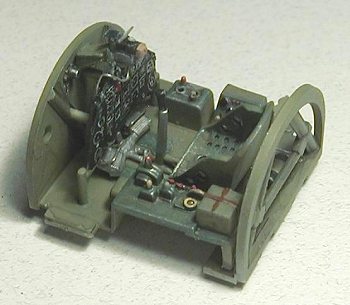 Construction began with the cockpit, as usual. The detail is acceptable and
lends itself well to simple washes and dry brushing. Much of the detail,
however, is lost once the fuselage sides are closed up because of the small
cockpit entrance. I used a custom mix for the “bamboo green”, trying to come as
close as possible to a color chip seen in the “Japanese Interiors” book. The
instrument panel is Scale Interior Black with the decal applied for the
instrument faces. The various boxes were painted a darker shade of green and
wire straps were added to the aluminum-painted rudder pedals. Various knobs were
picked out in red and yellow with the trim wheel, which looked like it was wood
in a couple of pictures of a Shinden interior I’ve seen, was painted
accordingly.
Construction began with the cockpit, as usual. The detail is acceptable and
lends itself well to simple washes and dry brushing. Much of the detail,
however, is lost once the fuselage sides are closed up because of the small
cockpit entrance. I used a custom mix for the “bamboo green”, trying to come as
close as possible to a color chip seen in the “Japanese Interiors” book. The
instrument panel is Scale Interior Black with the decal applied for the
instrument faces. The various boxes were painted a darker shade of green and
wire straps were added to the aluminum-painted rudder pedals. Various knobs were
picked out in red and yellow with the trim wheel, which looked like it was wood
in a couple of pictures of a Shinden interior I’ve seen, was painted
accordingly.
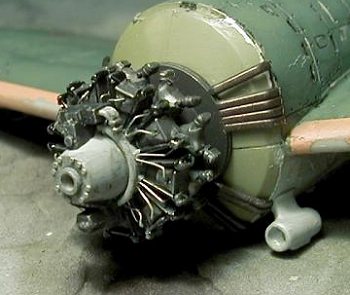
The
engine, hidden mostly behind the prop spinner, has acceptable detail. Metalizer
Stainless Steel with a wash of black really pops out the cooling fins. Thin
wires were inserted into pre-drilled holes for the ignition harness. The
fuselage halves were ready to be joined. The fit was good with only Mr. Surfacer
500 being used to tidy thing up. The wing, top halves and a single
 lower wing,
were next assembled and added to the fuselage. Unfortunately, the join does not
fall on a panel line, so some delicate, if not creative, filling and sanding has
to be done. The horizontal stabilizers were added and the fit was tight; no
filler or sanding required. The one real problem that I found, outside of the
wing to fuselage join, was that the seam is visible in the landing gear wells.
There is no easy way around this. Using a curved scalpel blade, I smoothed
things out as best as I could, but the “scar” still exists.
lower wing,
were next assembled and added to the fuselage. Unfortunately, the join does not
fall on a panel line, so some delicate, if not creative, filling and sanding has
to be done. The horizontal stabilizers were added and the fit was tight; no
filler or sanding required. The one real problem that I found, outside of the
wing to fuselage join, was that the seam is visible in the landing gear wells.
There is no easy way around this. Using a curved scalpel blade, I smoothed
things out as best as I could, but the “scar” still exists.
Not caring for the idea of using silver underneath transparent colors for the wingtip navigation lights, I cut out where the lights are located, including the large triangular piece at the bottom of the vertical stabilizer. I drilled small diameter holes in pieces of clear sprue and added small drops of red, green and white accordingly. I trimmed the sprue to fit and shaped the pieces after the glue had dried, polishing to remove all scratches.
The front and rear canopies were added using liquid cement, VERY CAREFULLY running the cement up to the mating edge of the glass. Capillary action drew the cement along the edge. When dry, I carefully sanded the adjoining surface to remove any marks left by the cement. A piece of drafting tape was smoothed into the cockpit, covering the interiors of both canopy sections. Parafilm-M was used to mask the exterior glass.
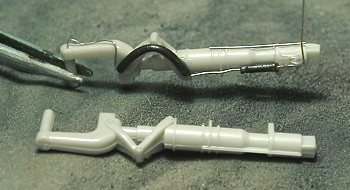 Before
sending everything to the paint shop, I first bored out the exhaust stacks and
modified the landing gear. For the exhaust, I used a small diameter-milling bit
and, under a magnifier, carefully removed a small amount of material at the
business end of each stack. On the landing gear legs, I drilled small holes in
the drag links and carefully removed the offending material with the point of a
#11 blade and small files.
Before
sending everything to the paint shop, I first bored out the exhaust stacks and
modified the landing gear. For the exhaust, I used a small diameter-milling bit
and, under a magnifier, carefully removed a small amount of material at the
business end of each stack. On the landing gear legs, I drilled small holes in
the drag links and carefully removed the offending material with the point of a
#11 blade and small files.
I used a spot of white glue to temporarily attach the cowling for painting then covered everything up that I didn’t want to over-spray.
|
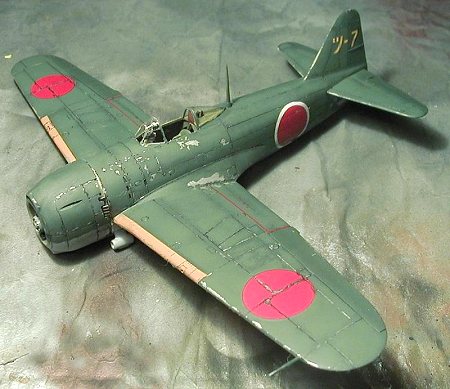
COLORS & MARKINGS |
Aircraft in the Pacific, regardless of nationality, tended to be extremely well worn … or worn out, depending on your perspective. Between the coral sand, wind, glaring sun, salt air and the general wear and tear of combat, airframes just showed a lot of weathering. One of the best approaches to simulating this effect is to undercoat the camouflage with a metalizer paint, buff it to an acceptable shine, gloss coat that and then shoot your camouflage scheme. I actually prefer ModelMaster buffable metalizer finishes. Because this was not going to be that most feared of paint schemes, the natural metal finish, I did not have to be so careful in finish and handling. The seams were all finished correctly, but just not to the degree that I would have had to go with a NMF. Therefore, after cleaning the airframe with a toothbrush and diluted dishwashing soap (and air-drying, of course) I shot the model overall with several good coats of buffable aluminum plate. When dry, I used toilet paper to buff the finish to an acceptable luster. Not highly polished, but not dull and drab either. Allowing that coat to set up overnight, I shot Future over the entire model and let that cure for several hours.
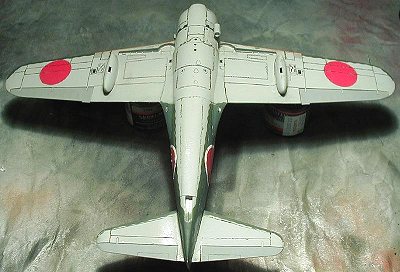
 The kit decals include the leading edges but, in my
opinion, they were way too orange. No color photograph of Japanese aircraft that
I have ever seen shows leading edges that orange. So I decided to mix my own
instead. I masked off where the yellow was to go using low tack tape and shot
the color. I removed the mask immediately and let the paint cure for several
hours. I then applied Parafilm-M over the yellow, above and below, and shot the
IJN gray, mixed about 50/50 with clear flat to speed the drying time. After
several hours to allow for drying, I used electrical tape to create the
demarcation line between the IJN Grey and the IJN Green. For this, I used thread
held off the wavy edge about 1/16” in order to get a soft-feathered edge on the
demarcation line … tedious at best.
The kit decals include the leading edges but, in my
opinion, they were way too orange. No color photograph of Japanese aircraft that
I have ever seen shows leading edges that orange. So I decided to mix my own
instead. I masked off where the yellow was to go using low tack tape and shot
the color. I removed the mask immediately and let the paint cure for several
hours. I then applied Parafilm-M over the yellow, above and below, and shot the
IJN gray, mixed about 50/50 with clear flat to speed the drying time. After
several hours to allow for drying, I used electrical tape to create the
demarcation line between the IJN Grey and the IJN Green. For this, I used thread
held off the wavy edge about 1/16” in order to get a soft-feathered edge on the
demarcation line … tedious at best.
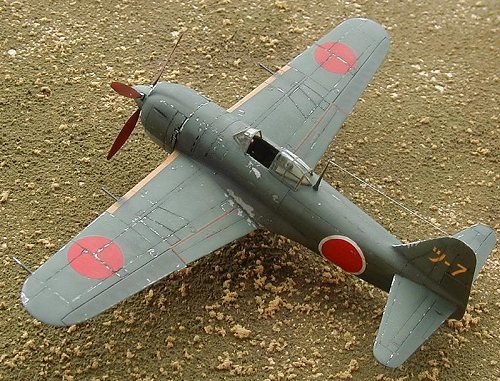
The IJN Green was shot early in the evening, again mixed 50/50 with clear flat; a thin strip of clear decal was painted first with the interior color, then the green (for the sliding portion of the canopy). After a 24-hour delay to let the paint cure, I was ready for the weathering process.
Because I knew that I’d have to apply weathering to the markings as well as the camouflage, I went ahead and added the decals at this time. After letting the decals set for an hour or so, I applied MicroSol to help them snuggle into the panel lines. The residue was removed with water after letting the decals set for several hours.
Using the back edge of a Xacto #11 blade, I followed all of the panel lines, allowing the paint to randomly chip. The leading edges of the wings and tail feathers were scuffed up with a course sanding stick which pulled larger chunks of color off, leaving the natural metal finish exposed. This approach was taken for both the upper and lower surfaces. The “dzus” fasteners were also carefully picked out.
 A thin wash was applied to all panel lines. Heavier
applications were used around the cowl flaps, vents and control surfaces. The
residue of the wash was removed with a Q-Tip and 90% rubbing alcohol, moving in
the direction of the airflow. After all panel lines were so delineated, a couple
dustcoats of DullCoat was applied … and let cure overnight.
A thin wash was applied to all panel lines. Heavier
applications were used around the cowl flaps, vents and control surfaces. The
residue of the wash was removed with a Q-Tip and 90% rubbing alcohol, moving in
the direction of the airflow. After all panel lines were so delineated, a couple
dustcoats of DullCoat was applied … and let cure overnight.
The fabric control surfaces were treated by lightly sanding with a fine grade stick. I found that this lightened the finish just enough to give the effect that I was after without having to mix up special paints.
The propeller was painted Burnt Sienna with the
yellow stripes being masked off and shot the same color as was used on the wing
leading edges. The landing gear wells and all doors were shot with non-buffing
aluminum. Although being the non-buffable type, I smoothed them all out anyway
then added a black wash. The landing gear legs were likewise treated. Cordite
and exhaust stains were added with Grimy Black, with the exhausts receiving
Reefer Gray in the center of the black “soot” stains. The exhaust was first
painted ModelMaster Burnt Iron, lightly buffed then touched with Rust-All.
|
CONSTRUCTION CONTINUES |
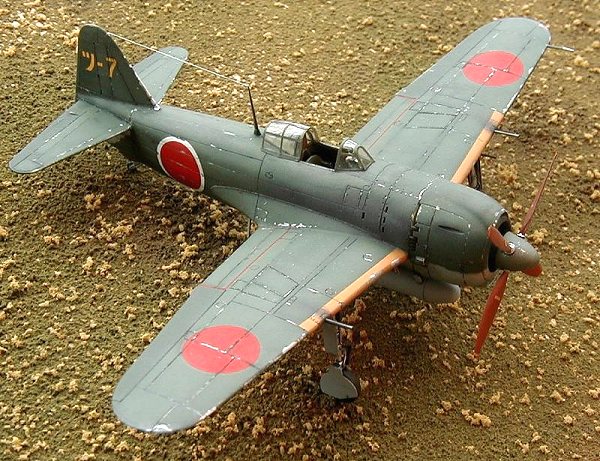
All of the gun barrels were drilled out, replaced with brass tubing that was super glued in place and painted gunmetal. One-pound monofilament was used for the radio aerial, snapped taunt via cigarette smoke and painted chrome silver. Thin telephone wire was added to the landing gear to simulate hydraulic brake lines. A portion of the insulator was retained over the gear drag links for the flexible portion of the brake lines. After the gear legs and covers were installed and the prepared decal film applied to the sliding portion of the canopy, the Shinden was essentially completed.
|
CONCLUSIONS |
This was a most enjoyable kit to build. This model could easily fall into that “weekend” category. I found the engineering to be quite acceptable with the fit and finish easily near the top of my list of excellent kits. I definitely like the looks of this aircraft; it’s a natural addition to my collection, sitting next to the N1K1 “Rex”. And I can highly recommend this kit to any builder; the novice should experience little difficulty turning out an acceptable model; the more experienced should find the end result an interesting addition to any collection.
|
REFERENCES |
If you would like your product reviewed fairly and quickly by a site that has well over 100,000 visitors a month, please contact me or see other details in the Note to Contributors.