
|
KIT # |
61078 |
|
PRICE: |
$38.46 |
|
DECALS: |
Two aircraft |
|
REVIEWER: |
Denis Moisan |
|
NOTES: |
|
HISTORY |
The Nakajima J1N1 was designed in 1938 following an Imperial Navy request for a twin-engine, long range escort fighter. The plane’s original armament consisted of one 20mm and two 7.7mm machineguns in the nose. It was also equipped with four 7.7mm machineguns housed in two remote controlled barbettes aimed by the navigator on top of the rear fuselage. This complex system was not liked by the navy and it was decided to remove these barbettes and convert the plane into a reconnaissance aircraft in July 1942.
 In the early months of 1943, Commander Yasuna
Kozono of the 251st Squadron came up with the idea of using two
unused reconnaissance J1N1 to defend Rabaul against night raids from USAAF,s
B-17 bombers. For this purpose, the planes where fitted on the field with two
20mm machineguns in the upper fuselage. The guns were fixed to fire forward at a
30 degrees angle, some planes also having two other guns under the fuselage,
firing to the rear.
In the early months of 1943, Commander Yasuna
Kozono of the 251st Squadron came up with the idea of using two
unused reconnaissance J1N1 to defend Rabaul against night raids from USAAF,s
B-17 bombers. For this purpose, the planes where fitted on the field with two
20mm machineguns in the upper fuselage. The guns were fixed to fire forward at a
30 degrees angle, some planes also having two other guns under the fuselage,
firing to the rear.
This configuration proved so effective that almost every reconnaissance J1N1 were converted as night fighters under the designation J1N1 Type 11 Gekko (Moonlight) the allied name for the Gekko was Irving.
|
THE KIT |
This is the usual Tamiya high quality gray plastic with crisp engraved panel lines and very good details. Some extra parts are included that will only be used for other versions of the Gekko soon to be released by Tamiya. A brief history of the plane is provided on a separate sheet. The instructions are clear and the color references are given using Tamiya color numbers only.
The decals are not numerous (only two planes to choose from) and, as is always the case with Tamiya decals, they are a bit thick.
|
CONSTRUCTION |
 You guessed it ! We start with the cockpit. The
details here are very good, no resin aftermarket will be needed. I added only
photo etched seat belts. I chose to follow Tamiya’s color call out for the
cockpit, a mix of metallic blue, silver and gray. The details were then picked
out by dry brushing. I did not use the decals provided for the instruments and
painted them by hand. The finished interior looks impressive and quite
busy.
You guessed it ! We start with the cockpit. The
details here are very good, no resin aftermarket will be needed. I added only
photo etched seat belts. I chose to follow Tamiya’s color call out for the
cockpit, a mix of metallic blue, silver and gray. The details were then picked
out by dry brushing. I did not use the decals provided for the instruments and
painted them by hand. The finished interior looks impressive and quite
busy.
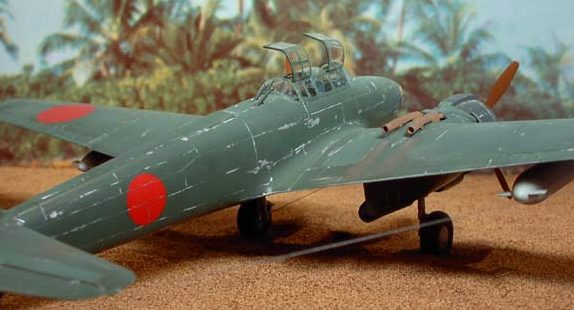
Joining the fuselage halves together was a breeze, no putty needed anywhere. A very good representation of the Type 99 20mm machineguns is included and it will look great if you choose to leave the gun access hatch open.
The wing assembly is straightforward enough, just do not forget to drill the holes for the bombs and extra fuel tanks if you plan on using them. Next you have to choose between an open or closed canopy. Once all the clear part are masked it is time for the paint.
|
CAMOUFLAGE & MARKINGS |
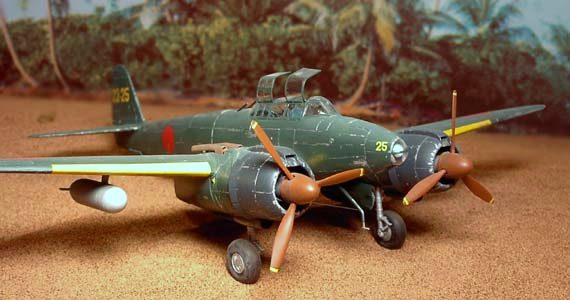
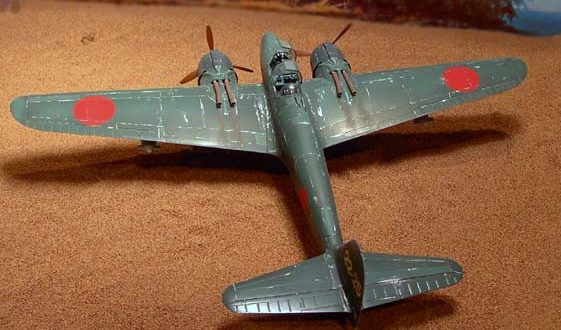
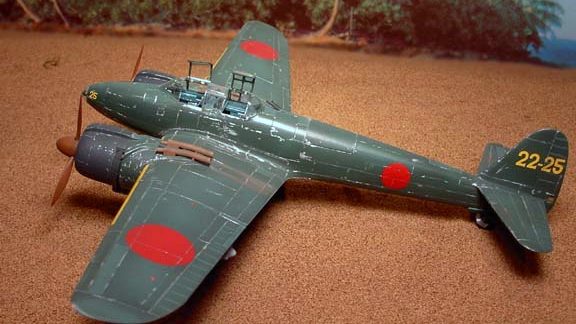
A choice of only two aircraft is proposed : one from 302nd Naval Fighter Group and one from 322 Naval Fighter Group. Both aircrafts are finished in overall IJN green with black engine cowlings. That is not the most spectacular finish but that’s the way it was !
 The leading edges were painted chrome yellow
first and masked. The plane was then painted using Model Master’s Imperial
Japanese Navy Green enamel. The black used by the Japanese on the cowlings and
anti-glare panels of their aircrafts had a subtle blueish coloration, so I used
Model Master FS 35042 Non-Spectacular Sea Blue mixed with just a bit of black.
The leading edges were painted chrome yellow
first and masked. The plane was then painted using Model Master’s Imperial
Japanese Navy Green enamel. The black used by the Japanese on the cowlings and
anti-glare panels of their aircrafts had a subtle blueish coloration, so I used
Model Master FS 35042 Non-Spectacular Sea Blue mixed with just a bit of black.
To add some depth and interest to aircraft with such a plain camouflage, I usually paint some panels and parts of the plane that are most exposed to the sun with a lighter shade of the base color to represent fading. I did the same on my Gekko but not as much as I usually do. My reasoning was that the plane, being a night fighter, was seldom used during the day and, as it would have to be camouflaged in some way, was not often exposed to the sun. That is why I kept the paint fading to a minimum. Using a fine brush I then applied silver paint around panel lines and some areas worn by dust, to mimic the paint chipping often seen on Japanese aircrafts. The rest of the weathering (exhaust stains, oil leaks, dust, etc…) was done using pastel chalks. I also used the extra fuel tanks and painted them IJN Sky Gray to add some colors to the plane.
Even if they were a bit thick, I used the kit decals, they reacted well with Microsol and the register was good. They went on without any problems.
|
CONCLUSIONS |
 I can say that this was an easy out-of-the-box
build (as is the case for most of Tamiya’s offering). A very enjoyable project
that even a novice can turn into a good looking model.
I can say that this was an easy out-of-the-box
build (as is the case for most of Tamiya’s offering). A very enjoyable project
that even a novice can turn into a good looking model.
January 2003
Please note that the images have all be altered. I cut back on the red in them all as it was quite overpowering. Editor
Copyright ModelingMadness.com. All rights reserved. No reproduction in part or in whole without express permission from the editor.
If you would like your product reviewed fairly and fairly quickly, please contact the editor or see other details in the Note to Contributors.