Tamiya 1/72 M6A1 'Serian'
| KIT #: | 37 |
| PRICE: | $15.00 |
| DECALS: | Several options |
| REVIEWER: | Mike Kleber |
| NOTES: |
| HISTORY |
The Aichi M6A1 ‘Seiran’
(Mountain Haze) was a single engine, two crewmember attack aircraft designed to
be ferried and launched by an I-400 class submarine.
Development began in May 1942 with the first flight in November 1943.
Twenty eight were
 built for the Imperial Japanese Navy Air Service
including two land based ‘Nanzan’ (Southern mountain) trainers.
The aircraft’s primary mission was to attack the Gatun locks in the
built for the Imperial Japanese Navy Air Service
including two land based ‘Nanzan’ (Southern mountain) trainers.
The aircraft’s primary mission was to attack the Gatun locks in the
In July 1945 two submarines of
the 1st Submarine Flotilla, each equipped with three aircraft on board, sailed
from
| THE KIT |
The kit consists of 54 light
grey parts attached to 2 runners and 5 clear parts.
There is a second windscreen option that accommodates an external gun
sight. The surfaces have very crisp
recessed panel lines and many other surface details.
Also included are the parts for the beaching dolly and 1 plastic
“bushing” used in the propeller assembly.
| CONSTRUCTION |
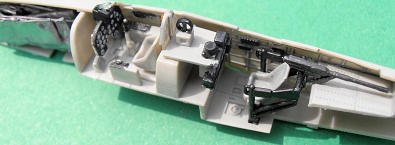
The cockpit parts fit very well
with no problems. Raised dial
details are found on the pilot’s instrument panel
 and radio operator’s panel.
Decals are provided for the instrument panels and seat harnesses.
Solvaset was used on the panel decals and they shrunk right down around
the raised features. For ease of
application, you may want to slice the harness decals down the middle of the lap
belt and apply in 2 pieces. Note:
Not much is readily visible in the cockpit once the canopy is on.
and radio operator’s panel.
Decals are provided for the instrument panels and seat harnesses.
Solvaset was used on the panel decals and they shrunk right down around
the raised features. For ease of
application, you may want to slice the harness decals down the middle of the lap
belt and apply in 2 pieces. Note:
Not much is readily visible in the cockpit once the canopy is on.
 Lead foil from my dentist’s
x-ray films was used for weight in the nose.
The foil is versatile as it can be shaped as needed.
Lead foil from my dentist’s
x-ray films was used for weight in the nose.
The foil is versatile as it can be shaped as needed.
The wing assembly was straight
forward and after it was attached to the fuselage only a tiny amount of filler
putty was required at the wing fuselage seams.
The construction of the floats
was trouble free as well.
The bomb racks required some
patience. The front and rear rack
pieces look very similar but are different with unique part numbers.
Test fitting the bomb helped to en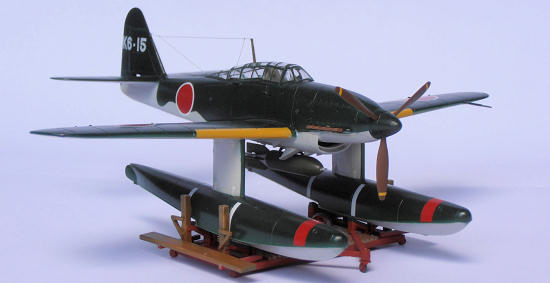 sure the proper alignment of the racks
before the cement dried. The bomb
is offset from the centerline and there is a small raised feature on the lower
wing which the bomb’s fin rests on.
For ease of assembly, you may want to cement the bomb in place prior to the
floats being attached.
sure the proper alignment of the racks
before the cement dried. The bomb
is offset from the centerline and there is a small raised feature on the lower
wing which the bomb’s fin rests on.
For ease of assembly, you may want to cement the bomb in place prior to the
floats being attached.
The canopy comes in two pieces:
The pilot’s windscreen and the remaining length of greenhouse.
The bottom of the greenhouse needed to be sanded at the back end in order
for it to fit to the fuselage with only very minor gaps remaining.
These gaps were filled with a small amount of white glue.
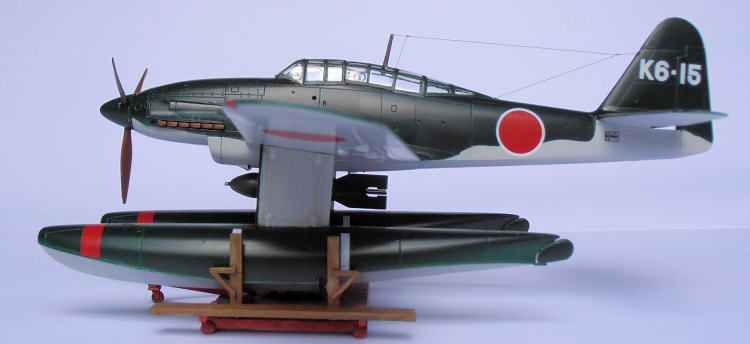
The floats were painted before
being attached to the wings.
The beaching dolly is an 11 piece project. The wheels have to be “trapped” in the frames in order for them to rotate. To avoid breaking the axle pins off, the frames needed to be spread apart while positioning the wheels. This feature seems to have little ‘value added’ to the kit for the all of the fuss.
| COLORS & MARKINGS |
Plastic enamel was used for the
entire model. The instructions call for a RLM grey green interior.
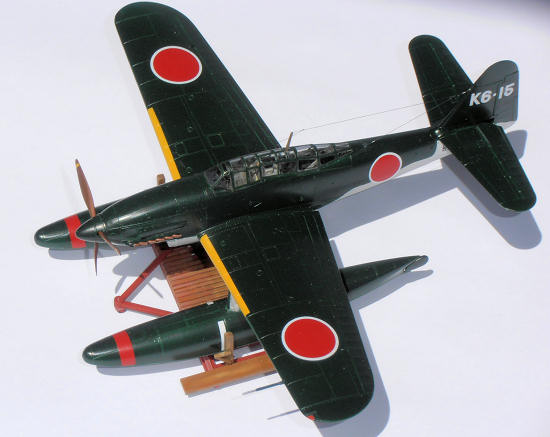
The yellow ID leading edges were painted, however decals are provided if
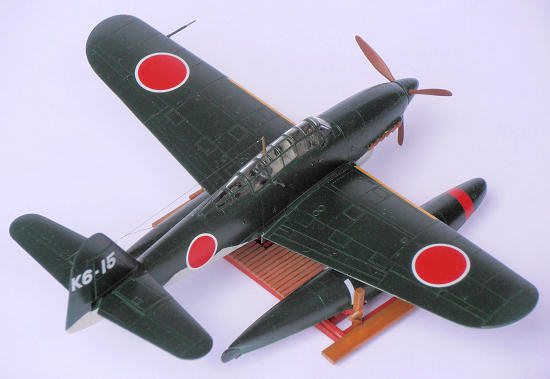
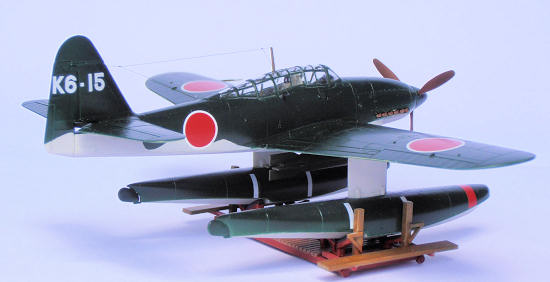
you prefer. IJN green was used for
the upper surfaces and RLM 63 for the
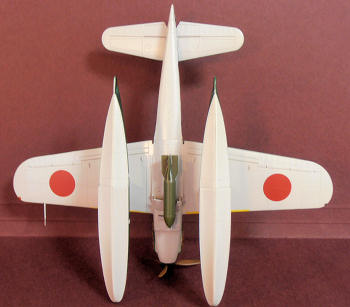 underside grey.
The paint dried with a semi-gloss finish and was left as is.
underside grey.
The paint dried with a semi-gloss finish and was left as is.
The Smithsonian’s Seiran has a
portion of the sides of the floats painted grey.
A color photograph of a Seiran, (looks to be taken by the allies post
war) shows no grey, so I opted to paint the floats in that fashion.
The beaching dolly was hand
painted. A few drops of copper and
brown were mixed into red for the anti-fouling paint on the frame and wheels.
For the wooden planks, tan, light brown and earth were used.
A thin coat of tan was applied and then brushed over with the other
colors thinned out.
Decals provided with the kit
were used. The carrier film does
not extend beyond the diameter of roundels (Hinomarus).
The decals have a semi-flat finish.
The carrier film around the tail numbers is glossy so a shot of dull coat
would be required to lessen the shine.
Two applications of solvaset were used to set the Hinomarus down into the
panel lines.
| CONCLUSIONS |
The end result is a nice
looking model of an uncommon subject.
The build is straight forward.
I highly recommend it.
| REFERENCES |
Combat aircraft of the world:
(John Taylor)
Warbirdphotographs.com
August 2012
Copyright ModelingMadness.com. All rights reserved. No reproduction in part or in whole without express permission from the editor.
If you would like your product reviewed fairly and fairly quickly, please contact the editor or see other details in the Note to Contributors.
Back to the Review Index Page 2023