| KIT #: | 61110 |
| PRICE: | 2600 yen SRP |
| DECALS: | Two options |
| REVIEWER: | Charlie Isaacs |
| NOTES: | Yamamoto Transport boxing |
| HISTORY |
The Mitsubishi G4M1 (Allied codename ‘Betty’) was designed
by a team headed by Kiro Honjo to replace the G3M Type 36 medium bomber. The
12-shi specifications called for maximum range of 2990 miles with a minimum bomb
load and a maximum 1-ton bomb load or standard torpedo in anticipation of a war
over long stretches of the Pacific Ocean. The design team originally preferred a
four-engine layout, but the
 Navy board was adamant that it must be a twin-engine
platform. The resulting G4M1 first flew in October 1939, and exhibited a
capacious, cylindrical fuselage powered by two Mitsubishi Kasei engines.
Although first used over China in May 1941, Allied forces were surprised by the
appearance of the bomber over the Philippines on December 8, 1941. The Americans
at Clark Field were amazed to be attacked by medium bombers and at first
believed that the Japanese had launched them from aircraft carriers. The G4M1
also participated in the sinking of the British warships
Repulse and
Prince of Wales, thus rendering
Singapore helpless to a Japanese onslaught. Allied fighter pilots, however, soon
learned of the G4M1’s fatal weakness -virtually all protection had been
sacrificed for maximum range. The G4M1, although relatively fast and
maneuverable for a large medium bomber, was extremely flammable soon resulting
in the allied nickname ‘one-shot lighter’ and the Japanese crews’ unfortunate
nickname ‘Hamaki’ or flying cigar.
The Betty was eventually improved as the G4M2 with a dorsal turret eliminating
the side blisters, and went on to become a launch aircraft for the Yokosuka Ohka
special attack aircraft. The Betty’s final mission was bearing the Japanese
surrender committee. These final Bettys were painted all white with large green
surrender crosses.
Navy board was adamant that it must be a twin-engine
platform. The resulting G4M1 first flew in October 1939, and exhibited a
capacious, cylindrical fuselage powered by two Mitsubishi Kasei engines.
Although first used over China in May 1941, Allied forces were surprised by the
appearance of the bomber over the Philippines on December 8, 1941. The Americans
at Clark Field were amazed to be attacked by medium bombers and at first
believed that the Japanese had launched them from aircraft carriers. The G4M1
also participated in the sinking of the British warships
Repulse and
Prince of Wales, thus rendering
Singapore helpless to a Japanese onslaught. Allied fighter pilots, however, soon
learned of the G4M1’s fatal weakness -virtually all protection had been
sacrificed for maximum range. The G4M1, although relatively fast and
maneuverable for a large medium bomber, was extremely flammable soon resulting
in the allied nickname ‘one-shot lighter’ and the Japanese crews’ unfortunate
nickname ‘Hamaki’ or flying cigar.
The Betty was eventually improved as the G4M2 with a dorsal turret eliminating
the side blisters, and went on to become a launch aircraft for the Yokosuka Ohka
special attack aircraft. The Betty’s final mission was bearing the Japanese
surrender committee. These final Bettys were painted all white with large green
surrender crosses.
The Mission:
Allied forces intercepted a Japanese coded message that
Admiral Yamamoto would be flying from Rabaul to Bouganville to inspect Japanese
installations there. P38s from the 347th and 18th Fighter
groups on Guadalcanal were dispatched at maximum range (at the time) to
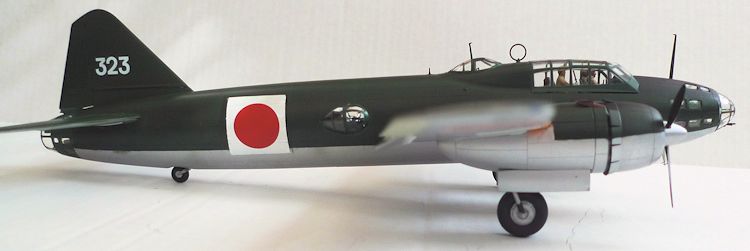
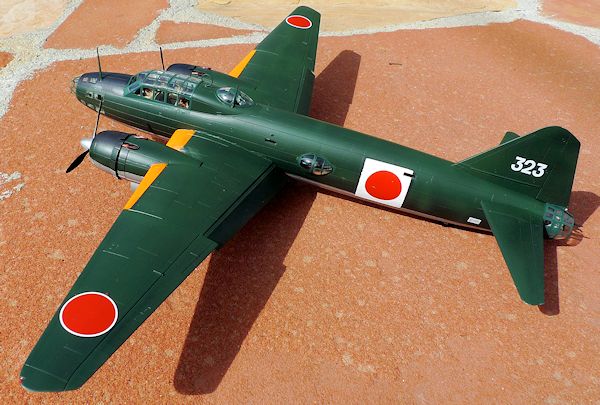
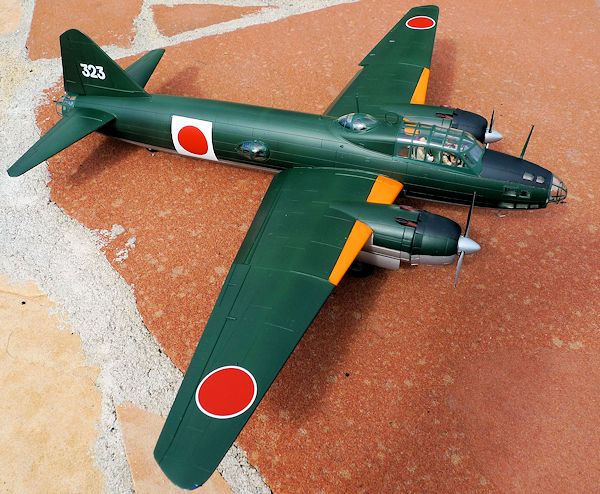
intercept the admiral’s plane. Bomber T1-323 picked up Yamamoto’s party at
Lanukai airfield on Rabual at 6:10 AM on April 18, 1943. The admiral’s
 plane was
accompanied by another G4M1 (T1-326) and was escorted by six Mitsubishi A6M2
Zeros from the 204th Kokutai. American P38s intercepted the bombers over Empress
Augusta Bay on Bouganville a little before 8:00 AM. Yamamoto’s plane dived for
the deck to escape the fighters. The P38s split up to separate the escorts from
the bombers. The admiral’s plane was shot down around 8:00 AM into the jungle
near Aku on southern Bouganville. The other bomber ditched into the sea off
Moila Point. American pilot Tony Lanphier originally claimed the bomber, as did
Rex Barber, starting a lifelong controversy over who actually shot down
Yamamoto. Later research awarded the claim to Barber, who attacked from the
rear. The crash site was so remote that it took Japanese personnel until late
the next day to locate the crash site in the jungle. Subsequent autopsy of the
admiral’s body showed no physical wounds other that a small cut above his eye.
It was believed that he died from internal injury or shock. The crash site now
displays a
memorial plaque placed by the Japanese and is now accessible by a
footpath.
plane was
accompanied by another G4M1 (T1-326) and was escorted by six Mitsubishi A6M2
Zeros from the 204th Kokutai. American P38s intercepted the bombers over Empress
Augusta Bay on Bouganville a little before 8:00 AM. Yamamoto’s plane dived for
the deck to escape the fighters. The P38s split up to separate the escorts from
the bombers. The admiral’s plane was shot down around 8:00 AM into the jungle
near Aku on southern Bouganville. The other bomber ditched into the sea off
Moila Point. American pilot Tony Lanphier originally claimed the bomber, as did
Rex Barber, starting a lifelong controversy over who actually shot down
Yamamoto. Later research awarded the claim to Barber, who attacked from the
rear. The crash site was so remote that it took Japanese personnel until late
the next day to locate the crash site in the jungle. Subsequent autopsy of the
admiral’s body showed no physical wounds other that a small cut above his eye.
It was believed that he died from internal injury or shock. The crash site now
displays a
memorial plaque placed by the Japanese and is now accessible by a
footpath.
| THE KIT |
| CONSTRUCTION |
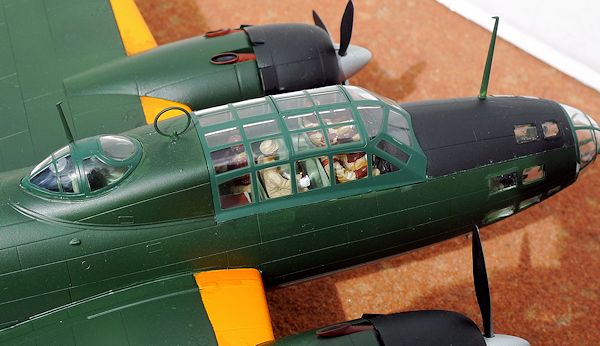
 interior
light green to dry. Rather than use the supplied decal, I painted the instrument
panel back and drybrushed the instruments. I then painted the tail gunner. While
waiting for all the paint to dry, I assembled the wings, vertical, and
horizontal stabilizers, glued in the nose windows,
and left them to dry over night.
interior
light green to dry. Rather than use the supplied decal, I painted the instrument
panel back and drybrushed the instruments. I then painted the tail gunner. While
waiting for all the paint to dry, I assembled the wings, vertical, and
horizontal stabilizers, glued in the nose windows,
and left them to dry over night.
The next day, I assembled the fuselage. Betty bombers did
not have opening bomb bay doors. The bomb bay had a panel to cover it when not
in use. I glued in the panel but noticed that fit was not perfect (for a Tamiya!)
I then attached the wings and tail surfaces. All of these fit very well. I then
left all of this to dry over night.
Day 3 was reserved for my least favorite part of the build – sanding. Fortunately, this is a Tamiya kit and fit so well that there was a minimum of sanding involved. This was a real treat after my last build – a Smer SVA that just consisted of vaguely shaped blobs of plastic. The Tamiya kit was crisply molded and fit almost perfectly – except for the bomb bay cover. It could have been due to my ham-handed building skills, but the bomb bay required more than minimum sanding. However, no putty was sued in this build.
| COLORS & MARKINGS |
Day 4 was used to start the paint process. I first masked
the nose windows with blue tape. I then painted the leading edges of the wings
and the center fuselage sides with flat white Tamiya acrylic paint. I let them
dry for a few hours. I then cut square masks out of blue tape for the fuselage
sides. I generally try to paint markings that I can rather than use decals. I
then painted the leading edges with Tamiya flat yellow mixed
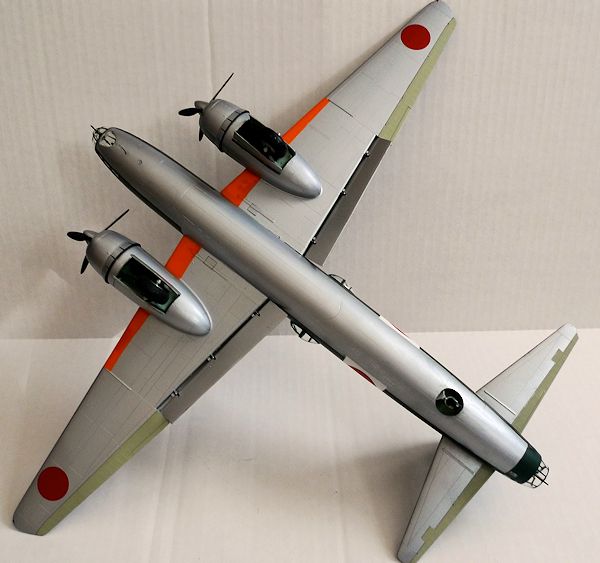 with a little Tamiya flat red (which will cause problems later.) I masked over the leading
edges and painted that anti glare panels with Testors flat black spray. My
airbrush is getting finicky, so I use spray cans for some things. After letting
that dry, I masked off the anti-glare panels. Here is where I went wrong. I used
the supplied clear parts that were not prepainted to mask off the interior areas
of the fuselage. I then sprayed the underside of the plane with Testors 1246
metallic silver. The top was painted with Tamiya’s recommended color XF-11 JN
Green. I figured that it would match the prepainted canopies – WRONG! The next
day while trial-fitting the canopies, I found to my dismay that the prepainted
color did not match – it was too light. I then mixed XF-11 with a little Tamiya
XF-26 deep green and lightly sprayed along panel lines and a little more thickly
along the top to show fading. T1-323 was only a month old when it crashed, so it
should not have faded too much even in a harsh environment like Rabaul. Upon
removing the masks from the fuselage, I found the inevitable bleeding through of
the top color. This was no real problem for the white squares, but the leading
edge color was hard to match on touch up, and my attempts at repair do not fully
match. I then sprayed Glosscote all over the plane to facilitate adherence for
the decals. I chose to use the markings for Yamamoto’s plane. Decals were also
coating lightly with Microsol. After the decals had dried, I sprayed the whole
top of the plane with Testors Dullcote.
with a little Tamiya flat red (which will cause problems later.) I masked over the leading
edges and painted that anti glare panels with Testors flat black spray. My
airbrush is getting finicky, so I use spray cans for some things. After letting
that dry, I masked off the anti-glare panels. Here is where I went wrong. I used
the supplied clear parts that were not prepainted to mask off the interior areas
of the fuselage. I then sprayed the underside of the plane with Testors 1246
metallic silver. The top was painted with Tamiya’s recommended color XF-11 JN
Green. I figured that it would match the prepainted canopies – WRONG! The next
day while trial-fitting the canopies, I found to my dismay that the prepainted
color did not match – it was too light. I then mixed XF-11 with a little Tamiya
XF-26 deep green and lightly sprayed along panel lines and a little more thickly
along the top to show fading. T1-323 was only a month old when it crashed, so it
should not have faded too much even in a harsh environment like Rabaul. Upon
removing the masks from the fuselage, I found the inevitable bleeding through of
the top color. This was no real problem for the white squares, but the leading
edge color was hard to match on touch up, and my attempts at repair do not fully
match. I then sprayed Glosscote all over the plane to facilitate adherence for
the decals. I chose to use the markings for Yamamoto’s plane. Decals were also
coating lightly with Microsol. After the decals had dried, I sprayed the whole
top of the plane with Testors Dullcote.
| FINAL CONSTRUCTION |
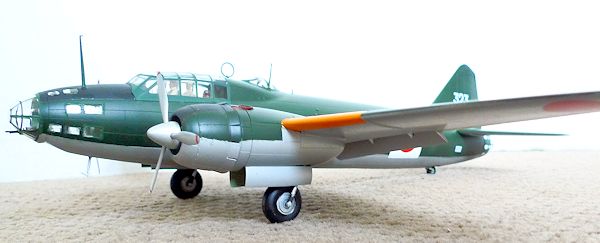
I attached the canopies, blisters, nose cone, etc. The colors now matched fairly well. Landing gear went on easily, making me appreciate the engineering involved in designing Tamiya kits. Once built, it makes an attractive, if large, addition to my growing fleet of Japanese aircraft.
| CONCLUSIONS |
I would definitely recommend this kit to collectors of WWII Japanese aircraft. I would like to thank Tom Cleaver who supplied the kit that had been provided by Hobby Link Japan.
| REFERENCES |
Famous Bombers
by William Green
Information supplied with the model
Pacific Wrecks.com
http://www.pacificwrecks.com/aircraft/g4m/2656.html
February 2013
Get yours at http://www.hlj.com/product/TAM61110
If you would like your product reviewed fairly and fairly quickly, please contact the editor or see other details in the Note to Contributors.