Fine Molds 1/72 Ki-61 'Hein'
| KIT #: | FP 25 |
| PRICE: |
€22,95 but it was
marked 50% off at www.plasticmodelbouw.nl |
| DECALS: | Two options |
| REVIEWER: | Jeroen Koen |
| NOTES: |
| HISTORY |
 The Kawasaki
Ki-61 Hien (飛燕, roughly "flying
swallow") was a Japanese World War II fighter aircraft used by the Imperial
Japanese Army Air Force. The first encounter reports claimed Ki-61s were
Messerschmitt Bf 109s: further reports claimed that the new aircraft was an
Italian design, which led to the Allied reporting name of "Tony", assigned by
the United States War Department. The Japanese Army designation was "Army Type 3
Fighter" (三式戦闘機). It was the only mass-produced Japanese fighter of the war to
use a liquid-cooled inline V engine. Over 2.500 Ki-61s were produced, first
seeing action around New Guinea in 1943, and continuing to fly combat missions
throughout the war.
The Kawasaki
Ki-61 Hien (飛燕, roughly "flying
swallow") was a Japanese World War II fighter aircraft used by the Imperial
Japanese Army Air Force. The first encounter reports claimed Ki-61s were
Messerschmitt Bf 109s: further reports claimed that the new aircraft was an
Italian design, which led to the Allied reporting name of "Tony", assigned by
the United States War Department. The Japanese Army designation was "Army Type 3
Fighter" (三式戦闘機). It was the only mass-produced Japanese fighter of the war to
use a liquid-cooled inline V engine. Over 2.500 Ki-61s were produced, first
seeing action around New Guinea in 1943, and continuing to fly combat missions
throughout the war.
| THE KIT |
Everyone must have had
this once in a while... a webshop is having a 50% off sale, and you need just a
few small things to get the most out of your shipping costs. I'd already browsed
through most of the site without finding something nice enough to order along,
until I looked at FineMolds, whose name I'd heard, but had never built a kit
from. So I ordered not only the Ki-61, but also an Bf109F-4, it along the rest.
When the lot arrived, I
opened up the Ki-61 last. What greeted me wasn't bad, not bad at all! Three
sprues, one of which is clear, a nicely printed sheet of decals for 2 versions,
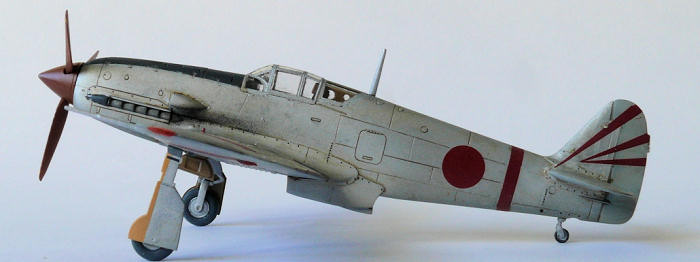
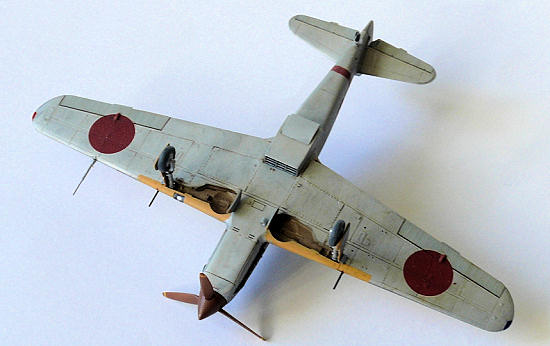
one from the 39th Training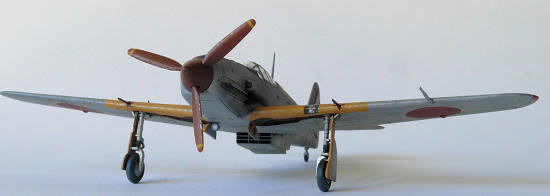 Wing in green over natural metal, the other is from the 18th Sentai
and this is in overall natural metal -both have the black anti-glare panel and
yellowish ID-marks on the wings. A nice touch is the inclusion of a pair of nice
brass barrels for the MG151/20's that the “Hei” carried.
Wing in green over natural metal, the other is from the 18th Sentai
and this is in overall natural metal -both have the black anti-glare panel and
yellowish ID-marks on the wings. A nice touch is the inclusion of a pair of nice
brass barrels for the MG151/20's that the “Hei” carried.
It has recessed panel
lines, and the overall appearance is quite similar to Hasegawa, though it's an
entirely different kit. Both engraving and raised ridges to represent
overlapping panels are a bit more heavy handed than one would get on a modern
Hasegawa kit, though. Other than 2 sink holes opposite to the raised detailing
in the cockpit, the molding looks good. The cockpit is nicely detailed for 1/72,
lacking only seatbelts. It's all the more unfortunate that the canopy can't be
posed open.
The only options you get are the drop tanks and their pylons, and
a part to show off an representation of the engine and cowl guns. Phosphorous
anti-bomber bomb dispensers are also included, but marked not for use in this
version.
The decals are those
typical Japanese ones that look well-printed, but have a thick carrier film, and
somewhat ivory whites, though not as bad as on some Hasegawa sheets. The decals
include the tail band for the 18th Sentai
option and yellow wing leading edge ID marks for both, as well as a whole lot of
stencils.
Instructions are pictorial, thankfully, as, except for the colour call-outs,
everything else is in Japanese!
| CONSTRUCTION |
 indicated by
the instructions and a few reviews I could find on the web. The interior was
assembled as indicated without problems; after trimming the clear film edges off
the instrument panel decal that fitted well, too. I made some tape seatbelts,
gave it a dark brown wash, light brown dry-brush and dinged it here and there.
indicated by
the instructions and a few reviews I could find on the web. The interior was
assembled as indicated without problems; after trimming the clear film edges off
the instrument panel decal that fitted well, too. I made some tape seatbelts,
gave it a dark brown wash, light brown dry-brush and dinged it here and there.
Then I glued the fuselage halves together. Fit was generally quite good, though there was a small step at the bottom seam, a bit of sanding and filling took care of that.. I then glued the gunsight in and put the canopy on -I had to sand a bit off the bottom of the clear part as it would sit too high. Then the vertical tails were installed and left to dry. In the meanwhile I cleaned up the remaining small parts and glued the wings together -a dryfit indicated there would be a gap at the wing root. I also had to sand the mating surfaces down on all sides to make both the upper wing root, and the lower insert sit flush with the fuselage. This was then glued in place and the gap on the top stuffed with Evergreen and a touch of filler made sure nothing would be seen later.
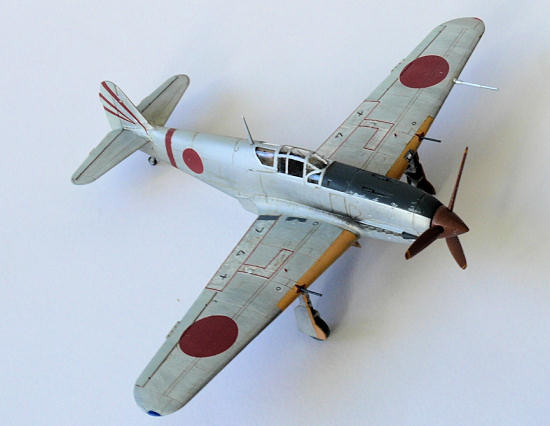
When that had all dried I added the top cowl part; there is a choice for an insert so you can leave it off and see an sort-of engine and cowl guns. Even before assembly started I decided it would spoil the lines of this sleek fighter, so I closed it up. This also required some sanding to blend it in. I then masked the wheel wells and cockpit (fun!), primed the airframe, did a bit of sanding here and there, and re-scribed all lost panel lines. I also bought a Verlinden scribing template and used that for the first time to re-scribe the fuel and oil filler hatches aft of the cockpit.
| COLORS & MARKINGS |
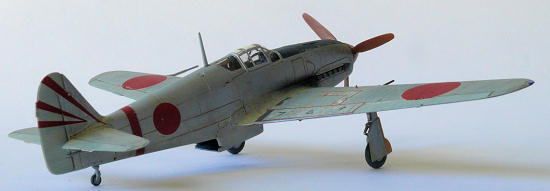
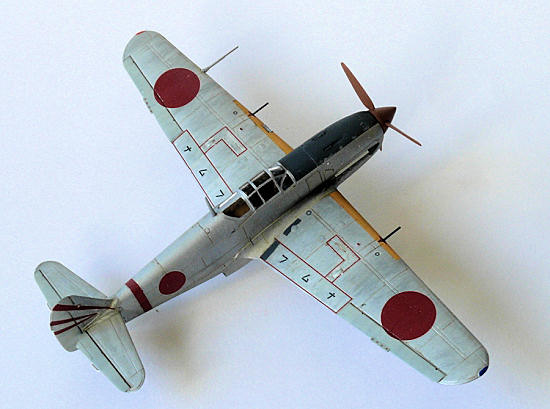
Initially I'd wanted to do the box-art aircraft as that had a nice looking bird-like design on the tail. However, I tried one of the red decals I would not use on an old dark green model and found them really translucent. So I went with the other, overall NMF, option. After re-priming the sanded areas I painted the fabric rudder, elevators and ailerons Tamiya JAAF grey and faded that with some base colour lightened with flesh. I masked those off and used the lightened mixture to undercoat the yellow ID edges. After these dried I added some red to my Humbrol Signal Yellow and painted these -2 times, because the leading edge seam wasn't really properly sanded.
 I then
painted the whole airframe Humbrol Panzergrau and masked off the anti-glare
panel in front of the cockpit. I then shot the entire airframe in Humbrol Silver
#11. Note to self: do not use a flat undercoat for these kind of finishes...
Though it wasn't entirely the way I liked, I deemed it good enough to continue.
After a few weeks of modelling inactivity I brush painted the Dutch equivalent
of Future on, only to discover it would actually “streak” the underlying paint
-curiously this did not happen on my test model. (I always spray an old test
model with the paints I use on the final product to test things like this) What
to do now... I didn't really feel like stripping it, so I continued with the
decals. Another small disaster... the tail band didn't fit, and the rest are
really thick, prone to silvering despite the gloss-coat, and don't respond to
any setting solution at all. To prevent the silvering I first put a dab of
Future on, and place the decal on that, and firmly press them on. The Future
shrinks a
bit when it dries so pulls the decal into most recesses -this
even works on Roden decals, but the FineMold decals wrinkled and would only stay
that way....
I then
painted the whole airframe Humbrol Panzergrau and masked off the anti-glare
panel in front of the cockpit. I then shot the entire airframe in Humbrol Silver
#11. Note to self: do not use a flat undercoat for these kind of finishes...
Though it wasn't entirely the way I liked, I deemed it good enough to continue.
After a few weeks of modelling inactivity I brush painted the Dutch equivalent
of Future on, only to discover it would actually “streak” the underlying paint
-curiously this did not happen on my test model. (I always spray an old test
model with the paints I use on the final product to test things like this) What
to do now... I didn't really feel like stripping it, so I continued with the
decals. Another small disaster... the tail band didn't fit, and the rest are
really thick, prone to silvering despite the gloss-coat, and don't respond to
any setting solution at all. To prevent the silvering I first put a dab of
Future on, and place the decal on that, and firmly press them on. The Future
shrinks a
bit when it dries so pulls the decal into most recesses -this
even works on Roden decals, but the FineMold decals wrinkled and would only stay
that way....
| FINAL CONSTRUCTION |
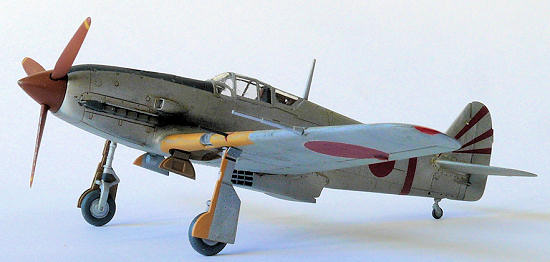
I
took a beer, still quite enjoyed it despite all the setbacks and imperfections,
took some pictures, and I called her done!
| CONCLUSIONS |
Most
of the goofs in this build were mine, and had I stripped the model, re-applied
the paint and used aftermarket decals the result could have been a lot better.
For a 23€ model, some better decals should have been included -even an 8€ Revell
or Italeri Corsair has proper decals?
| REFERENCES |
http://en.wikipedia.org/wiki/Ki-61
Jeroen Koen
April 2011
If you would like your product reviewed fairly and fairly quickly, please contact the editor or see other details in the Note to Contributors.