Modelland/Airmodel 1/72 Re.2005
|
KIT # |
? |
|
PRICE: |
? |
|
DECALS: |
See Review |
|
REVIEW : |
|
|
NOTES: |
Vacuformed kit |
|
HISTORY |
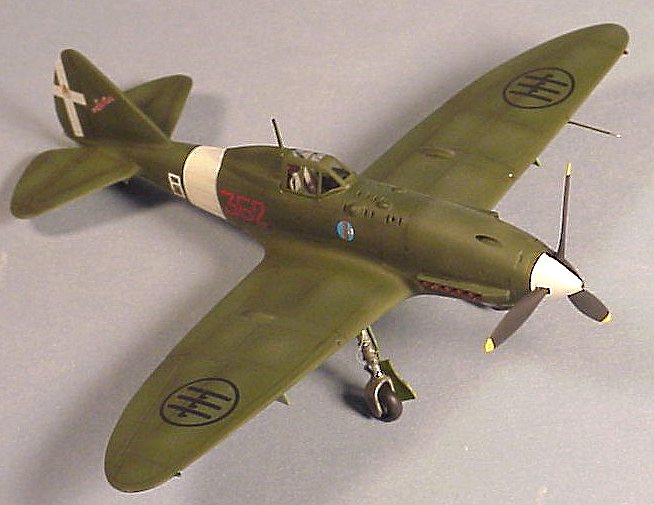
The Re-2005 was the culmination of the Reggiane series of fighter aircraft during World War two. The Sagittario as it was nicknamed was one of the series 5 of Italian fighters competing for production orders in 1942. Along with the Reggiane fighter, Fiats' G-55 and Macchis' Mc-205 were being developed as the next generation of aircraft for the Regia Aeronautica. Despite a large production order being placed, only two prototypes and 34 series 1 planes were made before the end of the war. A number of them being requisitioned by the Luftwaffe where they were used in the defense of the Ploesti oil fields.
|
THE KIT |
 As can be
seen by the manufacturer of the kit, we're getting a bit retro here. Airmodel, a
well known German vacuform kit maker has teamed up with a Polish vacuform
company to market this and the similar SAI 403 kit. I suspect Airmodel is
slowing production and is said to have gone out of business, I hope not as they
still have a number of models which are only available in the vacuform media.
As can be
seen by the manufacturer of the kit, we're getting a bit retro here. Airmodel, a
well known German vacuform kit maker has teamed up with a Polish vacuform
company to market this and the similar SAI 403 kit. I suspect Airmodel is
slowing production and is said to have gone out of business, I hope not as they
still have a number of models which are only available in the vacuform media.
The kit comes on a small vac sheet; all parts are remarkably well done for a kit of this age. A small unusable decal sheet and a very clear vac canopy round out the parts. This is one of the few vac kits that have a great deal of details that are still missing from those big Tamigawa companies. Wheel wells, correct Italian seat and a decent instruction sheet. Granted, I had to put together some sidewall details, but with the help of some detailed drawings it wasn't that difficult.
|
CONSTRUCTION |
 First off,
remove the parts from the main sheet, simply put, and use your vacuform assembly
skills and dry fit until fine sharp trailing edges are obtained. Use the same
techniques for a vac kit as for the limited run kits we how have available. I
sanded a bit too much off certain parts of the fuselage, but managed to get the
correct width by using the rear bulkhead part as a guide. The idea behind a
vacuform kit is to trick the judges at the hobby shows into thinking they are
seeing an injected plastic kit! I dropped the flaps, making ribs and stringers
out of thin plastic strips. This should totally confuse them.
First off,
remove the parts from the main sheet, simply put, and use your vacuform assembly
skills and dry fit until fine sharp trailing edges are obtained. Use the same
techniques for a vac kit as for the limited run kits we how have available. I
sanded a bit too much off certain parts of the fuselage, but managed to get the
correct width by using the rear bulkhead part as a guide. The idea behind a
vacuform kit is to trick the judges at the hobby shows into thinking they are
seeing an injected plastic kit! I dropped the flaps, making ribs and stringers
out of thin plastic strips. This should totally confuse them.
No way was I going to try and make the landing gear legs using the vacuform parts, I robbed the Supermodel Mc-205 kits gear and modified it to look like the 2005s' unique gear legs. Also coming from the Supermodel kit are the spinner, props, and tail wheel. The use of the originals was a lesson in futility and I was not about to go that direction.
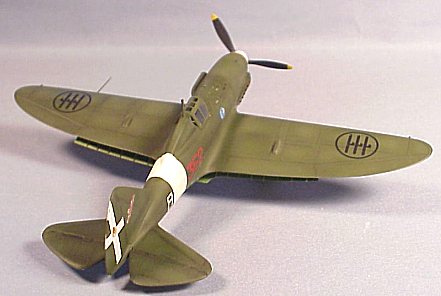
Fit of the wings to the fuselage is commendable, very little bondo was used as long as care in fitting and sanding the parts was taken. And it was looking like the sleek original! The tail planes are butt joined, as with most kits of this size, this should not pose a problem.
|
PAINT & DECALS |
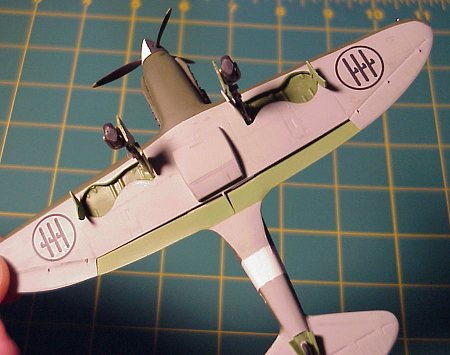 A good coat
of primer showed a few small areas that needed some medical attention, with this
taken care of, the underside was sprayed with Testors Italian Blue-gray and left
for the night to dry. The next day the undersurfaces are masked and the upper is
sprayed Dark Green, nothing special just plain old Testors Acrylic Dark Green. I
know a few of the true Itailianophites are probably moaning and shaking their
heads, "no no, it should be Verde Oliva Scuro 2!" Oh please,
give it a rest, it looks the part and I don't spend hundreds of dollars chasing
the illusive correct colors. Same for the lower surface color, except I just
happened to have that color in stock. A couple of drops of white into the base
colors and I sprayed those to highlight certain areas of the green and the gray.
Before decaling don't forget to clear coat with Future floor wax, lay it on
heavy to level the irregular surfaces, and hide the kit for a couple days to let
harden.
A good coat
of primer showed a few small areas that needed some medical attention, with this
taken care of, the underside was sprayed with Testors Italian Blue-gray and left
for the night to dry. The next day the undersurfaces are masked and the upper is
sprayed Dark Green, nothing special just plain old Testors Acrylic Dark Green. I
know a few of the true Itailianophites are probably moaning and shaking their
heads, "no no, it should be Verde Oliva Scuro 2!" Oh please,
give it a rest, it looks the part and I don't spend hundreds of dollars chasing
the illusive correct colors. Same for the lower surface color, except I just
happened to have that color in stock. A couple of drops of white into the base
colors and I sprayed those to highlight certain areas of the green and the gray.
Before decaling don't forget to clear coat with Future floor wax, lay it on
heavy to level the irregular surfaces, and hide the kit for a couple days to let
harden.
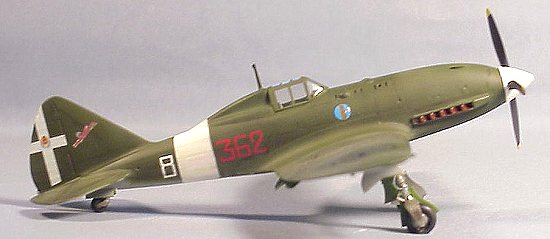
The decals come from the excellent Skymodels sheet 72-008 for the Regianne fighters and have everything to complete the look of the kit. My references showed 362-8 had a black and white spinner so that’s what it got. More Future wax over the decals to seal them and check for silvering, some that I did see was punctured with a sharp Xacto #11 and setting solution poured onto it, later more future was applied and set aside to dry.
|
FINAL CONSTRUCTION |
At this time the interior is completed, seat with aluminum foil belts, a control stick made of sprue, and a wanna-be gunsight are glued in place. The whole kit is sprayed with Testors flat clear. Some navigation lights are added as are the main landing gear and doors. The last little bit is the canopy, a nice thick vacuformed item that is very clear and needed no dip in the Future wax.
|
CONCLUSIONS |
Viola! A nifty Re-2005, all for less than $10.00 and it feels more fulfilling finishing this kit than to assemble a modern classic. There are not a lot of 1/72nd scale Re-2005s out there, a new Mr. Kit is forth-coming, the Pegasus is out of production, a Dujin resin is at best out there somewhere. But I believe some good stockists may still have this one on the shelves waiting for the real modeler to step up and take a chance. The difficulty meter rings pretty high considering that a lot of you avoid vacuforms like the plague, but if you like a challenge, this one's a 7 out of 10. Now I can't wait to try the upcoming Mr. Kit Re-2005!
Copyright ModelingMadness.com
If you would like your product reviewed fairly and quickly, please contact me or see other details in the Note to Contributors.
Back to Reviews Page 2016