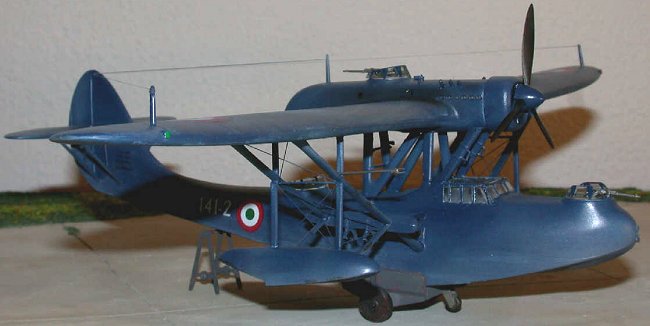
Italeri 1/72 CANT Z.501 Gabbiano
|
KIT # |
112 |
|
PRICE: |
$ |
|
DECALS: |
Three aircraft |
|
REVIEWER: |
|
|
NOTES: |
|
BACKGROUND |
I´ve already explained how I came by this kit; it´s strange, but I somehow managed to bypass all those 40+ kits in waiting and started this one instead. In fact, I had pursued the following strategy: Hey, man, now´s the time you really should begin building what you bought first. Take that Kingfisher. You bought it seven years ago and now before you start anything else, it´s her time! Lastly, the unusable Monogram decals were my excuse to chicken out of this project for the time being, so I ordered a nice aftermarket set and started the Gabbiano instead. Hey, it´s also a floatplane, isn´t it?
|
CONSTRUCTION |
I started with and didn´t spend much time on the cockpit. Although it´s rather spacious, you don´t have much of a view, and I currently advocate the position of „what you can´t possibly see, you don´t have to build“. I just added some homemade seatbelts.
 The kit exhausts weren´t worth
mentioning, so I replaced them with pieces of syringes; apart from that, I
continued the build OOB. The general fit was quite OK, especially the area
around the cockpit which required some filling and shaping and the junctures
between the engine nacelle and the wings that needed some serious sanding. I
completed the fuselage and the wing/nacelle complex, and then came the dreaded
moment when I had to mate them via this scaffolding construction I had mentioned
in the preview. It was as I had expected. I began the task calm and
concentrated; I did as much dry fitting as I could imagine, but when it came to
the moment I had to connect and aline everything, I ran in stormy waters. You
positively had to glue and align quite a lot simultaneously, and tensions in the
styrene mounted when I tried to connect the longitudinal stabilizing elements
with the X-shaped framing – they were soon present in me, too. I watched myself
losing my calmness gradually, always aware of the necessity for achieving some
fit NOW. There was a phase when things were literally on edge, when joints
started to open, subassemblies filed for divorce and when I internally began to
resemble Godzilla on one of his days of shorter temper. But somehow I managed to
get things together, heavily taped and to close the door behind me for the
evening.
The kit exhausts weren´t worth
mentioning, so I replaced them with pieces of syringes; apart from that, I
continued the build OOB. The general fit was quite OK, especially the area
around the cockpit which required some filling and shaping and the junctures
between the engine nacelle and the wings that needed some serious sanding. I
completed the fuselage and the wing/nacelle complex, and then came the dreaded
moment when I had to mate them via this scaffolding construction I had mentioned
in the preview. It was as I had expected. I began the task calm and
concentrated; I did as much dry fitting as I could imagine, but when it came to
the moment I had to connect and aline everything, I ran in stormy waters. You
positively had to glue and align quite a lot simultaneously, and tensions in the
styrene mounted when I tried to connect the longitudinal stabilizing elements
with the X-shaped framing – they were soon present in me, too. I watched myself
losing my calmness gradually, always aware of the necessity for achieving some
fit NOW. There was a phase when things were literally on edge, when joints
started to open, subassemblies filed for divorce and when I internally began to
resemble Godzilla on one of his days of shorter temper. But somehow I managed to
get things together, heavily taped and to close the door behind me for the
evening.
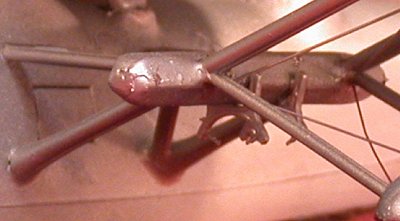 When I examined what I had
done, I was shocked to notice that one of the longitudinal thingies on which the
bombs were to be suspended looked somehow out of shape. I had fiddled with these
four parts quite a lot and – as things were – this was the only combination in
which I had achieved some fit on both sides. Well, it must have been, er, not
quite what the kit´s designers had in mind. I must have glued the two upper
parts togethe rand the lowers – just as the guy with a brown shoe and a black
one who has just another weird pair like this at home. I meditated on this for a
while and decided to leave things as they were in order not to wreck everything
in trying to redo the mistake. So what: I don´t attend contests and more and
more regard modeling as a source of fun. At least at this point of my life. But
I vowed I´d tell you. Which I did.
When I examined what I had
done, I was shocked to notice that one of the longitudinal thingies on which the
bombs were to be suspended looked somehow out of shape. I had fiddled with these
four parts quite a lot and – as things were – this was the only combination in
which I had achieved some fit on both sides. Well, it must have been, er, not
quite what the kit´s designers had in mind. I must have glued the two upper
parts togethe rand the lowers – just as the guy with a brown shoe and a black
one who has just another weird pair like this at home. I meditated on this for a
while and decided to leave things as they were in order not to wreck everything
in trying to redo the mistake. So what: I don´t attend contests and more and
more regard modeling as a source of fun. At least at this point of my life. But
I vowed I´d tell you. Which I did.
|
PAINT & DECALS |
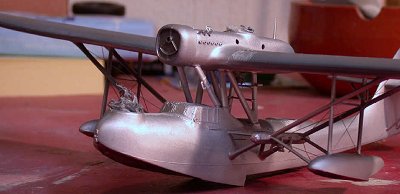 Having „completed“ this task,
I attached what odds and ends there were and coated the model with metalizer, in
order to watch out for gaps. Having worked some times back and forth with filler
and primer until I was satisfied, I started painting the model as per
instructions (Humbrol) Blue angels blue. I had chosen the post war scheme since
it was the easiest and since I had no real determination to start a masking orgy
on this rather fragile construction ...
Having „completed“ this task,
I attached what odds and ends there were and coated the model with metalizer, in
order to watch out for gaps. Having worked some times back and forth with filler
and primer until I was satisfied, I started painting the model as per
instructions (Humbrol) Blue angels blue. I had chosen the post war scheme since
it was the easiest and since I had no real determination to start a masking orgy
on this rather fragile construction ...
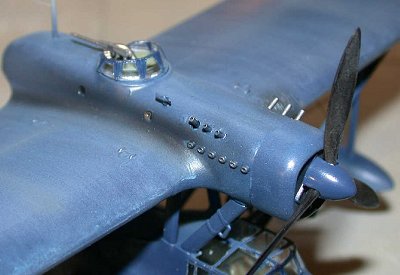
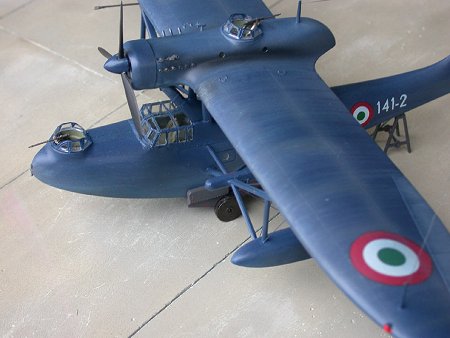
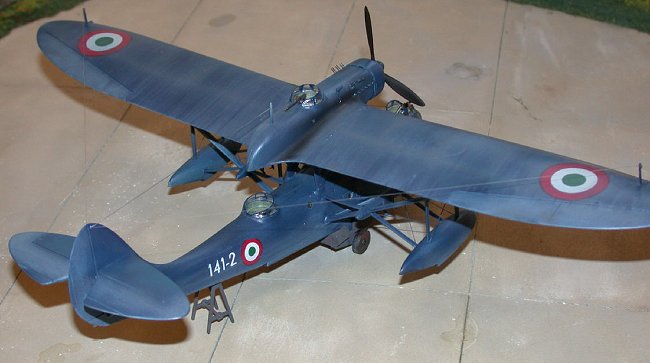
The control surfaces were painted some shades lighter to simulate the difference between the metal and the fabric. Next, I took a broad brush and applied lightened blue in determined strokes, well diluted to simulate some wear and tear under the adriatic sun. The parts of the fuselage that´d be exposed to salt water most were painted as to simulate a light crust of dried salt, as well as the black undersides that were weathered with some traces of grounding and handling. After sufficient drying and after I had considered myself contented with what I saw (my first attempt at that technique), I applied what decals there were, mainly italian cocards plus call numbers and a kind of data sheet under the horizontal stabilizer. The decals were really cute little jokers. They were applied with Micro Sol, waited for a while until I looked away, and then they started rolling away from the surface. Given the fact that they were also very brittle, I had my hands full – I had applied all of them in a row and consequently they all played that trick on me at a time.
 I finally mastered them with
more Micro Sol and sealed them with some good gloss coats. Then came a few flat
coats, unevenly applied to retain a lively surface, and then came the fun. I
played with grey, blue and black for a while, until the plane looked „used“
enough to me. I drybrushed selected areas with steel metalizer to simulate loss
of paint. Some work with pastel chalks completed the soiling of the paint job.
At some point in between , I had built the trestle and trailer; I painted them
RLM 66 and gave them some drybrushing with steel metalizer and some treatment
with pastel chalks (rust and ochre) until I was satisfied.
I finally mastered them with
more Micro Sol and sealed them with some good gloss coats. Then came a few flat
coats, unevenly applied to retain a lively surface, and then came the fun. I
played with grey, blue and black for a while, until the plane looked „used“
enough to me. I drybrushed selected areas with steel metalizer to simulate loss
of paint. Some work with pastel chalks completed the soiling of the paint job.
At some point in between , I had built the trestle and trailer; I painted them
RLM 66 and gave them some drybrushing with steel metalizer and some treatment
with pastel chalks (rust and ochre) until I was satisfied.
Now came the remaining odds and ends. I had chosen not to use the clear parts for the various bulleyes, but had covered them with silicone. Now I reopened them and filled them with Krystal Kleer. The canopy framing had been covered with Parafilm M and the framing cut out with a fresh X-Acto blade. Now I removed the Parafilm with a toothpick, but it wasn´t all of a breeze. It stuck more than usual and I had to repaint some of the framing by hand. I had already hand-painted the framing on the windbreakers for the gunners´ positions, and now they were glued with super glue. The final assembly included the machine guns, the anchor, the rather large pitot tube and finally the antennae made from stretched sprue, tightened with a heated waxing instrument and lightly sprayed medium gray and steel metalizer.
|
CONCLUSIONS |
All in all, this was a rewarding build for me. I didn´t have much in the way of references, so I acted to my liking. The instructions were a bit vague in what parts had to be used for what version as there are two different engine fronts and different windbreakers for the gunners, so I used them as I deemed right. I managed to keep cool enough not to trash the model during a hot assembly session and I´m glad I did so. I think the kit looks cool and a little out of the ordinary, and I really liked playing with that weathering.
Finally, it was fun, and that´s what matters to me. All the best to you and happy modeling, Frank
Copyright ModelingMadness.com
If you would like your product reviewed fairly and fairly quickly, please contact the editor or see other details in the Note to Contributors.
Back to Reviews Page 2020