|
KIT: |
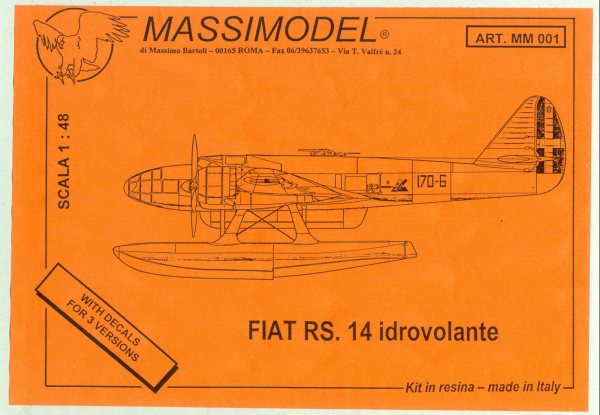
MassiModel 1/48 Fiat RS.14 |
|
KIT # |
MM 001 |
|
PRICE: |
$160.00 |
|
DECALS: |
Three aircraft |
|
REVIEW & |
|
|
NOTES: |
Kit is resin with vacufrom canopies |
|
HISTORY |
The RS.14 (Ricognizione Stiavelli) was a long-range maritime reconnaissance
floatplane bomber which
first flew in 1939. Inside the almost perfectly streamlined fuselage were two
pilots, a radio operator and an
observer/bomb-aimer. Two 840hp Fiat A.74 radials powered the aircraft to a
maximum speed of 240 mph
at 13,000ft, and enabled it to carry up to 800 lbs of various anti-submarine
bombs in a long ventral gondola.
CMASA built 186 series aircraft between May 1941 and September 1942. These were
operated by a
number of strategic maritime reconnaissance squadrons based around the Italian
coats and on Sicily and
Sardinia. There they performed useful anti-submarine and convoy escort work.
The small number of
survivors after the September 1943 armistice with the Allies were used for
similar duties with the Co-
Belligerent Air Force. Those that remained after the war were used for a time
as liason aircraft, carrying a
maximum of four passengers.
The basic design was modified as a land plane for use as a ground-attack
machine. Armed with a 37mm
cannon and four 12.7mm MGs, it would have been formidable in that role. Though
a prototype was built
and tested, no series production of this variant was undertaken.
|
THE KIT |
This kit is everything I look for in a model: obscure subject, preferably a
floatplane, and 1/48 scale.
Thanks to the lay-away plan offered by
Pacific
Coast
Models, I was able to afford it.
 The first thing I was struck with when opening the box after it finally arrived:
dang, that’s some SMELLY
resin! Even after sitting on a shelf for four months before coming to me it had
lost none of potency. I
believe I could leave the top open and keep the bugs out of the basement forever
…. but what that would do
to my lungs is not something I want to think about.
The first thing I was struck with when opening the box after it finally arrived:
dang, that’s some SMELLY
resin! Even after sitting on a shelf for four months before coming to me it had
lost none of potency. I
believe I could leave the top open and keep the bugs out of the basement forever
…. but what that would do
to my lungs is not something I want to think about.
Donning a respirator (I’m not kidding at all), I started unwrapping bits from
the bubble wrap packaging.
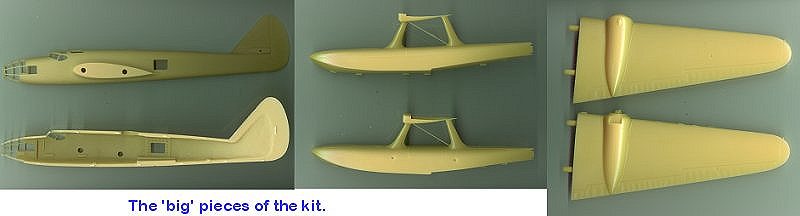
Regardless of what it smells like, the resin is very smooth and parts were very
well cast. Pour stubs are
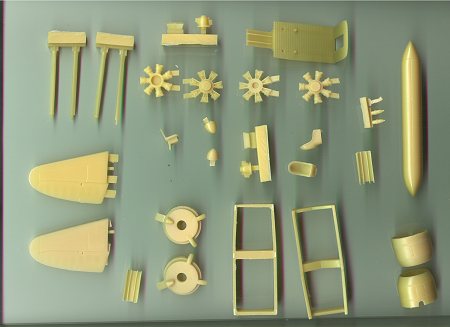
large, but not overly so, and I don’t expect much trouble removing them. Detail
parts are finely cast and
plentiful. Surface detail consists of nicely engraved panel lines and hinge
lines. The fabric control surfaces
are nicely restrained. The engines are especially nice looking, needing only
wire harnesses for that “hit
with a shrink ray” look.
The wings are molded as one piece with two large pegs a piece to connect them to
the fuselage. I’ll
probably bore out a tunnel in each for a steel rod to connect them through the
fuselage because they are
rather heavy. The only other trouble area I see with construction involves the
clear parts. The large glazed
nose and pilots windscreen are molded so that the clear bits must be cut out and
fit inside a resin framing. 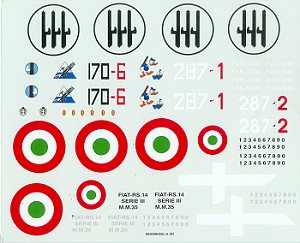 That will be a cast iron bitch to do with all the nose pieces. I am especially
concerned with how to glue
them in place, since I really don’t want them popping out later and the bond has
to be strong enough to take
masking and some handling. Epoxy glue with epoxy putty as a gap filler is
probably how I’ll handle this.
That will be a cast iron bitch to do with all the nose pieces. I am especially
concerned with how to glue
them in place, since I really don’t want them popping out later and the bond has
to be strong enough to take
masking and some handling. Epoxy glue with epoxy putty as a gap filler is
probably how I’ll handle this.
Decals are provided for three variants, or so say the instructions. Only one
aircraft is shown in the
documentation. There are enough numbers for the serials that one could
conceivably do any series aircraft,
though of course you’ll need reference for the other markings. Printed by
Cartograf, the decals are
perfectly registered and should be easy to work with.
Instructions are fairly useful, and consist of a series of exploded diagrams
showing where bits go. I already
know I’ll deviate from them – they indicate gluing the fuselage halves together,
then adding the glazing. I
think it’ll be much easier to paint the fuselage in and out, glue the windows in
place, finish the interior and
then glue the halves together.
|
CONCLUSIONS |
All-in-all it’s a nice kit of my kind of subject. Is it worth the hefty chunk
of change though? There’s
certainly enough resin in the box to justify the price, plus good decals and
decent instructions. Whether
that’s sufficient for you to fork over $160 is your call. Were it not for the
windows, I’d say this could be a
good kit for someone comfortable working with injection kits to try out resin;
because of the windows,
however, I’d recommend this to folks who have some experience in difficult
builds.
If you would like your product reviewed fairly and quickly by a site that has over 100,000 visits a month, please contact me or see other details in the Note to Contributors.