Hasegawa 1/48 Macchi C.205 Veltro
| KIT #: | Jt 33 |
| PRICE: | $43 AUD a few years ago |
| DECALS: | Two Options |
| REVIEWER: | Brad Gaff |
| NOTES: | Third Group Decals and etched metal seatbelts used |
| HISTORY |
The origins of the Macchi 205 date back
to 1936, when the Italian Air Force placed an order with Aermacchi for a high
performance interceptor. The Macchi
MC 200 was the first offering by the company. Due to a lack of power from the
radial engine, the DB 601 liquid cooled inline engine was fitted during 1940,
eventually resulting in the Macchi 202. However the ‘202 had its own share
of problem, primarily it was
woefully underarmed, sporting only two 12.7mm fuselage mounted machine guns. To
rectify the problems of the Macchi 202, the more powerful DB 605 engine was
fitted and provision made to accommodate two 20mm 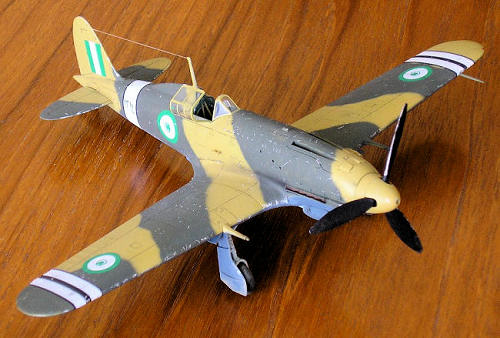 cannon in the wings.
The first prototype flew on
cannon in the wings.
The first prototype flew on
| THE KIT |
The kit comes in the usual Hasegawa light grey plastic with extremely well done
surface detail. No flash was encountered on any of the parts. Cockpit detail is
excellent straight out of the box and can be seen through the inclusion of a two
piece canopy. Cartograph decals look great and have gone into my spares folder
for future use.
| CONSTRUCTION |
I started where most of us do, with the cockpit. Assembly was straight forward;
however I decided to add some seatbelts to the rather large and naked seat. I
lacked any Italian seat belts and couldn’t actually find any aftermarket ones
(if you know of some in 1/48 drop me a line), so I used some RAF belts I had
from Red Roo. I painted the cockpit Humbrol Matt 30 g reen
and black for the instrument panel.
reen
and black for the instrument panel.
Installing the cockpit and gluing the fuselage was very easy with the fit being
every bit as good as Tamiya. A quick run over with some 800 grade sandpaper was
all that was needed. The fit of the horizontal stabilisers was so good I opted
to leave them off and install them after I’d finished painting.
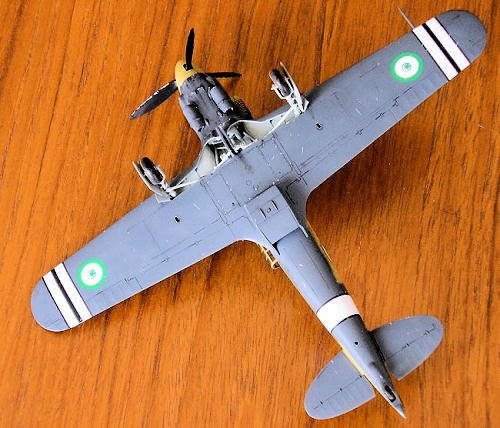
I painted the wheel well RLM 66 light blue and then assembled it. Once again the
fit was perfect, but just take a minute to make sure you align everything
correctly. Wing to fuselage fit was almost perfect but did require some
correcting and re-scribing aft of the radiator, so make sure you clean up this
join before fixing the radiator in place.
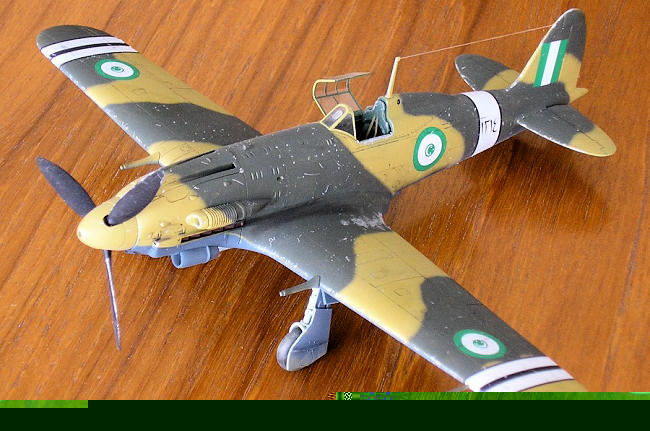
| COLORS & MARKINGS |
I chose to build the Egyptian Macchi as I have a strong interest in the post
war use of Axis aircraft.
The painting guide on the Third Group decals is very good and calls for Dark
Olive Green and RAF Middle Stone over Azure Blue. I used Gunze Azure Blue and
Middle Stone, but I can’t remember the Green.
Any RAF dark green will probably do, as the REAF had copious amounts of
RAF paint on hand. Although
the upper surface camouflage pattern is unknown, they do give you a guide which
I chose to follow.
| CONCLUSIONS |
I think the Italians made some of the most aesthetically pleasing aircraft,
and the Macchi 205 is no exception. The Hasegawa kit does the aircraft
justice and is, in my opinion, suitable for all skill levels. If you spot
one around and have an interest in Italian aircraft, buy it, you won’t be
disappointed!
| REFERENCES |
Alex
Yofe, Spitfire - Star Of Israel, Ventura Publications, New Zealand, 1996
Scale Aviation Modeller International, Volume 8 Issue 8, August 2002
September 2009
If you would like your product reviewed fairly and quickly, please contact the editor or see other details in the Note to Contributors.
Back to the Review Index Page 2024