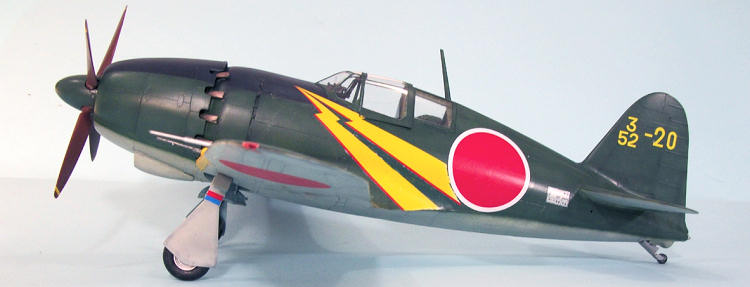
| KIT #: | 08882 |
| PRICE: | 3680 yen (approx $47.00) |
| DECALS: | Two options |
| REVIEWER: | Tom Cleaver |
| NOTES: | New tool kit |

| HISTORY |
The J2M “Raiden” (Thunderbolt) was a land-based interceptor designed by
Jiro Horikoshi for the Imperial Japanese Navy.
It was the first fighter design for the Navy that emphasized speed, climb
and dive capability over horizontal high-g maneuverability.
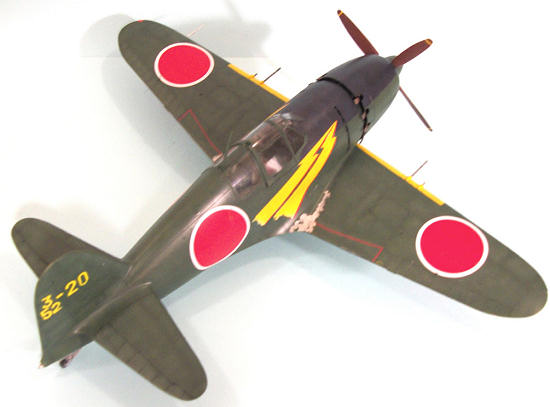
The J2M3 Model 21 was based primarily in the home islands for defense
against the B-29s.
The lack of an
adequate supercharger handicapped it at the operating altitude of the B-29s, but
the four-cannon armament was effective in bringing down a bomber with only a few
hits.
Assigned the Allied reporting
name of “Jack,” the Raiden was fast with a top speed of 417 mph. The lack of
maneuverability made the airplane a target for Hellcats and Corsairs, and
particularly for P-51D Mustangs that began escorting the B-29s from
| THE KIT |
Hasegawa has basically owned the Raiden ever since they released a 1/72
kit in the early 1970s.
This had
been originally designed by Mania, and introduced such revolutionary features as
detailed parts that actually fit well and trailing edges to flying surfaces one
could shave with.
The kit is still
available and still makes up into a decent model.
Tamiya released a 1/48 J2M3 in
 the
mid-1970s which is also still available, but the best kits of the airplane in
this scale are those released by Hasegawa in the mid-1990s.
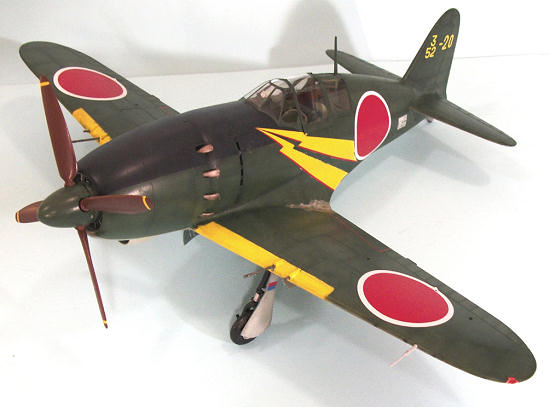
Essentially, this 1/32 kit is the excellent 1/48 kit scaled up, with some
additional detail, such as a very complete engine with cooling fans and
exhausts.
The cockpit out of the
box is nicely detailed, and a truly superb pilot figure with three different
heads including one wearing an IJN oxygen mask, can be placed in the cockpit.
This figure is the equal of anything I have seen cast in resin.
| CONSTRUCTION |
The model definitely shows its 1/48 ancestry in parts breakdown.
However, it does two interesting things that no other kit I know of has
done: the complete cooling fan system and exhaust system is included in the
engine assembly, most of which is not visible when completed, and the fuselage
and wings have internal bracing that makes for a very sturdy model when
finished.
Given the way the
fuselage parts get molded, in 1/32 they will lose their strength and become too
flexible without this.
This is only
“fiddly” when it comes to mating the fuselage sub-assembly to the wing
sub-assembly and getting the interlocking internal tabs to fit right.
You can tell they have when you hear a “click” and all of a sudden the
wing is in position.
I painted everything before commencing assembly.
The cockpit is easy, since just about everything is either Mitsubishi
Interior Green or Mitsubishi Exterior Green, with some semi-gloss black.
I
 used
Tamiya’s “Japanese Cockpit Colo” with is Mitsubishi Interior Green, and “IJN
Green 2" which is Mitsubishi Exterior Green (FYI, the original Tamiya “IJN
Green” is “Nakajima Green”).
Decals
were used for the instrument panel and they look just fine once they settle in.
The decals are a bit thick and needed two applications of Micro-Sol and a
final lick of Solvaset after being “sliced” to get them down without silvering.
I had to do the same with the external decals, too.
I still needed to use Tamiya Surfacer for the centerline seam and the big
rear seam of where the lower wing and fuselage come together.
I also had to use Surfacer to sand down the plugs for the cowling weapon
openings (Yes, they will be making a J2M2 from the parts breakdown) to get a
smooth surface.
The kit provides two different types of prop blades, and the instructions
do not indicate which should be used for which airplane.
However, an advertisement included in the kit shows a photo of Lt(jg)
Aoki’s airplane, equipped with what the kit instructions call “high performance”
prop blades, so these were used.
I
didn’t attach the drop tank because all the photos I have found of this airplane
show that not used.
| COLORS & MARKINGS |
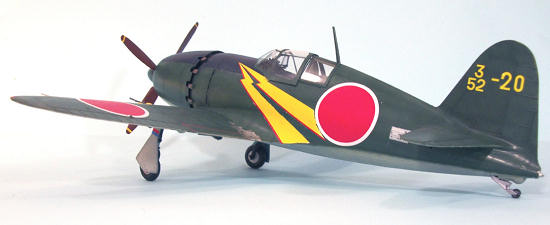 ted
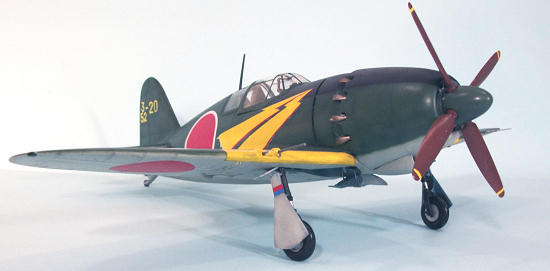
Tamiya “IJN Green 2", with both areas being post-shaded with lightened colors.
The prop blades were painted Tamiya “NATO Brown.”
The wheel wells and gear door interiors were painted Tamiya Aluminum,
with a thin coat of Tamiya “Clear Blue.”
I finished off by applying a coat of Future.
| FINAL CONSTRUCTION |
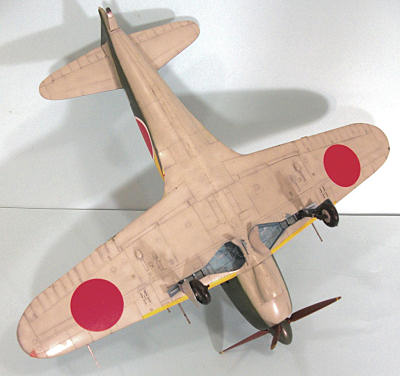 The three photos I found of this airplane show it to have been pretty
clean for a Japanese fighter, likely because it was new at the time.
I only “dinged” the area of the wing and fuselage where the pilot and
crew would have mounted it.
I unmasked the canopy and left the sliding section closed for now,
because opening it destroys the clean lines of the airplane and because the
canopy is clear enough to see all the detail within.
I assembled the landing gear and attached it, and attached the prop. I
then attached the cannon barrels and the pitot tube.
| CONCLUSIONS |
Highly recommended.
Copyright ModelingMadness.com. All rights reserved. No reproduction in part or in whole without express permission.
If you would like your product reviewed fairly and quickly, please contact the editor or see other details in the Note to Contributors.