|
KIT # |
` |
|
PRICE: |
$ |
|
DECALS: |
One aircraft |
|
REVIEW : |
|
|
NOTES: |
Kit vacuform with white metal |
|
HISTORY |
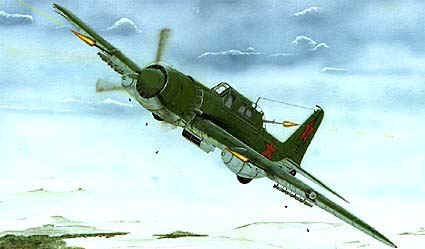
The history of the Il-2 reads like a history of Russian aviation, modest beginnings, trials and tribulations, then ultimate satisfaction. When the German onslaught took the Soviet forces by surprise during operation Barbarossa, the Il-2 was already under development. Being under the guns of the Luftwaffe meant the possibility of production snafus for the aircraft in production. Certainly engines were of primary concern when factories were moved east out of range of the medium bombers. The radial engine M-82 was thought to be a satisfactory replacement should the usual AM-38 power plant not be available. Most of these engines had been produced in the city of Perm, far away from possible bombing by the Luftwaffe. The trick was to mate the engine to an airframe designed for an inline engine. This prototype flew in September of 1941 with some success. But due to center of gravity issues was never put into production.
|
THE KIT |
 The box says R.V. Resin, the instructions have Smer, and the
kit looks like Eduard. Sounds a bit confusing? Well let me try to un-confuse
you, and myself in the process. Now, I'm not much of Russian aircraft modeler,
but this kit interested me in a couple of ways. First off it's a conversion, a
darn good-looking one when first opening the sturdy box. A finely molded tan two
piece resin fuselage is the heart of the kit. Second reason for my interest, the
plastic kit to be converted has Smer on the original instructions, a darn good
kit too. Which brings me to the last reason why I was interested in making this
kit, I think it's really a re-issue of the Eduard kit, and I've always heard
great things about them. On top of that, Smer has a habit of re-issuing others
kits.
The box says R.V. Resin, the instructions have Smer, and the
kit looks like Eduard. Sounds a bit confusing? Well let me try to un-confuse
you, and myself in the process. Now, I'm not much of Russian aircraft modeler,
but this kit interested me in a couple of ways. First off it's a conversion, a
darn good-looking one when first opening the sturdy box. A finely molded tan two
piece resin fuselage is the heart of the kit. Second reason for my interest, the
plastic kit to be converted has Smer on the original instructions, a darn good
kit too. Which brings me to the last reason why I was interested in making this
kit, I think it's really a re-issue of the Eduard kit, and I've always heard
great things about them. On top of that, Smer has a habit of re-issuing others
kits.
The first thing was to take a look at the errata instructions that defined the assembly of the conversion resin pieces. A one sided sheet which outlines the needed steps with the resin pieces. For those a bit timid about touching resin, don't be. This kit is as easy as pie. The two fuselage halves are ready to glue together after a light sanding, and even that was unnecessary. Resin pieces make up the new interior as well, although they are simply copies of the plastic ones, so they don't actually enhance the overall interior. After looking at the original plastic fuselage parts I see they actually have some sidewall detail not found on the resin pieces. What does enhance the kit is the fret of photo-etch by Eduard, of course. It supplies seat belts, control panel, and a score of small sundry items.
|
CONSTRUCTION |
First things first, sand the mold block off the cockpit floor, and sand, and sand, get the picture? For the life of me, I could not get the floor to sit properly in the fuselage. It ended up being too high. Actual sanding of the sidewalls was done with better results. After finally getting the floor in, I noticed the plastic part number 21, an armored bulkhead was no where to be seen. No sprue contained the part, neither was there a resin part added. Simply NO part 21, how strange. So my Stormovich will be a few kilos lighter when flown in actual combat, hope the pilot doesn't pick up a stray bullet. And what about that empty vodka box in the back? Someone has an interesting sense of humor. Be careful fitting the instrument panel, it won't go were it should without a lot of dry fitting. The resin fuselage is quite a bit thicker than the plastic one so the interior parts need to be thinned and downsized accordingly.
 Wings are a snap; they are well detailed and simply go
together! They contain a great deal of wheel well detail, something not found in
earlier Smer products. The fit to the resin fuselage is near perfect, nothing to
complain about here. And the tailplanes butt join to the fuselage in good
fashion, it may be a bit tricky to align for some that are used to a tongue and
slot joint. The whole kit was coming together nicely, even with the interior fit
problem.
Wings are a snap; they are well detailed and simply go
together! They contain a great deal of wheel well detail, something not found in
earlier Smer products. The fit to the resin fuselage is near perfect, nothing to
complain about here. And the tailplanes butt join to the fuselage in good
fashion, it may be a bit tricky to align for some that are used to a tongue and
slot joint. The whole kit was coming together nicely, even with the interior fit
problem.
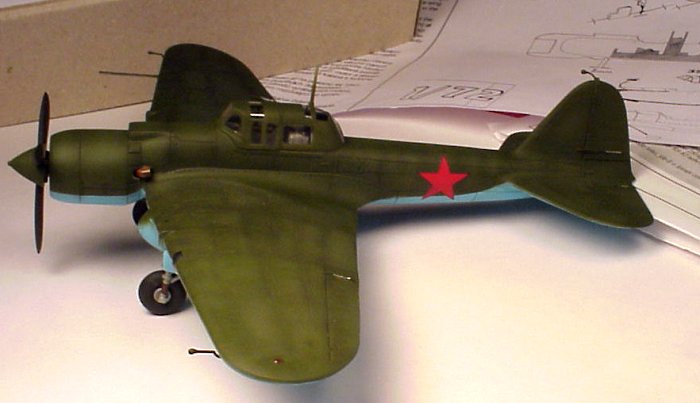
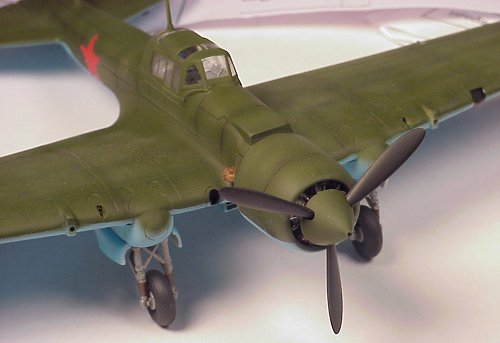
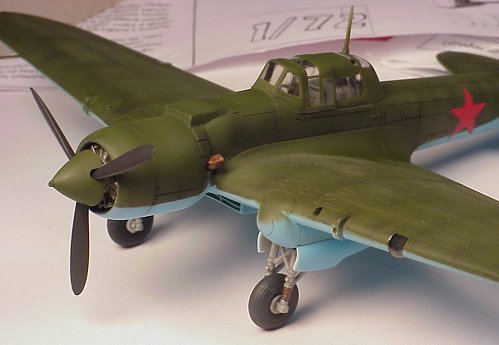
Looking at the finishing work ahead, it seems I'm without the proper paints for the kit at hand. Those are on order so attention will be turned towards popping out the landing gear and prop. The nice thing about this kit is it's lack of flash, the molds are still in good shape, detail still crisp. The original boxing of this kit has two options, one for landing gear and for skis. We need not concern ourselves about the skis; maybe at a later date they will be retrofitted to another Il-2. The prop is a simple three bladed affair while we have to fiddle about with a spinner and backing plate. My experiences with the two piece spinner are that they never match up when you glue them together. One is either to big in diameter or the sprue attachments ruin the surfaces. Let's call this one 'battle damage'.
|
PAINT & DECALS |
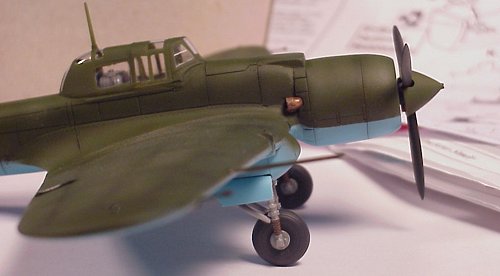
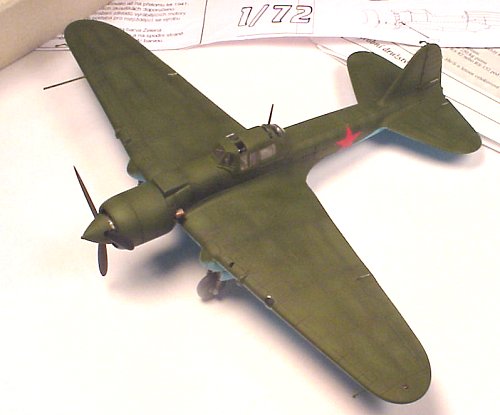
Finally got the paint today, as well as a paint mask by Eduard for the canopy. The upper is painted green, and the undersides are that horrible blue color. I must say the blue is really bright, it's so bright I thought the bottle was mislabeled. I laugh at houses painted this color. Oh well, if it must be, so be it.
 The canopy masks don't exactly match the RV vacuform supplied
part. As a matter of fact, the vac formed part seemed a bit foggy and was not an
enhancement to the kit. Time to dip it in Future. Unfortunately the original
plastic canopy is not supplied. The canopy in general fit well to the fuselage
opening, again dry fit and measure twice, glue once. I don't see a rear gun for
the passenger, seems he'll be throwing empty vodka bottles from that crate in
back.
The canopy masks don't exactly match the RV vacuform supplied
part. As a matter of fact, the vac formed part seemed a bit foggy and was not an
enhancement to the kit. Time to dip it in Future. Unfortunately the original
plastic canopy is not supplied. The canopy in general fit well to the fuselage
opening, again dry fit and measure twice, glue once. I don't see a rear gun for
the passenger, seems he'll be throwing empty vodka bottles from that crate in
back.
Decals are by Techmond and contain all 4 red stars needed for the decaling of this particular model. They went on well and were very dense color-wise, no green showing through, although they wanted to silver despite applications of Future. Some pastels are used around the panel lines to break up the all green color of the overall topcoat. Then, after all is satisfactory, a couple coats of Future and then Testors flat clear.
|
CONCLUSIONS |
 Seeing that I'm not a Russian aircraft buff, I pretty much
enjoyed the kit/conversion. There are no terrible pitfalls despite the mixture
of resin and plastic parts. The inclusion of the resin interior might have
better been utilized in enhancing some other part of the kit, but it's hard to
say what needed upgrading, the kit being very nice.
Seeing that I'm not a Russian aircraft buff, I pretty much
enjoyed the kit/conversion. There are no terrible pitfalls despite the mixture
of resin and plastic parts. The inclusion of the resin interior might have
better been utilized in enhancing some other part of the kit, but it's hard to
say what needed upgrading, the kit being very nice.
|
Fun-O-Meter |
Enjoyment Factor |
Satisfaction Rating |
|
7 of 10 |
7 |
8 |
In the end, it was a pleasant build. Thanks to R.V. Resins for thinking of adding to the Il-2 stable yet another version of the 'Flying Tank'.
Copyright ModelingMadness.com. All rights reserved. No reproduction in part or in whole without express permission from the editor.
If you would like your product reviewed fairly and fairly quickly, please contact the editor or see other details in the Note to Contributors.
Back to Reviews Page 2023