| KIT: | Drag |
| KIT #: | 48091 |
| PRICE: | $26.00 |
| DECALS: | Four options |
| REVIEWER: | Jonathan Presdige |
| NOTES: | Eduard pre-painted seatbelts used |
| HISTORY |
The
Lavochkin-Gorbunov-Goudkov LaGG-3 (Лавочкин-Горбунов-Гудков ЛаГГ-3) was a
Soviet fighter aircraft of World War II. It was a refinement of the earlier
LaGG-1, and was one of the most modern aircraft available to the Soviet Air
Force at the time of
The main
deficiency of the LaGG-1 design was power. A more powerful version of its
Klimov M-105 engine was tried. The improvement was poor and without an
alternative powerplant, the only solution was to lighten the airframe. The
LaGG team re-examined the design and pared down the structure as much as
possible. Fixed slats were added to the wings to improve climb and
manoeuvrability and further weight was saved by installing lighter armament.
The LaGG-3 replaced the LaGG-1 immediately.
 The
result was still not good enough although it came close to its rival Bf-109F
in performance and was superior in maneuverability. Still, even with the
lighter airframe and supercharged engine, the LaGG-3 was underpowered and
proved immensely unpopular with pilots. The novel, wood-laminate
construction of the aircraft continued to be poor quality (as with its
predecessor) and pilots joked that rather than being an acronym of the
designers' names (Lavochkin, Gorbunov, and Goudkov) "LaGG" stood for
lakirovanny garantirovanny grob ("guaranteed varnished coffin" -
лакированный гарантированный гроб). Some aircraft supplied to the front line
were up to 40 km/h (25 mph) slower than they should have been and some were
not airworthy. In combat, LaGG-3's main advantage was its strong airframe.
Although the laminated wood did not burn it shattered severely when hit by
high explosive rounds.
The
result was still not good enough although it came close to its rival Bf-109F
in performance and was superior in maneuverability. Still, even with the
lighter airframe and supercharged engine, the LaGG-3 was underpowered and
proved immensely unpopular with pilots. The novel, wood-laminate
construction of the aircraft continued to be poor quality (as with its
predecessor) and pilots joked that rather than being an acronym of the
designers' names (Lavochkin, Gorbunov, and Goudkov) "LaGG" stood for
lakirovanny garantirovanny grob ("guaranteed varnished coffin" -
лакированный гарантированный гроб). Some aircraft supplied to the front line
were up to 40 km/h (25 mph) slower than they should have been and some were
not airworthy. In combat, LaGG-3's main advantage was its strong airframe.
Although the laminated wood did not burn it shattered severely when hit by
high explosive rounds.
The LaGG-3 was improved during production, resulting in 66 minor variants in the 6,258 that were built. Experiments with fitting a large radial engine to the LaGG-3 airframe finally solved the power problem, and led to the superb Lavochkin La-5, though it also initially was fraught with problems.
| THE KIT |
 Thank
you once again
Thank
you once again
My particular kit had only a few mold
glitches (an improvement over some
| CONSTRUCTION |
I started this one by doing a little
research. On a visit to
www.sovietwarplanes.com I found a great series of photos of Captain
Leonid Galchenko’s LaGG-3 in the Spring/Summer of 1942. A LaGG-3 ace,
Captain Galchenko was the most famous pilot of the 145 IAP based in
| COLORS & MARKINGS |
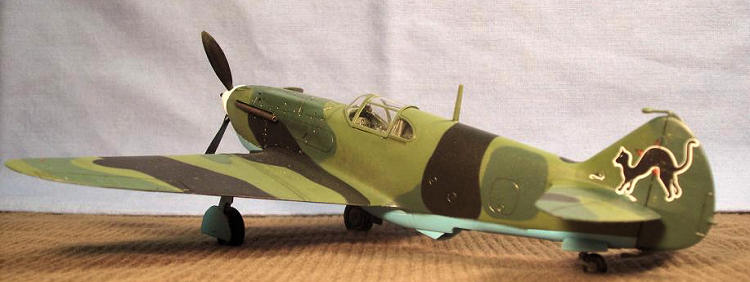
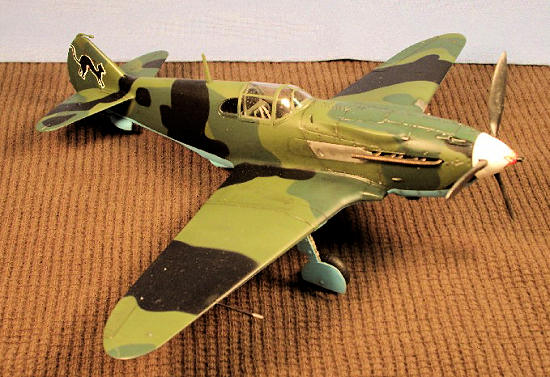
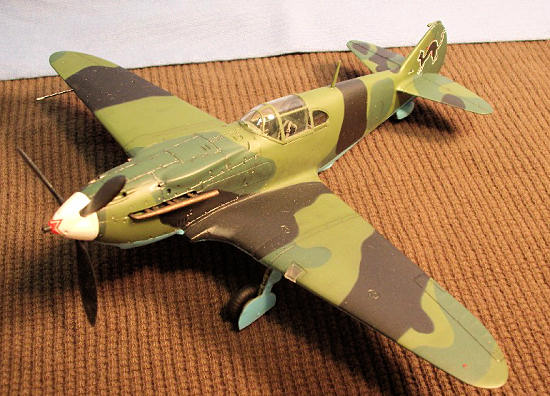
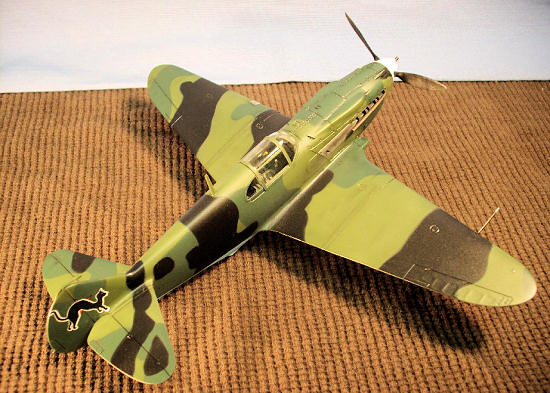
 Having
chosen to model Galchenko’s LaGG-3, I studied the photographs of his plane
to get the paint job as accurate as possible. Several things stand out on
this particular aircraft. First, there are no red stars on the wings or
fuselage. Second, there is a three color camo scheme – Medium Green
(FS34102), Dark Green (I used RAF Foliage Green) and Black that was painted
over the white winter camouflage. During this time period, the only markings
on the plane were the two black cats on the tail and the red star on the
spinner. Now that I had a good idea of what I was doing, I broke out my
Badger Anthem airbrush and began.
Having
chosen to model Galchenko’s LaGG-3, I studied the photographs of his plane
to get the paint job as accurate as possible. Several things stand out on
this particular aircraft. First, there are no red stars on the wings or
fuselage. Second, there is a three color camo scheme – Medium Green
(FS34102), Dark Green (I used RAF Foliage Green) and Black that was painted
over the white winter camouflage. During this time period, the only markings
on the plane were the two black cats on the tail and the red star on the
spinner. Now that I had a good idea of what I was doing, I broke out my
Badger Anthem airbrush and began.
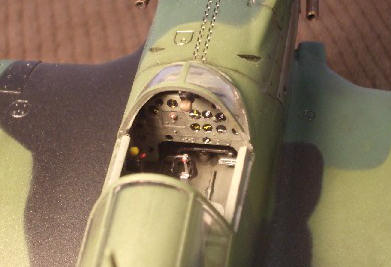
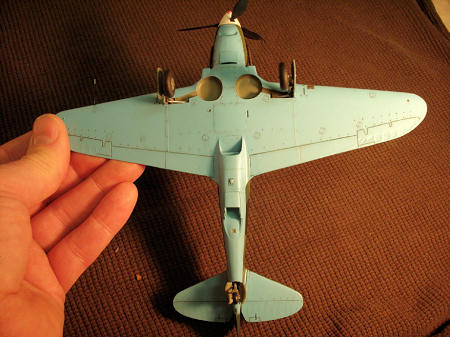
I first sprayed Poly Scale acrylic RLM 02
(a great match for Soviet interior green) on the window framing and wheel
wells. I filled the wheel wells with kneadable eraser and sprayed Poly
Scale’s Russian Underside Blue on the lower surfaces of the plane. When this
had dried, I masked off the underside and sprayed the entire upper surface
with Poly Scale’s Semi Gloss Black. I used a combination of masking tape and
kneadable eraser to mask off the black areas. By rolling the eraser into
thin snakes and sticking it to the airplane along the edge of the
camouflage, I was able to get a softer demarcation line than with tape
alone. I painted the Foliage Green next and masked it using the same method.
Finally, the Medium Green was applied and all the masking came off!
I
let the plane dry overnight and then I applied various powdered artist
pastels to bring out panel lines, exhaust stains, etc. I applied the pastels
with a soft, closely cropped paintbrush, removing the excess with kneadable
eraser. I then sealed the pastels with an airbrushed coat of Future floor
polish diluted slightly with water.
 backing
again. Once it was ready, I very
carefully realigned all the pieces while it was still on the backing. I then
set aside to dry for several hours. When it was dry, I brush-painted a coat
of Future floor polish over this and the other decals. After letting the
Future dry, I gave it another go and the decals behaved just fine! I applied
a little Champ setting solution to get them settled into the panel lines. I
had to touch up the front star decal with paint where it wrapped around the
spinner.
backing
again. Once it was ready, I very
carefully realigned all the pieces while it was still on the backing. I then
set aside to dry for several hours. When it was dry, I brush-painted a coat
of Future floor polish over this and the other decals. After letting the
Future dry, I gave it another go and the decals behaved just fine! I applied
a little Champ setting solution to get them settled into the panel lines. I
had to touch up the front star decal with paint where it wrapped around the
spinner.
| CONCLUSIONS |
Having built several
| REFERENCES |
March 2010
If you would like your product reviewed fairly and quickly, please contact me or see other details in the Note to Contributors.