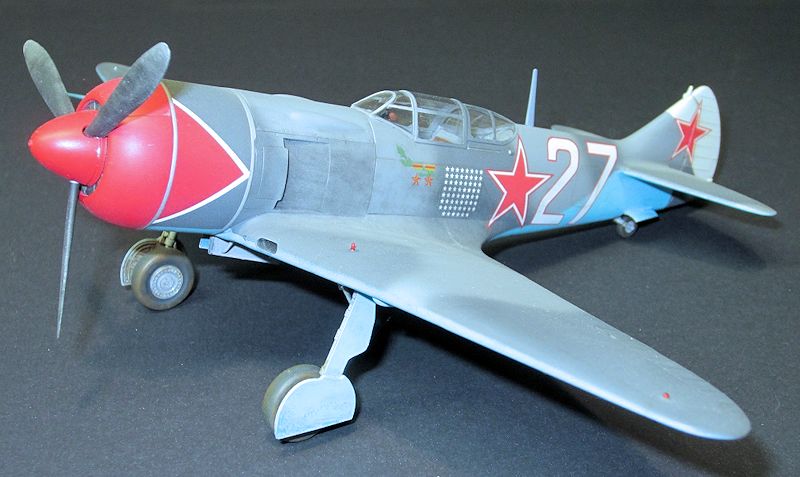
| KIT #: | 51201 |
| PRICE: | $35.00 SRP |
| DECALS: | Five options |
| REVIEWER: | Jonathan Prestidge |
| NOTES: |
Painting masks included for the wheels, canopy, and engine cowl. Eduard
photoetched seatbelts used. |

| HISTORY |
Paraphrased
from the kit instructions: The La-7 ranked among the best Soviet fighters used
in the later days of WWII. It was developed at the CAGI Institute from the La-5
model on the basis of aerodynamic refinements. It was proposed to increase the
internal rigidity of the entire structure, to completely enclose the landing
gear, to move the oil cooler from under the engine to the fuselage under the
 cockpit,
and to move the carburetor intake to the wing roots. These refinements resulted
in a significant increase in speed and rate of climb. The new model was
designated La-7, and its production started in May, 1944. In addition, it was
proposed to add three Berezin B-20, 20mm cannons. However, their development was
not completed before the end of the war, so the number of La-7s armed with three
guns reached 368 aircraft only. A total of 3,877 aircraft had been built in
Europe before the end of the war, of which 2,957 were allocated to the VVS
(Soviet air force), and 198 to the Soviet Navy. Production continued until the
end of 1945, and a total of 6,158 machines were produced. The La-7 had excellent
performance and was used by a number of Soviet air aces; among the most
prominent ones being the double Hero of the Soviet Union I.N. Kozhedub.
| THE KIT |
 This kit
originated in the 1990s. Released by Gavia and produced by Eduard under
contract, it has engraved detail, painting masks, and comprehensive decals. The
parts count is low with only 70 plastic parts and 5 more clear parts. The
engraved detail is good, but not as extensive as that of an Eduard Bf 109 kit.
There is minimal flash, and the clear pieces are thin and of good clarity. The
kit decals are thin, opaque and in register. Cockpit detail is adequate but not
up to modern standards. It is on the basic end of the spectrum with shallow side
wall detail. When released, Gavia’s La-7 effectively shelved the Hobbycraft/Academy
La-7. The Gavia kit is better in accuracy, fit, detail, ease of assembly,
decals, etc. If you are looking for an easy “weekend” build, look no further!
| CONSTRUCTION |
 Per the
usual, construction began with painting and detailing the cockpit. First, Poly
Scale Israel Gray was painted throughout. I then brush-painted the cockpit
details and gave the interior a thin black wash. Once the wash had dried, I
drybrushed the interior with a slightly lighter shade of gray. Next, I added the
photoetched seatbelt for the pilot’s seat. I then closed up the fuselage. My
only issue here was getting the tailwheel solidly mounted. The rest of the
airframe was a breeze. The fit was terrific, requiring minimal putty and
sanding.
As the final step in preparation for paint, I added the canopy. The kit canopy comes in three parts, allowing one to pose the canopy open or closed. The clear parts were dipped in Future prior to assembly. I used the kit supplied canopy masks to mask the clear parts.
| COLORS & MARKINGS |
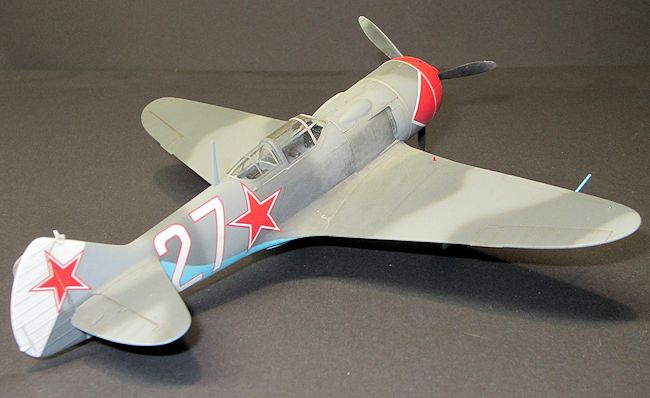
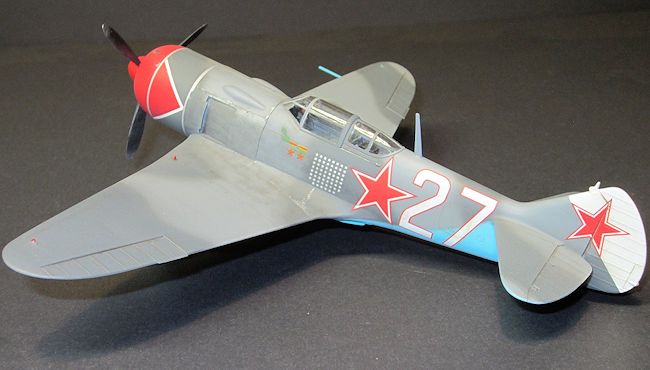
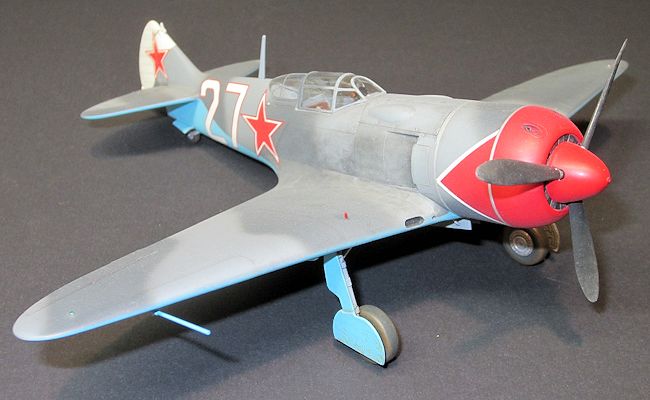
I decided to
use the kit decals to model I.N. Kozhedub’ La-7. Lt. Col. Ivan N. Kozhedub was
the ‘Allied Ace of Aces’ with 62 “kills” to his credit. There are well many
circulated black & white photos of Kozhedub’s “white 27”. There are also
countless interpretations of the camo scheme ranging from white to solid gray to
two-tone gray. In one very good close up photo of the fuselage side, there is a
clear demarcation line in the light gray (AMT 11), dark gray (AMT 12) finish
indicating that this bird sported the standard, two-tone upper camouflage.
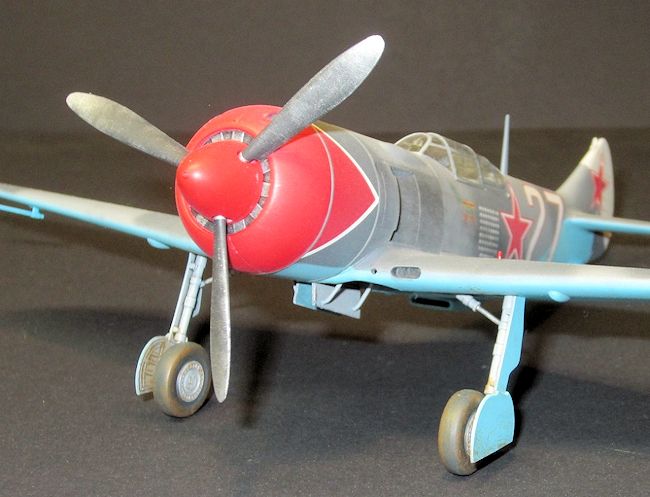 Poly Scale
Israel Gray was sprayed on the canopy framing first. I then used Polly Scale
acrylics U.S.S.R. Dark Topside Gray, U.S.S.R. Light Topside Gray, and U.S.S.R.
Underside Blue for the airframe. The camo pattern was sprayed freehand. The red
nose was also masked and sprayed at this time.
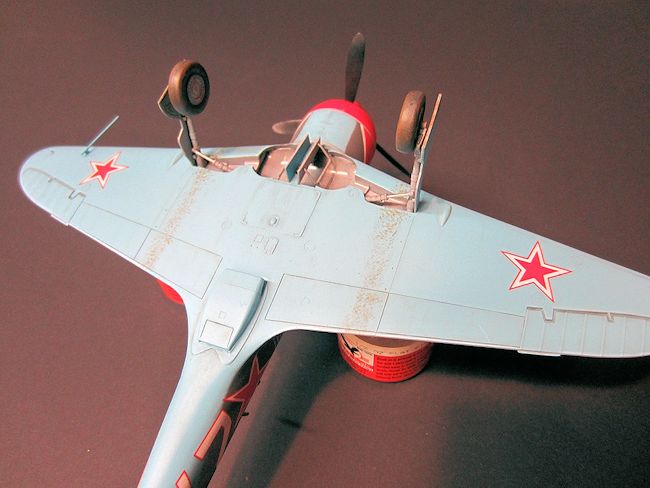
At this
point I used pastels to emphasize the panel lines and dirty the airframe up a
bit. Since the wings were covered in plywood, there is minimal detail on them. I
tried to keep things subtle, adding just enough shade variation to enhance
detail. I then sealed everything with a coat of Future in preparation for
decals.
The kit
decals were a bit sticky, but I was able to get them in place without too much
trouble. Once in position, the decals responded well to an application of Micro
Sol. I had several photos of the plane I modeled and I noticed that the red
triangles on the nose had white borders. I added these with some leftover kit
decals. I also noticed that the “27” on the fuselage sides did not have a red
border. Since I don’t possess a decal printer, I decided that I could live with
the thin red border on the kit-supplied decals. Other than the aforementioned
issues, the markings are correct and in register. After weathering the decals, I
gave the plane a final flat clear coat.
The landing
gear and other final bits were added at this time. Final detailing was then
completed.
| CONCLUSIONS |
January 2014 If you would like your product reviewed fairly and
fairly quickly, please
contact
the editor or see other details in the
Note to
Contributors.