Eduard 1/48 I-16 type 24
| KIT: | Eduard 1/48 I-16 type 24 |
| KIT #: | 8149 |
| PRICE: | $29.95 MSRP |
| DECALS: | Five options |
| REVIEWER: | Dan Lee |
| NOTES: | Kit also includes photo etch and masks |
| HISTORY |
The I-16 was the world’s first all
metal cantilever winged monoplane with retractable landing gear. It carried the
brunt of combat for the VVS till 1943 when it was replaced by more modern and
higher performance fighters like the P-39, and various fighters from the Yak and
Lavochkin bureaus. There has been a lot written about the I-16 (Ishak, Russian
for Donkey) on Modeling Madness  and
I refer you to this link to other reviews
http://modelingmadness.com/kitindex/kitindexghi.htm if you want to read
more.
and
I refer you to this link to other reviews
http://modelingmadness.com/kitindex/kitindexghi.htm if you want to read
more.
From Wikipedia:
Lev Lvovich Shestakov (December 28, 1915-March 13, 1944) was the Soviet military aviator and the Red Air Force's leading ace in the Spanish Civil War.
Upon graduating from military college in 1936 he applied for combat in Spain, joining a fighter squadron in 1937. Flying Polikarpov I-16s he claimed eight solo victories and 31 collaborative. At the time of the German invasion of the Soviet Union in June 1941, Shestakov led a fighter regiment on the Odessa front. Over the next three years he held other commands in various regions, including Stalingrad. As a colonel, on 13 March 1944 (other sources state 12 March), he intercepted German bombers but was never seen again (he was probably shot down by Hans-Ulrich Rudel). His 26 victories in the Great Patriotic War raised his career total to 65 with 42 shared.
His decorations included Hero of the Soviet Union, Order of Lenin, Order of the Red Banner, and Order of the Patriotic War.
| THE KIT |
The Eduard kit of the Type 24 contains almost everything required to build an I-16, consisting of four sprues of grey green plastic parts, one tiny sprue of clear parts, one PE fret of mostly interior details and a sheet of low tack tape masks. The parts are the typical “new” Eduard style: free of flash and the detail is nicely done.
| CONSTRUCTION |
As with most planes, construction begins with the cockpit. I cut and glued the various PE bits into place along the left and right sidewalls. I then assembled the cockpit floor and seat as per instructions. Once the glue dried, I sprayed on Gunze H61 light grey on the sidewalls while the floor assembly was sprayed with Gunze H319 Green. A couple of the left side sidewall parts were hand painted with H319 as per instructions. Once the paint was dry, I added the PE seat belts and straps and then assembled the PE instrument panel.
At this point, I cut away the left
side entry hatch before I glued the fuselage halves together. Next I inserted
the floor/seat assembly which was a bit fiddly and needed some adjustment. I
then added the instrument panel, but I w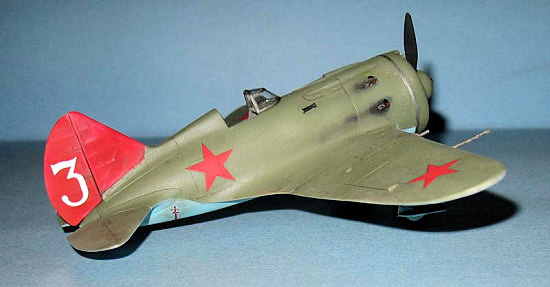 asn’t
really happy about the strength of the instrument panel join (if you’re using
the PE version) so I reinforced the support with plastic strip and CA glue.
asn’t
really happy about the strength of the instrument panel join (if you’re using
the PE version) so I reinforced the support with plastic strip and CA glue.
Next parts added were the exhaust pipes before I added the wings. The wing parts were glued together and mated with the fuselage. I knew that the lower portion of the engine cowling was going to be a problem as I discovered during dry fitting. The curve of the wing portion was slight warped relative to the curve of the fuselage part. I tried to glue plastic card to force the fuselage parts together, but this is did not work well so I used filler and shims instead. After some careful sanding and filling (using CA glue), I managed to get engine round and smooth without losing a lot of detail (which I mostly recovered thru rescribing.)
I decided to use the PE cowling covers which meant I didn’t need to paint or detail the engine. The PE cowling cover was glued on with CA glue and the engine cowling was glued in place. There were some noticeable gaps that needed a little bit of Tamiya’s version of Mr Surfacer to fill.
Aside from the underside engine cowling, the remaining seams were easy to deal with. I tried something a little different as I used slow setting CA glue without accelerator to fill the seams. It takes longer to let the glue air dry, but then again this method eliminates those annoying pinholes that appear in the filled seam when you use accelerator and reduces the number of times to repeat filling/sanding.
| COLORS & MARKINGS |
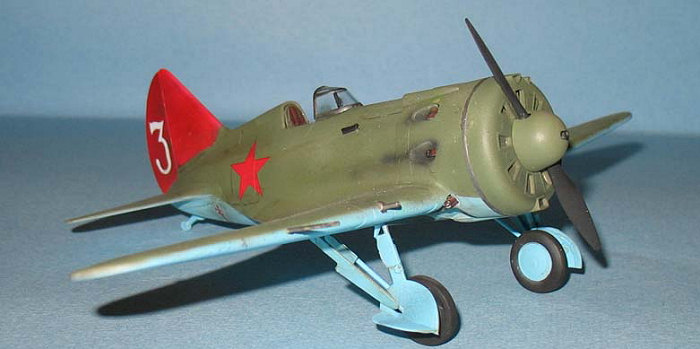
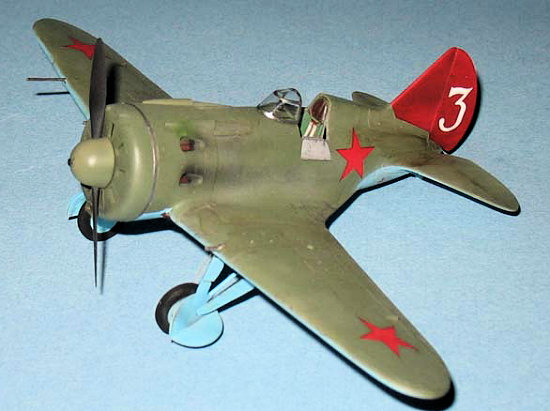
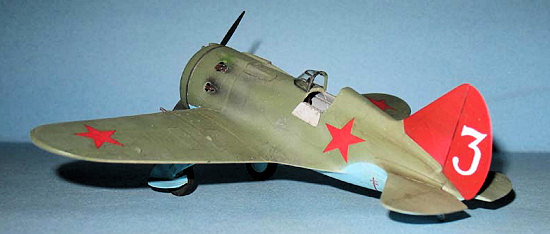
The I-16 Type 24s in Soviet service were usually a dark green over USSR underside blue. Most of the schemes were of famous I-16s, but they were either winter schemes or looked alike. I selected ace Lev Shestakov’s plane White 3 with Red tail from the 69 IAP/Fighter Aviation Regiment (later to be the famous 9 GIAP/Guards Fighter Aviation Regiment) as I wanted a more colorful scheme.
The tail parts were sprayed with
flat white in preparation for the gloss red tail then the model was preshaded
with flat black along the panel lines and various panels—the prop was painted at
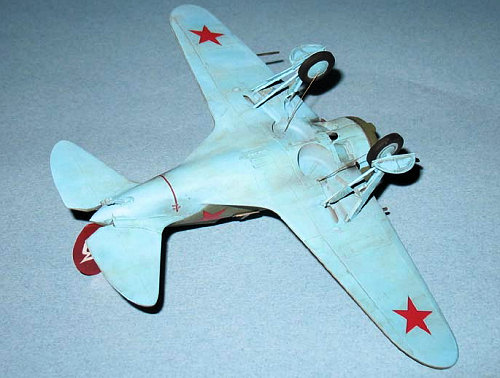
the same time. I sprayed the underside of the Ishak and
 undercarriage parts Poly Scale
USSR light blue. Once dry, I masked off the blue and white areas and sprayed
Gunze H320 Dark Green on the top as well as the prop spinner. I then used some
really thinned Tam XF-60 Dark Yellow to post shade the topside to represent
faded green paint.
undercarriage parts Poly Scale
USSR light blue. Once dry, I masked off the blue and white areas and sprayed
Gunze H320 Dark Green on the top as well as the prop spinner. I then used some
really thinned Tam XF-60 Dark Yellow to post shade the topside to represent
faded green paint.
I let the green dry overnight and then removed the masking on the white areas and then the green areas were masked to prevent overspray. I sprayed the tail and rudder (not attached to the model at the time) with Gunze H3 Red as per instructions. Once the paint was dry, I sprayed on a light gloss coat over the green and blue areas in preparation for the decals.
This I-16 only required a total of nine decals instead of the 50+ for the typical jet (one reason I get annoyed building jets.) Unlike earlier Eduard decals, these did not stick to the model where initially placed so it was easy to adjust them into the correct position. These decals worked well with Microset and Microsol.
The kit comes with a low tack tape canopy mask which I attached to the canopy and then sprayed with Gunze H320. It was only till later when I read the instructions that I realized that I should have used Gunze H18 steel instead.
I used the wheel masks when I sprayed the landing gear tires. They didn’t work as well as I hoped.
 The ring around the engine and
the canopy were carefully hand painted using Citadel Chainmetal. The exhausts
were hand painted with Gunze Rust and flat black.
The ring around the engine and
the canopy were carefully hand painted using Citadel Chainmetal. The exhausts
were hand painted with Gunze Rust and flat black.
Finally, I took some thinned flat black and sprayed very thin lines at low pressure from the exhausts to represent exhaust staining. I ended up doing the same for the underside including the gear doors which would be up during flight.
At this point, I let the model sit for a day and then applied a dirty dark watercolor wash on the plane, focusing mostly on the underside (including the landing gear.) Tamiya Smoke was also used on various landing gear bits to represent grease and oil. I made the plane dirty to represent those desperate dark days where minor details like cleaning were sacrificed for plane availability.
I dry brushed Citadel steel over various sections to represent chipped paint.
After the wash was dry, I sprayed two thin coats of Gunze Flat for the final top coat.
| FINAL CONSTRUCTION |
The canopy, PE gunsight and PE entry door were glued on using white glue while the landing gear doors, tail (placed on a slight angle) and other tiny bits were glued on the model with Tamiya thin. Finally, I used cut 0.13 brass wire glued with white glue to represent the landing gear retraction cable.
| CONCLUSIONS |
 I found the Eduard I-16 to be a
very nice kit but with a minor fit issue around the underside engine cowling
where the wing joins to it. The PE is a nice touch, but not a necessary as most
of the detail is barely noticed in the cramped cockpit.
I found the Eduard I-16 to be a
very nice kit but with a minor fit issue around the underside engine cowling
where the wing joins to it. The PE is a nice touch, but not a necessary as most
of the detail is barely noticed in the cramped cockpit.
If you like Soviet/Russian WW2 fighters or want a simple 1/48 kit then I highly recommend this model.
2008
Copyright ModelingMadness.com. All rights reserved. No reproduction in part or whole without express permission.
If you would like your product reviewed fairly and quickly, please contact the editor or see other details in the Note to Contributors.