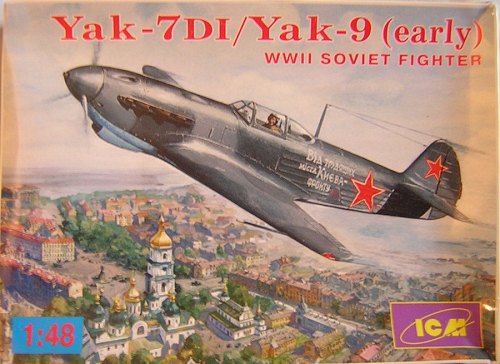
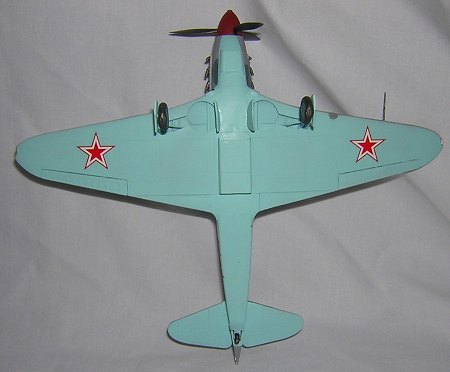
ICM 1/48 Yak-9 (early)
|
KIT # |
48041 |
|
PRICE: |
$16.98 MSRP |
|
DECALS: |
One option |
|
REVIEWER: |
Mike Horrell |
|
NOTES: |
AML 48001 decals used. This is an early version of the Yak 7DI / Yak 9 kit and is no longer listed on the Alanger website. ICM 48042 (M. Albert) contains the same airframe with the addition of ground crew and is therefore a better buy. |
|
HISTORY |
The WW2 series of Yak-1 through Yak-9 fighters formed the backbone of the Soviet Union’s air defense against the German invasion. This series was not produced in a smooth numerical progression and various models continued in parallel production throughout the war.
 Of
mixed construction, the majority of the Yak family had wooden wings, a
steel tube fuselage, metal panels from the cockpit forward with fabric
covering on the rear fuselage and control surfaces. Power was supplied by
an ever-evolving series on inline, liquid-cooled V-12s very similar to
the American Allison in layout.
Of
mixed construction, the majority of the Yak family had wooden wings, a
steel tube fuselage, metal panels from the cockpit forward with fabric
covering on the rear fuselage and control surfaces. Power was supplied by
an ever-evolving series on inline, liquid-cooled V-12s very similar to
the American Allison in layout.
Armament varied, but usually consisted of 1 or 2 cowl-mounted machine guns accompanied by a hub-firing cannon. This cannon was normally a 20mm unit, but in the Yak-9K evolved into a formidable 45mm canon of such size that the cockpit had to be relocated 3 feet to the rear, the barrel protruded well in front of the spinner and an imposing, tank-like muzzle-brake was fitted. Very intimidating.
The Yak-7V two-seat trainer proved to have such excellent performance characteristics that it served as the basis of the Yak-7A and B single seat fighters. The 7B in turn was refined into the Yak-9 with an aluminum rather than wooden spar providing far greater strength for less weight and size. The Yak-9’s performance gave it both handling and a climb rate superior to its primary adversary, the BF-109. This is the version modeled here.
|
THE KIT |
ICM has produced a series of Yak-7 and 9 kits complimenting the Accurate Miniatures Yak-1 and the Eduard Yak-3. These kits are simple and straightforward in nature. Parts are generally free of significant flash and do not have the airframe sink marks or short-shots that plagued ICM’s early Spitfire releases.
 The
kit comes with an engine that I have never used, a single piece canopy
whose windshield framing is significantly oversized, a very basic cockpit
but with separate, full tube framing for the sidewalls and utterly
useless decals. ICM boxings in the Great Aces series also contained a
very nice set of ground and pilot figures, a workbench, oil drums, etc.
that can be made up into a nice little diorama. Since these are often
found at the same price as the basic kit, I would strongly recommend
buying one of these upgrades if at all possible.
The
kit comes with an engine that I have never used, a single piece canopy
whose windshield framing is significantly oversized, a very basic cockpit
but with separate, full tube framing for the sidewalls and utterly
useless decals. ICM boxings in the Great Aces series also contained a
very nice set of ground and pilot figures, a workbench, oil drums, etc.
that can be made up into a nice little diorama. Since these are often
found at the same price as the basic kit, I would strongly recommend
buying one of these upgrades if at all possible.
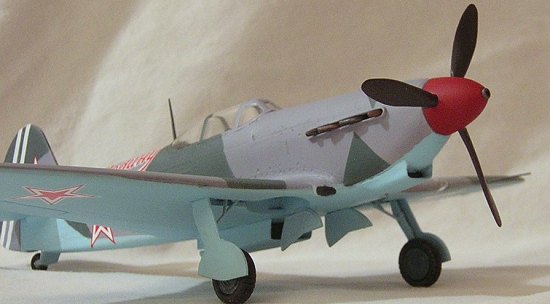
Prop and wheels are the kit’s major shortcomings. The kit wheels are usable, but lack any true rim separating the tire from the wheel so I substituted a set of True Details resin wheels solely for my own convenience. The prop blades are very poorly molded with large sink marks on the reverse side. If a replacement prop assembly had been available, I would have used it in a flash. Sadly, there appear to be none so I was forced to carve and fill until I reached an acceptable result.
The canopy fits well, but the other clear parts do not. The landing light insert is both too shallow in height and too deep horizontally requiring a careful reshaping of the leading edge recess and liberal use of white glue or some other clear filler to give it additional height and smooth it in. The wingtip formation lights are also undersized and require similar work to match the tip curvature.
The fabric sections are a bit overdone as is common in so many kits and I did not choose to “correct” it. The fuselage and wing panel lines are crisp and cleanly molded, as are all parts except the wheels and prop blades. No locating pins are provided but the kits engineering and part breakdown makes them unnecessary.
|
CONSTRUCTION |
 Like everyone else, I
started with the cockpit giving everything a coating of ALG-5 metal
primer. The seat back is amazingly thick and I would give serious
consideration to using a replacement if one can be found. Since the seat
back is padded in a vertically rolled pattern, a simple sheet replacement
is not practical. The sidewall tubing and instrument panel appear to be
accurate to Yak drawings while the rudder pedals, side control panels and
radio gear are all pretty lame.
Like everyone else, I
started with the cockpit giving everything a coating of ALG-5 metal
primer. The seat back is amazingly thick and I would give serious
consideration to using a replacement if one can be found. Since the seat
back is padded in a vertically rolled pattern, a simple sheet replacement
is not practical. The sidewall tubing and instrument panel appear to be
accurate to Yak drawings while the rudder pedals, side control panels and
radio gear are all pretty lame.
Correct placement of the interior frame tubing is critical for the rest of the cockpit’s fit so some care should be taken to make sure that the lower tubing’s curve matches that of the wing roots. The cockpit insert presented no real problems since its positioning is fixed by upper wing roots although a small amount of trimming is required on the floor for a snug fit.
There were no airframe sink marks, warped parts or poorly engineered fit anywhere on the aircraft itself. Ailerons are separate and a bit too long for their openings. The landing gear height and rake seems to be correct as the final result does not have the stork like appearance of some kits.
The upper
cowling is engineered as a separate part to accommodate different gun
arran gements
on different kit versions as well as to allow display of the engine if so
fitted. The cowl is a bit too narrow for the rest of the fuselage and I
would recommend very slightly narrowing the top of the fuselage over the
instrument panel to obtain a better overall fit. This would probably
require trimming the instrument panel but no detail would be lost in
doing so.
gements
on different kit versions as well as to allow display of the engine if so
fitted. The cowl is a bit too narrow for the rest of the fuselage and I
would recommend very slightly narrowing the top of the fuselage over the
instrument panel to obtain a better overall fit. This would probably
require trimming the instrument panel but no detail would be lost in
doing so.
I did not use the engine, but those who have say that the cowl is very difficult to fit over the installed engine. Not fitting the engine leaves nothing for the exhausts to mount to, but adding a bit of plastic sheet or trimmed sprue just below the cowling slits gives a shelf for them to rest on when they are inserted at the end of the build.
With the exception of the prop blades, which required a lot of patient filling and surgery to correct, the kit goes together very smoothly. Fit is generally good. Only a slight amount of putty required on the wing roots and major seams but a bit more work is required to smooth in the under chin oil cooler scoop. The belly radiator scoop does have a blanking plate in the front, but I added one toward the rear to more adequately represent the rear of the radiator.
|
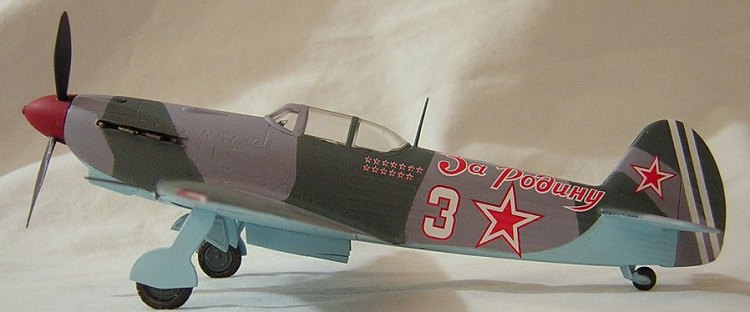
COLORS & MARKINGS |
Since the kit decals were worthless (pink stars, anyone?) I chose to use a set of AML decals I had in the stash and would paint the aircraft to match. Well, that was the intent, anyway…
 With
the exception of tires and some cockpit bits, I used White Ensign Models
(WEM) enamel paints throughout. I had previously used WEM’s naval paints
and the new VVS line is every bit as good as anything they have produced.
The colors are dead accurate as they are based on actual color chips and
are a bit different than the “traditional” interpretation of WW2 Soviet
camo colors. The paint goes on very smoothly with excellent coverage at a
50/50 thinning ratio and produces a surface quality far better than the
Humbrol or Model Master paints I have used in the past. I heartily
recommend WEM’s entire line of paints for any application.
With
the exception of tires and some cockpit bits, I used White Ensign Models
(WEM) enamel paints throughout. I had previously used WEM’s naval paints
and the new VVS line is every bit as good as anything they have produced.
The colors are dead accurate as they are based on actual color chips and
are a bit different than the “traditional” interpretation of WW2 Soviet
camo colors. The paint goes on very smoothly with excellent coverage at a
50/50 thinning ratio and produces a surface quality far better than the
Humbrol or Model Master paints I have used in the past. I heartily
recommend WEM’s entire line of paints for any application.
The finish on this was so smooth that I was able to apply the AML decals directly with no gloss coat, no silvering of any kind and without any use of setting solutions.
The AML decals were in perfect register with excellent color saturation and a four-page painting guide booklet. However, the painting guide did not look right to me. The more I looked at it, the more convinced I became that it was fundamentally “off”. So I turned to Erik Pilawskii’s recently published book for guidance, eventually settling on what would seem to be a common, well documented scheme for the early Yak-9s consisting of AMT-11 (blue-gray), AMT-12 (dark gray) and AMT-7 (underside blue).
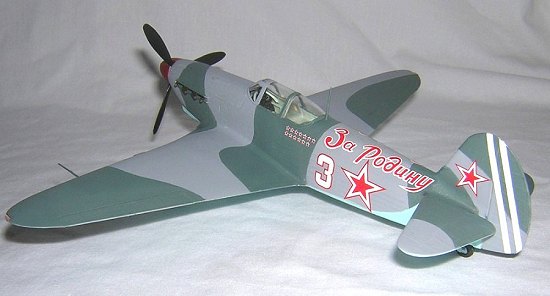 The
aircraft I chose to build had a lavishly scripted patriotic slogan on the rear fuselage covering almost the
entire spine area from rudder to canopy so there are two very large
decals that needed to be set. Here is where I ran into another problem
with the AML set; the lettering is significantly oversized and cannot be
placed to match AML’s own artwork.
The
aircraft I chose to build had a lavishly scripted patriotic slogan on the rear fuselage covering almost the
entire spine area from rudder to canopy so there are two very large
decals that needed to be set. Here is where I ran into another problem
with the AML set; the lettering is significantly oversized and cannot be
placed to match AML’s own artwork.
As can be
seen on the AML placement guide, the script should run from a foot or so
ahead of fin to within a couple feet of the rear of the canopy. To fit at all, the
decal runs from the very base of the fin almost to the canopy and forces
the victory markings to be displaced under the rear of the canopy rather
than behind it along the spine and
 ahead
of the slogan. This was annoying to say the least and seriously calls
into question the rest of the sheet.
ahead
of the slogan. This was annoying to say the least and seriously calls
into question the rest of the sheet.
The decals themselves though, were very easy to use and laid down perfectly. I just wish they had got it right on the sizing.
|
CONCLUSIONS |
As no one else makes either a Yak-7 or a Yak-9 in 1/48 scale, the ICM family is your only option. The single, largest drawback is the overly sculpted fabric sections, which would be a major effort to correct. Far more effort than I was willing to attempt.
I definitely would recommend replacing the wheels and canopy. I would also suspect that the Eduard Yak-1 “Zoom” cockpit set (EU4166, $5.47 from Squadron) could easily be adapted to the Yak-9 and would go a long way toward addressing the cockpit weaknesses.
The WEM paints are a solid hit. They are a bit more expensive, but the coverage from each of the little tins is so good, the accuracy and quality of finish so high, that it’s hard to justify using anything else. I’m sold.
The AML decals are a very mixed bag. The sheer quality of printing, the ease of use and the perfect application are terrific, but the research and design accuracy of this sheet is very poor and makes me somewhat wary of their other products.
June 2004
Copyright ModelingMadness.com
If you would like your product reviewed fairly and fairly quickly, pleasecontact the editor or see other details in the Note to Contributors.