|
KIT # |
|
|
PRICE: |
$18.98 |
|
DECALS: |
See review |
|
REVIEWER: |
|
|
NOTES: |
Vacuform kit |

|
HISTORY |
The Lavochkin radial-engined fighters were the first Soviet fighter aircraft to at least be able to hold their own with the Fw-190 at low to medium altitudes - which was where most combat over the Eastern Front took place. Along with the Yakovlev series, the Lavochkins were the backbone of the Soviet fighter arm, with 9,920 La-5s built between July 1942 and November 1944.
Design of the La-5 series was difficult, inasmuch as it came from the inline-powered LaGG-3 and had to graft a 49.6-inch diameter M-82 radial to a fuselage designed to mount a 30.5-inch wide Klimov M-105 engine. That it was done at all was due to the fact that the 1,676 hp of the M-82 was superior to the 1,100 hp M-105; the fact that it was underpowered was one of the main problems of the LaGG-3.
With the additional power, the La-5 could carry a considerably heavier armament than the under-armed LaGG-3. Rather than the two 50-caliber machine guns of the LaGG-3, the La-5 carried 2 20mm ShVAK cannons.
 The La-5FN (Forsirovanny
Neprosredstvenno or "directly boosted) was powered by an 1,850 hp ASh-82FN
engine that developed 150 more horsepower than the ASh-82F that powered earlier
versions. It was the first of the series to equal the performance of the
Bf-109G-6, though it could only "hold its own" against the Fw-190. It was
particularly well-suited to a close-in, high-g maneuvering style of combat.
The La-5FN first saw combat during the Battle of Kursk in July 1943. It was a nasty surprise for the Luftwaffe. The 14 La-5FNs of the 32nd Guards Fighter Aviation Regiment took part in 25 aerial combats during July and August and claimed 33 German aircraft, including 21 Fw-190s and 3 Bf-109Gs.
In May, 1944, twenty highly experienced Czechoslovakian Air Force pilots who had been discharged from the RAF and transferred to the Soviet Union, began to form the nucleus of an independent Czech fighter regiment when they commenced training on La-5FNs. After 5 50-minute flights in an La-5UTI, they were deemed ready to solo in the La-5FN. They saw combat after the Germans began taking over the territory of Slovakia on August 29, 1944. The Slovak Army resisted the Germans, and by October 1944 the insurgent army numbered 50,000 troops and 7,000 partisans. The area controlled by the insurgents was complete surround by German forces and was an isolated pocket deep in German-held territory. The 1st Czech Fighter Regiment flew into Tri Duby airfield on September 21, 1944, with 21 fighters. the following day they entered combat when the attacked the Luftwaffe airfield at Piestany and destroyed 10 aircraft. Several other strafing attacks were conducted against German flying fields in the following days, which took the Germans completely by surprise.
By October 25, 1944, the Germans were closing in on Tri Duby, and the air support bridge from the Soviet Union and U.S. forces in Italy was ended. Eleven surviving La-5FNs took off that evening in hopes of reaching Soviet-controlled territory. One was shot down over the Carpathians though the pilot was rescued and joined the partisans. Ten La-5FNs managed to reach airstrips in liberated Hungary, Romania and the Ukraine. During a month of combat, the Czechs flew 573 sorties, destroying 13 German aircraft, as well as tow tanks, three AAA positions, three locomotives and 77 trucks. Ten La-5FNs were lost, with three pilots killed in action.
The wooden La-5FN had not been built to last, and the aircraft quickly disappeared from the V-VS within two years of the end of the war.
|
THE KIT |
 To date, there is only
one injection-molded La-5FN kit offered, that by Hobbycraft. The list of things
wrong with the kit begins at the nose and ends at the tail; as it comes from the
box, it cannot be built into anything remotely resembling an La-5FN. I was able
to take this kit and, by combining it with the wings and tail of the LTD
limited-run LaGG-3 kit, come up with a model that more closely resembled the
real airplane, but this was a major kit-bash.
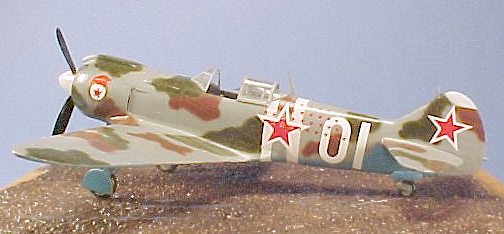
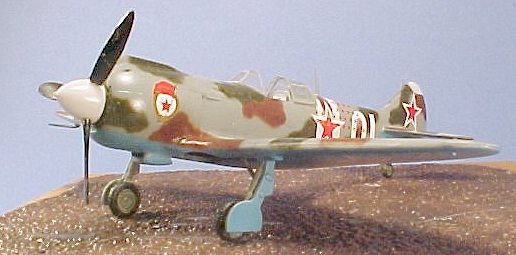
Back in the mid-1980s, Falcon Industries in New Zealand released a fairly-accurate La-5FN as a vacuform. I recently ran across one of these kits at a hobby show, and decided to proceed with it. The fact that I was also able to obtain the True Details resin La-5 cockpit and wheels made it certain I would proceed with the project, since interior detail was the only place where the Falcon kit was really lacking. I also had the Aeromaster "Fighting Lavochkins" sheet, which had the markings for G. Popov's airplane, which has a very singular camouflage and good-looking personal markings; this was good because - though the kit had originally been produced with some very good decals, including one of the Czech Tri Duby airplanes - the kit I found had lost them.
|
CONSTRUCTION |
Construction of any vacuform begins with removal of the parts from the backing sheet. This is really far easier than people imagine it is. The one big problem is the likelihood of over-sanding the parts after they have been removed from the backing sheet, with consequent difficulty in accurate assembly. Of the many methods vacform modelers have come up with over the years to deal with this problem, the one I have used with consistent success consists of drawing around the part with a pencil, then cutting the part off the sheet without leaving a "border" of backing sheet. I then sand down the part until the pencil line disappears, at which point the part is ready. I do find that sanding down the trailing edges of wings, horizontal stabilizers and vertical fins and rudders results in a better looking model when assembled. Overall, I really don't think this process is more difficult or time-consuming than removing flash and sprue gates from limited-run injection kits.
 I then cut out the
wheel wells on the lower wing, being careful to trim the cutaway closely, since
these would become the gear doors. I boxed in the wheel wells with some
Evergreen sheet, then glued the upper wing parts to the lower wing. I also
assembled the horizontal stabilizers at this point.
The problem in assembling the fuselage of a vacuform is that often the plastic is thin, with the result being that there is not a lot of surface to glue together in the centerline joint. I solve this by using some Evergreen strip and gluing it along the centerline of one fuselage half, so that when it fits inside the other, there is a considerable surface for the glue to attach to, making a strong sub-assembly.
While all this set up, I assembled the True Details cockpit and painted and detailed it. I inserted it in the fuselage when done, then glued the fuselage and wings together and attached the horizontal stabilizers.
I ran cyanoacrylate glue along all the joints to fill the seams. When dry, I sanded down all the joints and seams, then applied Mr. Surfacer 500 and sanded that down. Fortunately, since the La-5FN was a wooden airplane, there was not a lot of panel lines to worry about, so I rescribed the delicate raised lines of the kit and the model was ready to paint.
|
PAINT & DECALS |
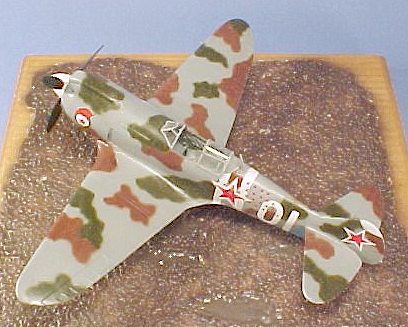 Painting:
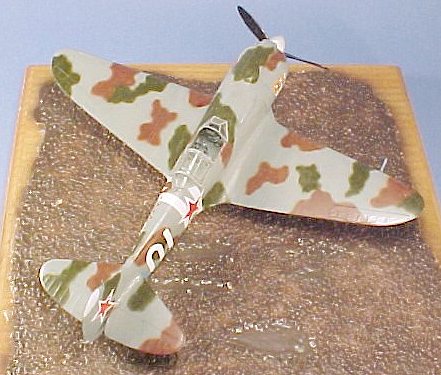
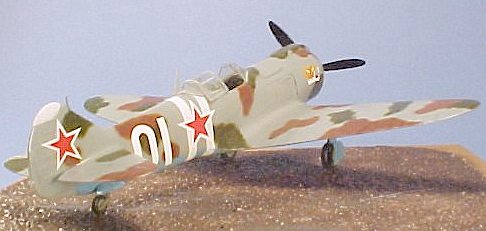
Popov's airplane was different from the standard La-5 camouflage of two greys in that it was delivered in the "winter scheme" of overall light grey, and was then painted in the field with blotches of brown and green. I used Tamiya Sky Blue for the Underside color, and Gunze-Sanyo "Greyish-Blue" for the upper color. Following the camouflage pattern in the decal instructions, I used Tamiya "Dark Green" and "NATO Brown" for those. The model was given a good coat of Future and allowed to dry overnight.
Decals:
The decals went down with no problem, and when they were dry the model was washed to get rid of dried-on decal solvent, and given another light coat of Future. Since Soviet fighters were given a heavy coat of polish in the factory, this was all that was needed.
Final Details and Weathering:
I used landing gear legs and tailwheel from an LTD LaGG-3 kit that had been "parted out" after meeting a bad fate a few years earlier. The propeller and spinner came from a Hobbycraft La-7 that had met a similar fate. The very good Falcon vacuform canopy was Futured, painted, cut apart and posed in the open position. I applied exhaust stains with Tamiya "Smoke."
|
CONCLUSIONS |
Until some other manufacturer deigns to bless us with an injection-molded La-5FN, this Falcon kit is the only one available that makes up into an acceptably-accurate model. As vacuforms go, it is well-designed and easy to assemble. Fortunately, the True Details cockpit is still generally available, which vastly improves the final look. I don't know if the kit is still in production, but I have seen it listed as available through Rex Barker's mail order hobby shop in New Zealand.of
July 2002
If you would like your product reviewed fairly and fairly quickly , please contact the editor or see other details in the Note to Contributors.