| KIT #: | 61094 |
| PRICE: | $29.00 SRP |
| DECALS: | Three Options |
| REVIEWER: | Bill Michaels |
| NOTES: | Original and recent release of the kit compared |
| HISTORY |
The history of the Brewster Buffalo has been
well documented in many of the other review articles here on MM, so I won’t
repeat it here.
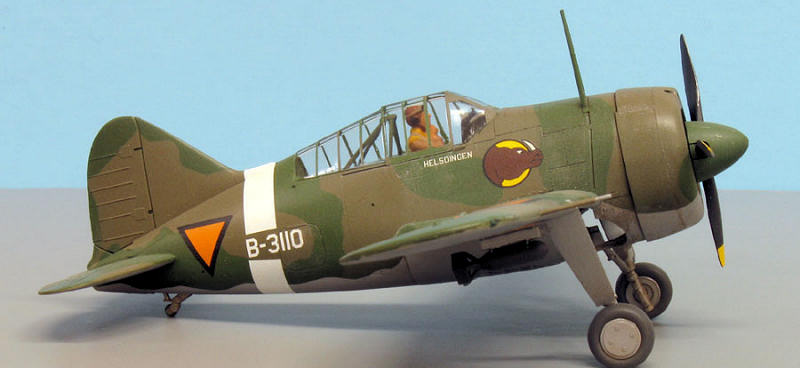
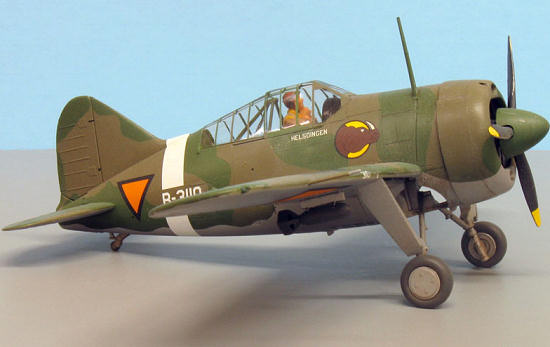
The Dutch aircraft I chose to model is
identified as the mount of Kapt van Helsdingen of the NEIAC.
A quick Google search found the following information:
The
When war came to the Pacific, the squadron was
based in 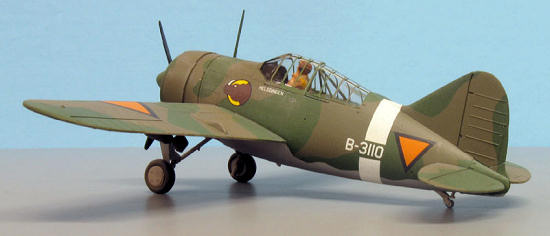 action against vastly superior numbers of Japanese
aircraft, scoring some successes, with a two or three to one kill ratio, but
attrition was talking its toll.
In
January 1941, the squadron was withdrawn to assist in the defense of Java.
action against vastly superior numbers of Japanese
aircraft, scoring some successes, with a two or three to one kill ratio, but
attrition was talking its toll.
In
January 1941, the squadron was withdrawn to assist in the defense of Java.
The Wikipedia article describes the squadron’s
final fight:
“On
| THE KIT |
Tamiya’s
 original’s, and the decal sheet is better.
Another nice plus is the inclusion of a set of canopy masks.
This is especially convenient, as the Eduard canopy masks appear to be
out of production and are getting hard to find.
original’s, and the decal sheet is better.
Another nice plus is the inclusion of a set of canopy masks.
This is especially convenient, as the Eduard canopy masks appear to be
out of production and are getting hard to find.
I had all three copies of the kit in my
stash—an original release, the USN-only version, and the new Pacific Theater
boxing.
Somewhere along the
way, I had also picked up an old Aeromaster decal sheet for aircraft of the
The decals in my original kit were in bad
shape, so I decided to build the model as Kapt van Helsdingen’s plane, using the
decals from the Aeromaster sheet.
(The plane I chose is also on the decal sheet for the new Tamiya release, but
not on the original release’s sheet.)
My
plan is to save the new decals for use when I build the new kit.
When you look at the two kits side by side, the
first thing you notice is the color of the plastic.
The original kit was molded in light gray, while the new kit is molded in
the same dark gray color that they used for many of their German armor subjects.
The instructions in the original kit are fairly sparse, compared to the ones in the new kit. On a couple of cases, I found that I needed to refer to the new instructions. I especially found that the color callouts in the original kit instructions were incomplete, and difficult to decipher. The new kit instructions are much better, but you have to be careful about the colors referenced. The instructions seem to call out the colors for an RAF plane, and not for the Dutch version.
| CONSTRUCTION |
The kit goes together well.
One reminder—you do need to decide on which version you’re going to build
before you start, and pay attention to the instructions, to make sure you use
the correct parts for the version you’re building.
Construction starts with the cockpit, as
expected.
The instructions in the
current edition of the kit tell you to paint the cockpit interior RAF interior
green—that may be correct for the British plane, but I had doubts about that
color in a Dutch
 The kit seat has molded on seatbelts.
I wasn’t sure how I’d deal with them—paint them? Sand them off and
replace them with some scratchbuilt or scrounged replacements?
I was doing an OOB build, so I decided to just use the seated pilot
figure to cover them up.
(The kit
includes a both a seated and a standing pilot figure.)
While I was working on the cockpit, I needed to solve my instrument panel
problem.
The kit panel is a flat
surface, to take the provided decal.
Problem was, my decals were in bad shape—so I had to steal them from the
new kit. (I have an Eduard zoom set I’ll use for the next build.)
The kit seat has molded on seatbelts.
I wasn’t sure how I’d deal with them—paint them? Sand them off and
replace them with some scratchbuilt or scrounged replacements?
I was doing an OOB build, so I decided to just use the seated pilot
figure to cover them up.
(The kit
includes a both a seated and a standing pilot figure.)
While I was working on the cockpit, I needed to solve my instrument panel
problem.
The kit panel is a flat
surface, to take the provided decal.
Problem was, my decals were in bad shape—so I had to steal them from the
new kit. (I have an Eduard zoom set I’ll use for the next build.)
The rest of the model goes together quite
easily.
This is the second Tamiya
Buffalo I’ve built, and both of them have needed a little putty at the aft
wing/fuselage joint.
But that’s the
only place I needed to use putty during my build!
I found the model was easier to paint before putting the landing gear, prop, bomb racks, radio mast, etc., so I left those bits to the end.
| COLORS & MARKINGS |
After doing some research, it seemed to me that
Tamiya has the upper surface colors wrong, at least for the Dutch version.
I think the colors called out in the Aeromaster sheet are correct- Olive
Drab and Medium Green, over silver lacquer below.
 When it came time to mask the canopy, I wasn’t
looking forward to having to mask the all the tiny panels on the fuselage bottom
window.
So, I stole the canopy
masks out of the new kit to use on my old one.
Made from Tamiya tape, they fit well, and are a real help- especially for
the tiny panels on the window on the fuselage bottom. However, I should mention
that the Tamiya masks are just printed on a single piece of material, and are
not pre-cut. But I found them easy to cut out with a fresh knife blade.
When it came time to mask the canopy, I wasn’t
looking forward to having to mask the all the tiny panels on the fuselage bottom
window.
So, I stole the canopy
masks out of the new kit to use on my old one.
Made from Tamiya tape, they fit well, and are a real help- especially for
the tiny panels on the window on the fuselage bottom. However, I should mention
that the Tamiya masks are just printed on a single piece of material, and are
not pre-cut. But I found them easy to cut out with a fresh knife blade.
I’m not usually one to buy canopy masks—but I
think the Buffalo is one of those kits where it makes sense to get a set.
(I later found a set of the Eduard masks, so I have a replacement set for
my newer kit.)
As mentioned above, I used the AeroMaster decals for Kapt. Van Helsdingen’s plane. They were terrific—thin, with good color saturation. The white and orange sections were opaque, even over the dark upper surface colors. They reacted well to Micro-set/sol, and really settled down. Now, I’ve always found Tamiya decals to be OK, and I’m sure they would have been fine, though a little thicker than the aftermarket ones I used.
| CONCLUSIONS |
Definitely Recommended.
This 25 year old Tamiya classic still holds up well. Parts in the current
release of the kit look as crisp as the ones in my 20+ year old copy of the kit.
Review kit courtesy of my wallet. Note that
while the retail price of the current release is $29, you can find it for less.
Plus, you can find older editions of the
kit for decent prices—I found the copy I built for this review for only $10 on a
vendor’s table at a local show, and I found the new copy on sale for $20 at a
local shop. But when comparing
prices, keep in mind that the recent release of the kit includes the canopy
mask, a worthwhile addition.
Special thanks to Pip Moss for taking all the
great pictures.
| REFERENCES |
I found a
great Wikipedia entry on Kapt. Van Helsdingen: "http://en.wikipedia.org/wiki/2-VLG-V_(ML-KNIL)"
January, 2011
If you would like your product reviewed fairly and quickly by a site that has over 300,000 visitors a month, please contact me or see other details in the Note to Contributors.