Revell/Monogram 1/48 P-39 Airacobra
|
KIT #: |
5255 |
|
PRICE: |
$14.95 MSRP |
|
DECALS: |
Three options |
|
REVIEWER: |
Jonathan Prestidge |
|
NOTES: |
Reissue of 1967 Monogram kit |
 Bell’s
P-39 was developed as a high performance interceptor whose performance was
hamstrung by the deletion of its turbocharger. The lack of a turbocharger meant
that the P-39 was limited to low level ops. The P-39 was best employed as a
fighter/bomber and in support of ground troops.
Bell’s
P-39 was developed as a high performance interceptor whose performance was
hamstrung by the deletion of its turbocharger. The lack of a turbocharger meant
that the P-39 was limited to low level ops. The P-39 was best employed as a
fighter/bomber and in support of ground troops.
The P-400 was originally built for
the British with the nose mounted 37mm Oldsmobile cannon replaced by a 20mm
Oerlikon cannon. Due to the
United States’
entrance into WWII, the P-400s were redirected to the USAAC in the Pacific.
There they saw much use in the island campaigns that typified the Pacific
theater.
Please see Andrew Abshier’s excellent
preview of this kit for what is
included in the box.
Per the norm, I started construction by
painting the interior parts, wheel wells and inner fuselage parts interior
green. Other bits in the interior were painted and assembled, given a wash to
bring out detail, and dry brushed with Testors silver. I painted the molded in
seatbelts and detailed the control panel. Once finished, the interior looked
very nice.
 This
kit has the option to display the forward gun bay and engine compartment open on
the right side of the aircraft. I decided to leave these closed since I wasn’t
thrilled with the detail that was visible through the open panels (plus, I
wanted to be able to enjoy the fighter’s sleek lines to the full). Before
closing up the fuselage, I placed several nuts & bolts in the nose and slathered
them in white glue to keep them in place. If no weight is added, she’ll tail sit
for sure! Also, the right side cockpit door can be displayed open. I was able to
get the door on mine to stay in place without glue so I can display it either
way.
This
kit has the option to display the forward gun bay and engine compartment open on
the right side of the aircraft. I decided to leave these closed since I wasn’t
thrilled with the detail that was visible through the open panels (plus, I
wanted to be able to enjoy the fighter’s sleek lines to the full). Before
closing up the fuselage, I placed several nuts & bolts in the nose and slathered
them in white glue to keep them in place. If no weight is added, she’ll tail sit
for sure! Also, the right side cockpit door can be displayed open. I was able to
get the door on mine to stay in place without glue so I can display it either
way.
The rest of the airframe was
completed without a hitch. I drilled out the gun ports on the top of the nose. I
was pleasantly surprised at the excellent fit of the wings and tailplanes. I
cleaned up the seams and attached the clear parts with white glue at this time.
A note of caution, the front windshield part must be dry fitted carefully to
avoid a step between it and the bar it butts up against just aft of the doors.
Mine still has a little more of a step than I like! Finally, I masked off the
clear parts with Tamiya tape and a sharp #11 exacto blade.
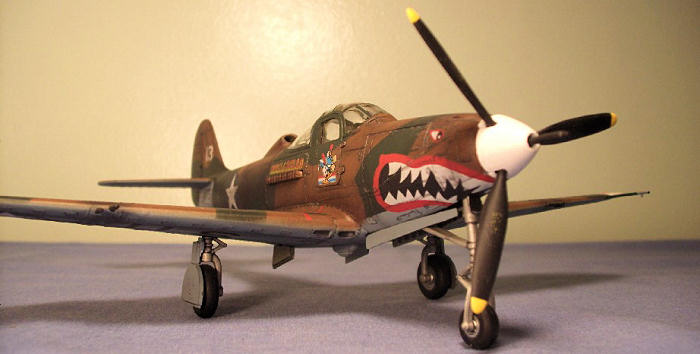
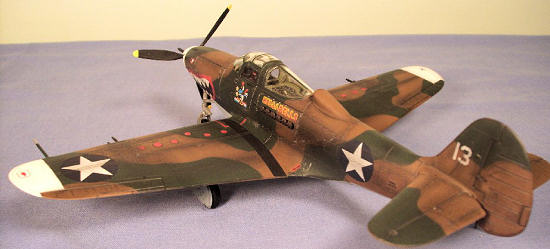
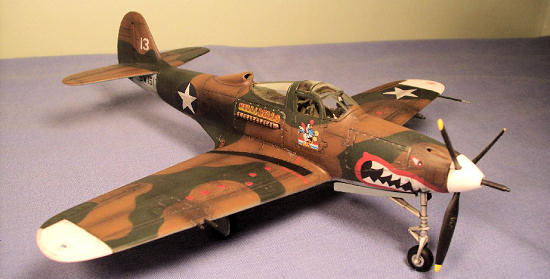
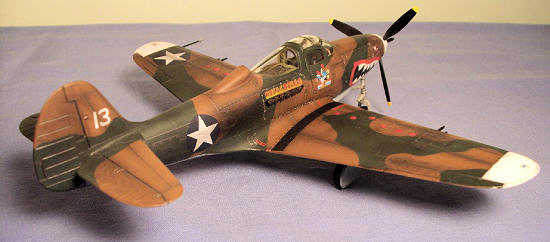
I chose to use the kit markings for a P-400
“Hells Bells”, 347th FS/67th FG,
Guadalcanal
1942. The plane was still in British colors of medium green and brown over a
light blue-gray. Throw in a nasty looking shark mouth and how could I have
picked anything else? To me, the battle of
Guadalcanal
is a tremendous story of ordinary people doing the extraordinary!
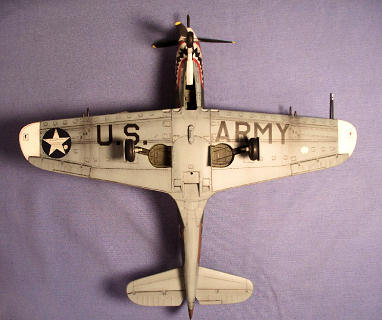 I
air brushed Poly Scale acrylics, first spraying interior color on the window
framing, then spraying the white nose and wingtips. I masked off the white with
Tamiya tape and used RLM 78 for the underside color. Once the underside was
masked off, I sprayed a lightened earth brown over the entire upper surface.
Kneadable eraser was then rolled into thin snakes and used to mask off the upper
camouflage. I used RAF foliage green to finish the color scheme.
I
air brushed Poly Scale acrylics, first spraying interior color on the window
framing, then spraying the white nose and wingtips. I masked off the white with
Tamiya tape and used RLM 78 for the underside color. Once the underside was
masked off, I sprayed a lightened earth brown over the entire upper surface.
Kneadable eraser was then rolled into thin snakes and used to mask off the upper
camouflage. I used RAF foliage green to finish the color scheme.
I then highlighted panel lines and exhaust
stains using artists pastels applied with a closely cropped, dry paintbrush. I
remove any excess pastel with a kneadable eraser. This tones down the effect to
a more realistic level. I then clear coated the model with future floor polish
and added the decals. The kit decals went down fine, conforming to panel lines
with the application of a little champ setting solution. I did have to touch up
the roosters on the doors since they were out of register.
Once the decals were dry, I gave my
P-400 a final coat of flat clear. I used an oil based wash to further pick out
detail and to add some surface staining to the airframe.
The landing gear, exhausts and
other final bits were added at this time. I used Testors silver (oil-based) to
simulate chipping around maintenance panels & scuffing on areas walked on by
pilots and ground crew.
 This
kit went together better than I expected with no major fit issues. I like the
dramatic color scheme - it is much more exciting than olive drab over neutral
gray! It built up quickly and, given the price, I can easily recommend this kit
to modelers of any skill level. While the detail holds up well for its age, it
is not as crisp as that of the newer offerings from Eduard and Hasegawa.
This
kit went together better than I expected with no major fit issues. I like the
dramatic color scheme - it is much more exciting than olive drab over neutral
gray! It built up quickly and, given the price, I can easily recommend this kit
to modelers of any skill level. While the detail holds up well for its age, it
is not as crisp as that of the newer offerings from Eduard and Hasegawa.
Jonathan
Prestidge
January 2010
If you would like your product reviewed fairly and quickly, please
contact
me or see other details in the
Note to
Contributors.
Back to the Main Page
Back to the Review
Index Page