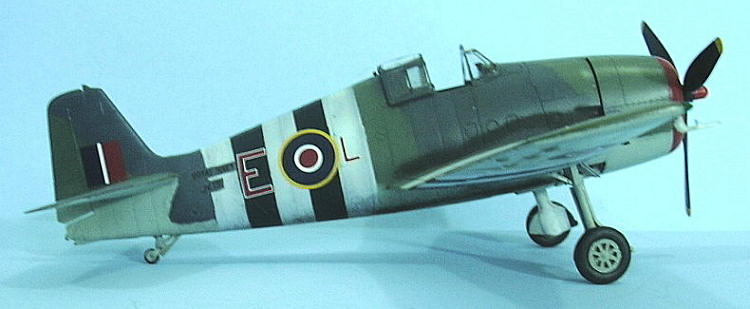
Eduard 1/48 Hellcat I
| KIT #: | 8223 |
| PRICE: | $49.95 MSRP? |
| DECALS: | Six Options |
| REVIEWER: | Tom Cleaver |
| NOTES: | Dual Combo kit. |

| HISTORY |
The F6F‑3/5 Hellcat is the most successful naval fighter series ever built.
With pilots of moderate training levels, the airplane
could more than hold its own against its opponents, while it was tractable
enough that the same moderately‑trained pilot could bring a damaged one back and
get aboard his carrier, a point of no small importance in naval warfare.
It is the only fighter of the Second World War to remain
essentially unchanged in basic design from its introduction to service to its
post‑war withdrawal, with the main difference between the two production
variants being engine power.
 apacity, to improve its ability as a fleet defense fighter.
They were fortunate that the airframe was amenable to
initial change from the underpowered R‑2600 to the far‑superior R‑2800, the
finest radial piston engine ever built. With this engine, the airplane had
sufficient power to outfly its opposition.
 uropean Theater.
| THE KIT |
Many modelers wondered why Eduard would do a Hellcat when two different good
models were already available.
After studying the various releases Eduard has done to
date of the Hellcat, I can say that they did it for the same reason they
released a series of Fw-190s in 1/48: their product is superior.
 The kit has surface detail that is superior to either the Otaki or Hasegawa
kits, with very petite engraved rivet detail along panel lines, and separate
control surfaces that can be posed dynamically.
This Royal Navy kit has separate fuselages, wings and
cowlings for the F6F-3 (Hellcat I) and F6F-5 (Hellcat II), which take into
consideration detail differences beyond the obvious that other kit manufacturers
have missed in their desire to cut costs, as well as ordnance that is different
to the two types as regards the F6F-3 and F-6F-5.
The kits include nicely-detailed cockpits in plastic,
accompanied by very good pre-painted photo-etch detail that is up to Eduard’s
usual standards.
Additional photoetch is there for the engine ignition detail.
Decals are provided for six Hellcats: three Hellcat Is and three Hellcat IIs.
I particularly like that the canopies are thin enough that they can be posed in the open position, since this is likely the best-detailed cockpit of any Hellcat kit, including the aftermarket resin cockpits that have been released over the years.
| CONSTRUCTION |
The Hellcat is basically a simple model to build overall, in any kit from any
manufacturer, and the Eduard kit is no exception.
One can do several small things to improve on what is
there, and the reader is referred to William Reece’s article here at Modeling
Madness as an example of what is possible.
As designed, the separate control surfaces are not posable, though they do
provide separation of these surfaces from the main airframe.
Other than that, I cannot see why the kit was designed
this way, particularly since the Hellcat had a spring-loaded stick, so that the
controls were never “dynamically posed” while the airplane was on the ground to
begin with.
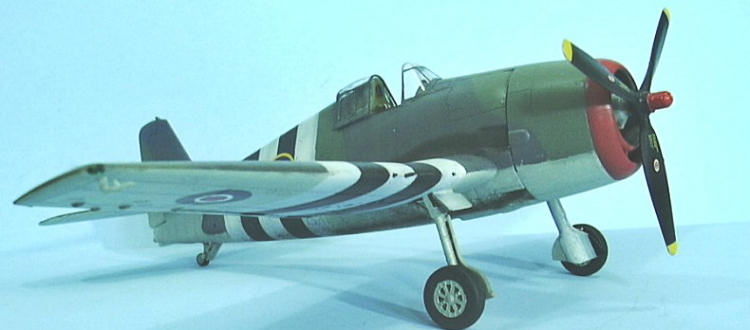 I
assembled the wings and tail surfaces and then attached them to the fuselage
halves before assembling the fuselage, because this allowed me to work the
connections from inside and out and get them fully seated, which I think is
necessary given the design for attaching the wings and tail.
Personally, I think Hasegawa got it right with a
one-piece lower wing that attached to the fuselage along panel lines, which
insured getting the proper dihedral to the wing.
The cockpit is perhaps the simplest Hellcat cockpit I have seen from any kit
since the Otaki release.
That said, with the use of the very complete photoetch,
what one sees in the end with the fuselage assembled and the cockpit closed up
is quite acceptable; much of the detail of the more-detailed Hasegawa kit
cockpit, or the True Details resin cockpit, isn’t all that visible in the final
result.
I
needed to run some cyanoacrylate glue along the fuselage centerline seam, but
that was the only place the kit needed help.
The plastic engine assembles easily and looks right once it is inside the
cowling.
The cowling parts fit perfectly, and I only needed some cyanoacrylate
glue along the lower center seam to smooth that out.
| COLORS & MARKINGS |
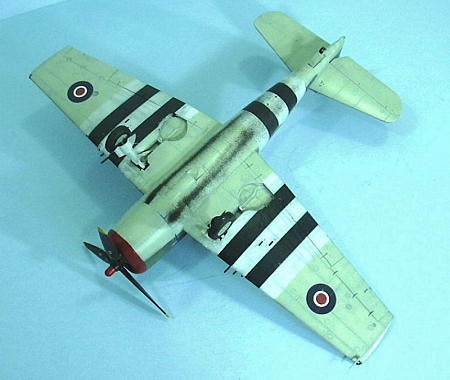 Painting:
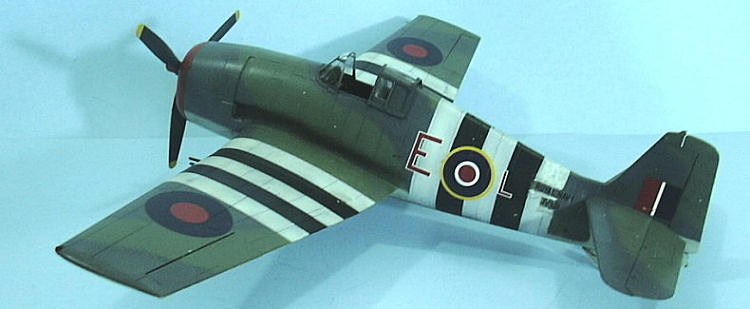
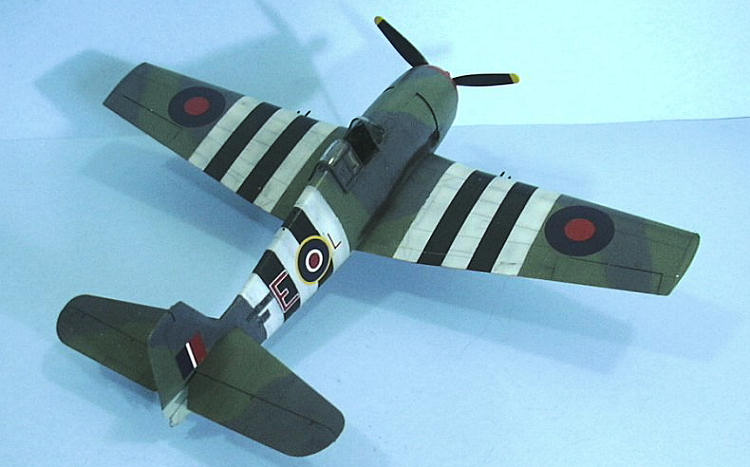
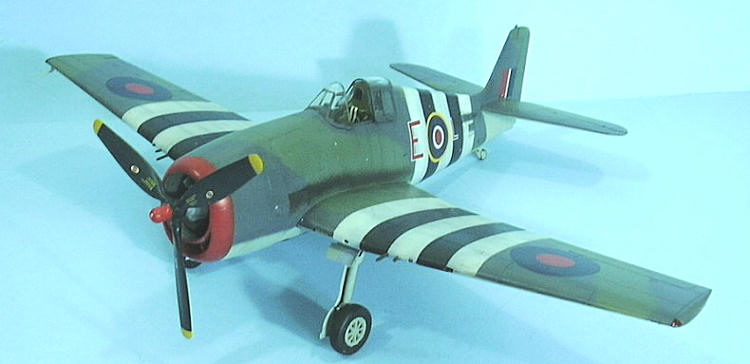
Doing the 804 Squadron Hellcat I as it appeared during Operation Dragoon
involved a lot of masking.
I began by pre-shading the model with flat black,
filling in the areas where the D-Day stripe would be entirely in black.
I then masked off the black stripes, and painted white
over the black.
This was intentionally “ragged” to get an impression of these
stripes being temporary.
I also painted the nose with a white undercoat for the
red.
After all this was dry, I masked off the white stripes and the red nose.
The FAA camouflage was applied using Xtracrylix Extra
Dark Sea Grey, Dark Slate Grey and Sky.
When that was dry, I unmasked the stripes and gave the
model a coat of Xtracrylix Gloss varnish.
Decals:
The kit decals went on without a problem. They are thick enough and opaque enough that none of the black and white stripes bleed through the markings.
| FINAL ASSEMBLY |
I
gave the model an overall coat of Xtracrylix Satin varnish, then applied exhaust
stains.
When that was dry, I unmasked the canopy and posed it open, and attached
the main wheels and propeller.
| CONCLUSIONS |
The Eduard Hellcat series is overall the most accurate kit of this airplane
available in 1/48 scale.
Surface detail is more accurate than any other kit, and
the detail differences between the F6F-3 and F6F-5 are fully covered in the
different kits.
This “Hellcat with D-Day stripes” is very unusual.
There is an F6F-3 in this scheme based out at the Planes
of Fame Air Museum in Chino.
Thanks to Eduard for the review kit.
November 2008
Copyright ModelingMadness.com. All rights reserved. No reproduction in part or in whole without express permission.
If you would like your product reviewed fairly and quickly, please contact the editor or see other details in the Note to Contributors.