H-K Models 1/32 B-25J 'Strafer'
| KIT #: | 321E02 |
| PRICE: | $169.95 |
| DECALS: | One option |
| REVIEWER: | Tom Cleaver |
| NOTES: |
| HISTORY |
“Betty’s Dream” and the End of the Pacific War:
 the Bettys, the Zeros turned away. It was
an acknowledgment of their contribution to victory in the Pacific that aircraft
of the Air Apaches had been chosen to escort the surrender delegation to the
island of Ie Shima, near Okinawa.
the Bettys, the Zeros turned away. It was
an acknowledgment of their contribution to victory in the Pacific that aircraft
of the Air Apaches had been chosen to escort the surrender delegation to the
island of Ie Shima, near Okinawa.
 The bomber flew out over the Inland Sea, taking the most direct route to
Tokyo. Over the water, the Betty
finally ran out of fuel. The pilot
attempted an emergency landing ashore, but the plane ended up short, going into
the water and breaking up on impact.
The bomber flew out over the Inland Sea, taking the most direct route to
Tokyo. Over the water, the Betty
finally ran out of fuel. The pilot
attempted an emergency landing ashore, but the plane ended up short, going into
the water and breaking up on impact.
The two
Mitchells and the Betty droned north‑northeast toward the Home Islands.
Decker and Tatelman had already determined that once they got over the
islands, they would not allow the Japanese to fly over water until they reached
Tokyo, and that if anything mechanical went wrong with the Betty, they would
force it down at the first airfield they came across, to guarantee successful
delivery of the precious cargo aboard.
As it turned
out, the Betty had enough fuel to make the full return flight to Atsugi air base
outside Tokyo. The Americans stayed
with the plane until it touched down, at which point they applied power and
climbed back to altitude for the journey home.
For the crews of
the 345th Bomb Group, World War II in the Pacific was finally over.
| THE KIT |
 This is the second of three versions of the B-25 Mitchell released in
1/32 scale by H-K Models. It
differs from the glass-nosed first release by having a nicely-detailed North
American designed “strafer nose” with eight .50 caliber machine guns, as well as
decals for an airplane flown by the 498th “Falcons” Bomb Squadron of
the 345th Bomb Group.
Other than that it is the same as the original release.
This is the second of three versions of the B-25 Mitchell released in
1/32 scale by H-K Models. It
differs from the glass-nosed first release by having a nicely-detailed North
American designed “strafer nose” with eight .50 caliber machine guns, as well as
decals for an airplane flown by the 498th “Falcons” Bomb Squadron of
the 345th Bomb Group.
Other than that it is the same as the original release.
| CONSTRUCTION |
For me, construction of this large kit begins with the sub-assemblies:
the horizontal stabilizer and rudders, the wings and engine nacelles, the
engines themselves. While there is
an option to lower the flaps on the wings, I’ve never seen a photo of a B-25
sitting on the ground with the flaps down, so I assemble them in the “up”
position. With careful assembly, no
seam filler is needed on any of these sub-assemblies, and fit of the engine
nacelles to the wing is excellent.
 The R-2600 engines are models in themselves, but unless you are planning
to open up some cowling panels, there is a lot more there than you really need
to assemble. Operating on my rule
that “if you can’t see it, I didn’t do it,” I only assembled the two rows of
cylinders and the detail parts on the front of the engine, since once the
cowling is on you really can’t see very much engine inside.
I also attached the main landing gear legs at this time before attaching
the engine nacelles. You need to
pay attention to the instructions and use the specific cowling panels that are
called out therein in order to get a good fit of the engine cowling.
The R-2600 engines are models in themselves, but unless you are planning
to open up some cowling panels, there is a lot more there than you really need
to assemble. Operating on my rule
that “if you can’t see it, I didn’t do it,” I only assembled the two rows of
cylinders and the detail parts on the front of the engine, since once the
cowling is on you really can’t see very much engine inside.
I also attached the main landing gear legs at this time before attaching
the engine nacelles. You need to
pay attention to the instructions and use the specific cowling panels that are
called out therein in order to get a good fit of the engine cowling.
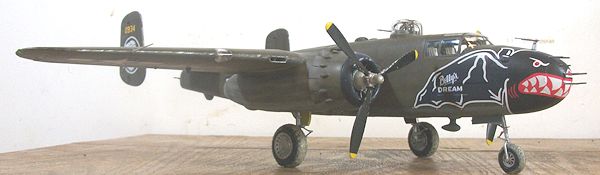
Since I had a very spectacular forward fuselage decoration to use, I
decided to close up the strafer nose.
Like many plastic kits where the “open” or “lowered” option is provided,
assembling those parts in the “closed” position can be more difficult, since the
open panels are not a good close fit to the nose.
Once I had assembled and installed the guns inside, I needed to use some
cyanoacrylate glue to fill the small gaps around the panels when attached, then
sand them smooth. I rescribed the
borders, and then rescribed the engraved rivet detail with my pounce wheel.
I painted and assembled the cockpit, which has a lot of nice detail.
A modeler can do a lot of extra work here if they want to open one of the
side windows of the canopy so it can be seen.
Since this model was going to the Planes of Fame Museum where it would be
sitting in a glass case and visitors would not be able to inspect that area
closely, I didn’t do that. I also
closed up the lower entry hatches, so there were fewer things that might be
broken off in the future if museum volunteers who aren’t modelers were to move
it around. I did not open the bomb
bay, since those viewing the model would never be able to see anything inside.
Given the need to insure nose sitting, I also didn’t put in any of the
detailed interior for the rear fuselage, since it cannot be seen once it’s in
there, though it doe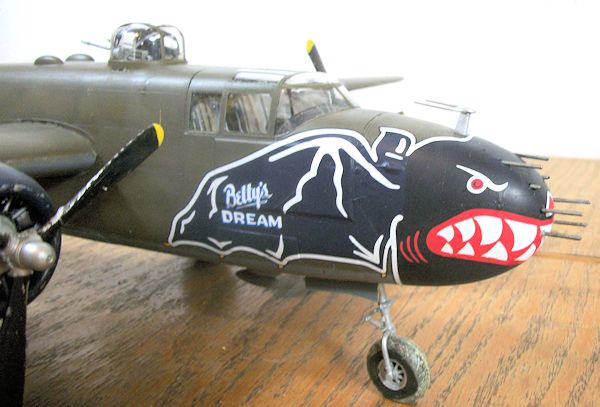 s contribute to weight aft of the center of gravity.
I used two of Terry Dean’s cast nose weights, installed in each fuselage
half under the cockpit floor to either side of the nose gear, and this weight
insured a nose fit. Again, with
careful assembly of the fuselage halves, I did not have to use any filler on the
centerline seam, though I did have to scrape it down and then rescribe the panel
lines and re-do rivet lines with the pounce wheel.
s contribute to weight aft of the center of gravity.
I used two of Terry Dean’s cast nose weights, installed in each fuselage
half under the cockpit floor to either side of the nose gear, and this weight
insured a nose fit. Again, with
careful assembly of the fuselage halves, I did not have to use any filler on the
centerline seam, though I did have to scrape it down and then rescribe the panel
lines and re-do rivet lines with the pounce wheel.
I have seen some other built-up models of this kit, and modelers are
making the mistake of painting the cockpit and fuselage interior “Interior
Green” overall in shades that range from “Interior Green” to “Apple Green.”
This is wrong. The pilot’s
cockpit in the forward fuselage should be Dull Dark Green (I use Tamiya “Black
Green” for this) and the area immediately behind and the entire rest of the
fuselage interior should be Yellow Zinc Chromate.
The ammo boxes were unpainted wood for those who intend to install them.
The bomb bay and wheel wells were unpainted aluminum, though some of the
sub-contractors painted the inside of the gear doors with Yellow Zinc Chromate,
which I did with this model. The
inner parts of the top turret are all flat black.
With careful fitting and the use of rubber bands to hold it in place
while the glue set up, the nose went on without need of seam filling.
The 345th did not keep the four “package” guns below the cockpit on the dedicated “strafer” B-25s with the 8-gun noses, since the recoil of 16 .50 caliber weapons was found to crack the fuselage skin and some of the airframe, and the 8 nose-mounted weapons were sufficient to clobber anything attacked.
| COLORS & MARKINGS |
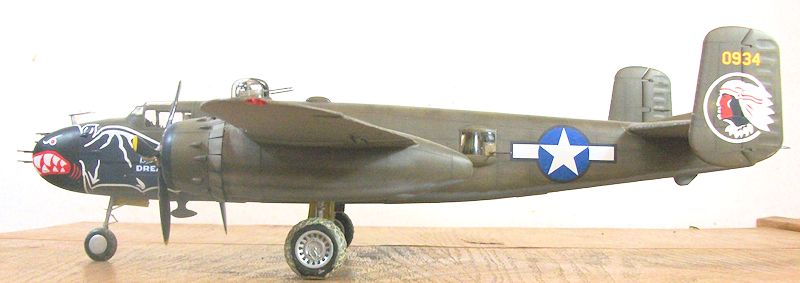
“Betty’s Dream” was an early-production B-25J that came out of the
factory in July or August 1943, prior to the end of factory-applied camouflage.
Vic Tatelman told me the airplane arrived in the 345th BG in
June 1945 as a replacement. Without
further knowledge of the airplane’s prior history, an educated guess was made
that it had had perhaps served a tour with some other bomb group before going to
the Townsend Modification Center in Australia in the spring of 1945, when B-25s
in the SWPA Theater were refitted with factory-supplied kits for the strafer
nose. I therefore determined that
the model should have sun-faded paint but a cleaned-up airframe, having so
recently gone through the center. I
kept the wings off
 the model while painting, which made painting the inner
surfaces of the engine nacelles and the lower fuselage sides much easier.
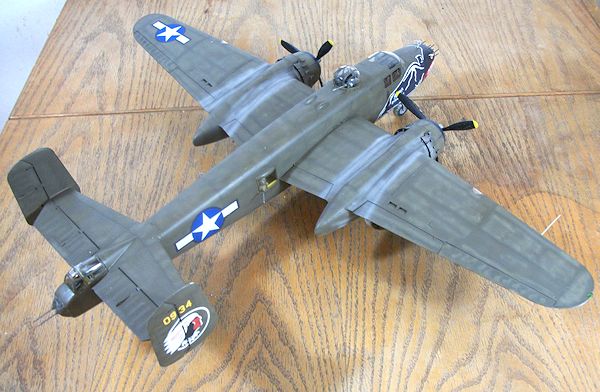
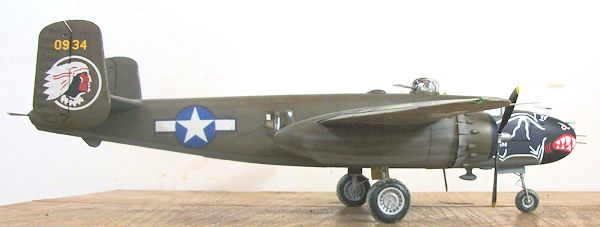
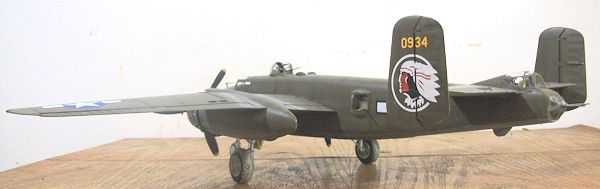
After “pre-shading” the panel lines overall, I applied a mixed Tamiya
“Olive Drab” color (a mixture of Tamiya “Olive Drab,” “Khaki Drab” and “Desert
Yellow” to get the late war OD color), which I then lightened with tan and with
white to go over the surface and “fade” it.
The fabric control surfaces were faded a bit more than the metal areas.
The Tamiya “Neutral Grey” was mostly left alone, since it wasn’t as
exposed to the sun as the upper surfaces.
the model while painting, which made painting the inner
surfaces of the engine nacelles and the lower fuselage sides much easier.
After “pre-shading” the panel lines overall, I applied a mixed Tamiya
“Olive Drab” color (a mixture of Tamiya “Olive Drab,” “Khaki Drab” and “Desert
Yellow” to get the late war OD color), which I then lightened with tan and with
white to go over the surface and “fade” it.
The fabric control surfaces were faded a bit more than the metal areas.
The Tamiya “Neutral Grey” was mostly left alone, since it wasn’t as
exposed to the sun as the upper surfaces.
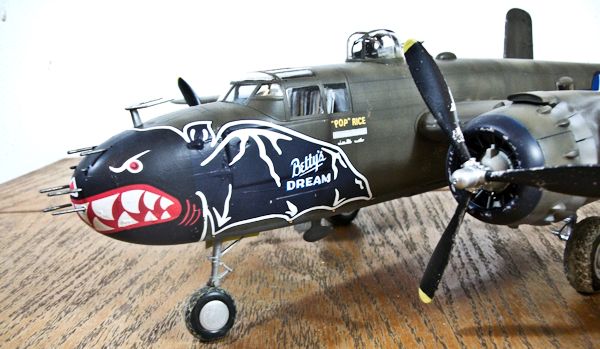
Vic Tatelman told me that “Betty’s Dream” was one of the last airplanes
to receive the full “Bats Outta Hell” nose markings, so I made sure this looked
fresh. The Eagle Cals provide the
side sections of the marking, and I matched that dark blue color with Tamiya
“Royal Blue” and some “Semi-Gloss Black”, then painted the nose and the forward
rings of the cowlings. I then gave
the model an overall coat of Future to seal it.
Eagle Cals are printed by Miceo-Scale and never present any problems.
I applied the “bat wings” and allowed them to set up thoroughly before
applying any of the detail markings for the nose.
I chose to use the “faded” national insignia with the dark blue border,
since this airplane would most likely have been originally delivered from the
factory in the summer of 1943 with the red-surround insignia.
| FINAL CONSTRUCTION |
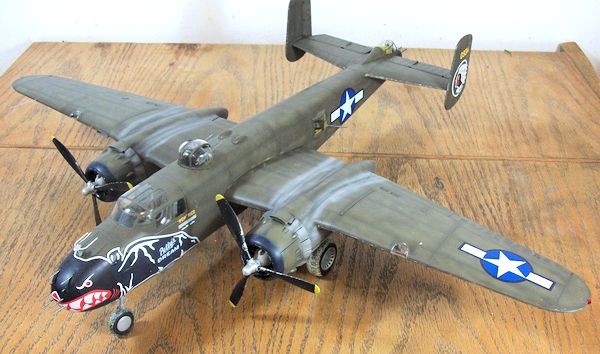
I did not glue the wings on, since that really isn’t necessary.
For those of you who want to have the model, but wonder where you would
keep it when not on display, attaching the wings this way so they can be removed
will allow you to keep the model in a smaller box if needed.
You do need to cut the outer tabs of the wing attachment sparts so they
are only half as thick, in order to attach the wing this way.
The joint is very tight and strong, and there is no sag in the wings when
you do this. I also did not glue
the props on, since they fit tightly to the engines when pushed on.
I did attach the gun barrels, and glued the upper turret in position.
| CONCLUSIONS |
March 2013
Review Kit courtesy of H-K Models.
Decals courtesy of Eagle Editions; order yours at
www.eagle-editions.com
Nose weights courtesy of Terry Dean: order these at Nightiemission@aol.com
If you would like your product reviewed fairly and fairly quickly, please contact the editor or see other details in the Note to Contributors.