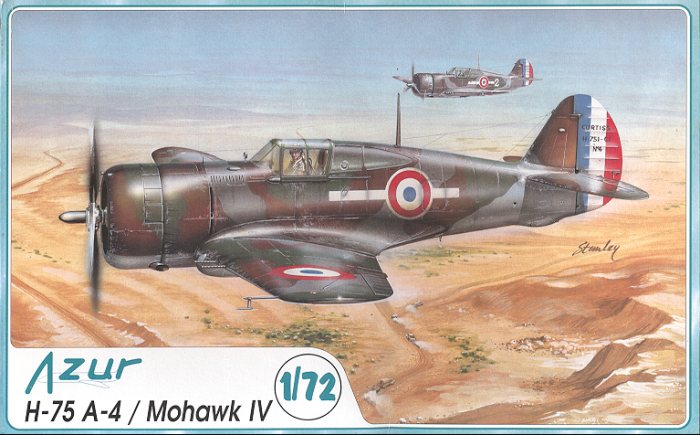
Azur 1/72 Curtiss Hawk 75A-4
|
KIT # |
A013 |
|
PRICE: |
$15.98 |
|
DECALS: |
Four aircraft |
|
REVIEW : |
Drew Nix |
|
NOTES: |
Short run with vac canopy & resin bits |
|
HISTORY |
Even though I'm a fan of the P-36, I'm often at a loss about the many
variants, mostly involving changes in engines and/or armament, of the various
foreign versions of this important aircraft. So, with apologies to the
reader, I will use the kit's instruction sheet history of this particular
variant. "The Curtiss 75-B prototype was one of the competitive
designs of the contest in April for providing a single-seat interceptor to the
USAAC to replace the P-26A. The Seversky P-35 won it, but in July 1936
Curtiss received a contract for three service test examples. The USAAC ordered
210 aircraft in July 1937. Several versions were built. The H-75A-4 was powered by a
9-cylinder radial engine Cyclone GR-1820-G205A. Several hundred of the
Curtiss H-75 were ordered by the French Armee de l'Air in 1939. 291 Hawk
75A's were taken on strength by the French before the collapse of their forces
in June 1940. They were mainly H-75A-3, but some of them were H-75A-4.
They were in service also under the Vichy Air Force. Some of the aircraft
captured by the Germans were used for training or sent to the Finnish Air Force.
With the fall of France, outstanding French contracts were transferred to the
British. The H-75A-4 was dubbed Mohawk IV by the British." Many
if not most of the French aces that flew combat against the German onslaught in
the Spring of 1940 flew Hawk 75's. They were quite nimble and fared very
well against the Messerschmitt 109.
|
THE KIT |
 Azur is a Czech company that
specializes in doing 1/72 scale kits of French aircraft. The kit is a
mixed media offering having both injected plastic and resin parts. The
injection molded parts are about what one has come to expect from a short-run
kit such as this, well molded parts that often exhibit flash and some crudeness
in the smaller parts. The major injected pieces, such as the fuselage
halves and the wings exhibit finely etched panel lines. The resin in this
kit, though, is top notch. Also included are vacformed canopy parts,
unfortunately including the rear-quarter scalloped clear parts. A very
nice instruction sheet is included with easy to read drawings and with general
painting information for various areas. The decal sheet is by Propag Team
and is very well printed, being in register even though it includes the French
roundels. The blue in the French markings is too light however marring
what is otherwise an outstanding sheet. If one chooses to do the captured
German trainer version or the Finnish version, the swastikas have to be pieced
together.
Azur is a Czech company that
specializes in doing 1/72 scale kits of French aircraft. The kit is a
mixed media offering having both injected plastic and resin parts. The
injection molded parts are about what one has come to expect from a short-run
kit such as this, well molded parts that often exhibit flash and some crudeness
in the smaller parts. The major injected pieces, such as the fuselage
halves and the wings exhibit finely etched panel lines. The resin in this
kit, though, is top notch. Also included are vacformed canopy parts,
unfortunately including the rear-quarter scalloped clear parts. A very
nice instruction sheet is included with easy to read drawings and with general
painting information for various areas. The decal sheet is by Propag Team
and is very well printed, being in register even though it includes the French
roundels. The blue in the French markings is too light however marring
what is otherwise an outstanding sheet. If one chooses to do the captured
German trainer version or the Finnish version, the swastikas have to be pieced
together.
|
CONSTRUCTION |
Construction begins with the cockpit. The floor and rear bulkhead are
plastic and the seat and control stick are resin. The floor and bulkhead
were glued together then test fit into the two fuselage halves. The fit
was remarkably good, especially given my experience with other short run kits.
Very little sanding was required to get an excellent fit. The interior,
including the molded in detail on the two fuselage halves were painted with
Model Master Interior Green as was the scalloped areas of the rear quarters.
The seat and control stick were also painted Interior Green at this time.
After this had dried, the various details were picked out using flat black
acrylic paint. Seat belts made out of thin strips of masking tape was
added to the seat. Buckles for the belts were made using thickened silver
paint. The seat and control column were then glued to the floor.
Next a wash of Raw Umber artist's oil paints was brushed over the interior
parts. After this dried dry brushing was done with Interior Green,
followed by two lightened shades of Interior Green.
 The resin instrument panel is
very nicely done and includes molded in rudder pedals. This was painted
Aeromaster RLM 66 (a very nice scale black color!) After this had dried,
the various instrument pips were picked out using a VERY sharp white artist's
pencil. Next a drop of Future was added to each dial to represent the
instrument faces. The completed instrument panel was glued (using
"super" glue) to the right side fuselage half along with the plastic
tail wheel floor. The instrument panel's fit was very nice requiring no
sanding to get it to fit correctly. However, the tail wheel floor did
require a little sanding to get an acceptable fit. The fuselage halves
were then glued together. As I imagined, some filling and sanding were
required to get everything to close up nicely.
The resin instrument panel is
very nicely done and includes molded in rudder pedals. This was painted
Aeromaster RLM 66 (a very nice scale black color!) After this had dried,
the various instrument pips were picked out using a VERY sharp white artist's
pencil. Next a drop of Future was added to each dial to represent the
instrument faces. The completed instrument panel was glued (using
"super" glue) to the right side fuselage half along with the plastic
tail wheel floor. The instrument panel's fit was very nice requiring no
sanding to get it to fit correctly. However, the tail wheel floor did
require a little sanding to get an acceptable fit. The fuselage halves
were then glued together. As I imagined, some filling and sanding were
required to get everything to close up nicely.
The nose is in two separate pieces with a useable Cyclone engine facsimile done
in resin to be trapped between the two halves. I painted the interior of
the nose halves Testors Zinc Chromate Yellow doing the tail wheel well, inner
portion of the tail wheel doors, and the inner potions of the main gear doors at
the same time. The engine itself was painted a dark metallic color, washed
with Black artist's oil color, then drybrushed with lighter shades of metallics
to highlight the cooling fins, etc. The engine sits too low in the
cowling, which would lead to unfortunate results later.
The lower wing is one piece to which two round wheel well inserts are glued.
Then the two upper wing halves were added. The fit here was very good with
only a little filling and sanding being required. The wheel wells were
painted Zinc Chromate Yellow and, when dry, masked using Silly Putty.
That's right, Silly Putty. It's cheap, it's malleable, it conforms to the
wheel wells, and is easy to remove. Don't, however, use it on a wheel well
with a lot of complex detail molded into it. The Silly Putty can still be
removed once painting is done, but the process is much more time consuming.
 The engine cowl/nose, wing
assembly, and horizontal tails were added to the fuselage. The tails are
only butt jointed to the vertical tail, so some careful filling and sanding were
required to get a good fit yet avoid losing that nice detail that I mentioned
earlier. The nose and wing joints require a massive amount of filling and
sanding before an acceptable fit could be achieved.
The engine cowl/nose, wing
assembly, and horizontal tails were added to the fuselage. The tails are
only butt jointed to the vertical tail, so some careful filling and sanding were
required to get a good fit yet avoid losing that nice detail that I mentioned
earlier. The nose and wing joints require a massive amount of filling and
sanding before an acceptable fit could be achieved.
At this time the vacform canopy was carefully separated from its backing
material, trimmed and added to the cockpit. The fit of the main canopy was
excellent, surprising me just a little. Non-fogging super glue was used
for attaching the canopy. As expected, the side panels were a bear to cut
out and get to fit the side-scalloped areas of the canopy. I never did
achieve a satisfactory fit despite much filling and sanding. Again
non-fogging super glue was used to attach these parts.
|
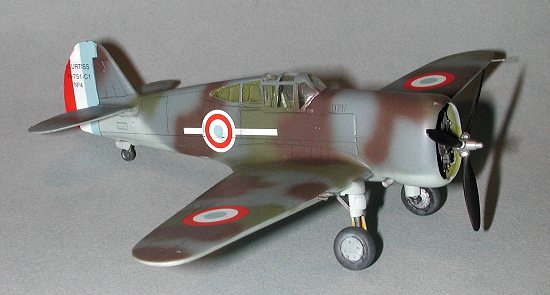
PAINT & DECALS |
First the canopy was masked using Tamiya tape. Good stuff! Next the
canopy area was painted Interior Green. Before Aeromaster sadly went out
of the paint business, I had the good fortune to stock up on their French colors
in both enamels and acrylics. These colors are also available from Model
Master so don't fear. The underside of the aircraft was painted Light Blue
Gray. The upper colors were (in order of application): Dark Blue Gray,
French Khaki (really a green), and Brown. French aircraft were painted in
some wild blotch patterns with no hard edges between colors. Using the
instruction sheet painting guide I painted the upper fuselage and wing using the
above colors in the order listed. As with any freehand airbrush camouflage
application there is the inevitable overspray. Places where this had
happened were noted and the necessary colors reapplied to remedy the problem.
This occurred until such time as I was happy with the results.
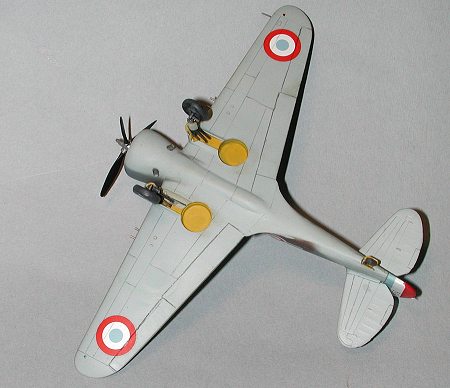 The Silly Putty was removed
from the wheel wells and then three thin coats of Future were added to the model
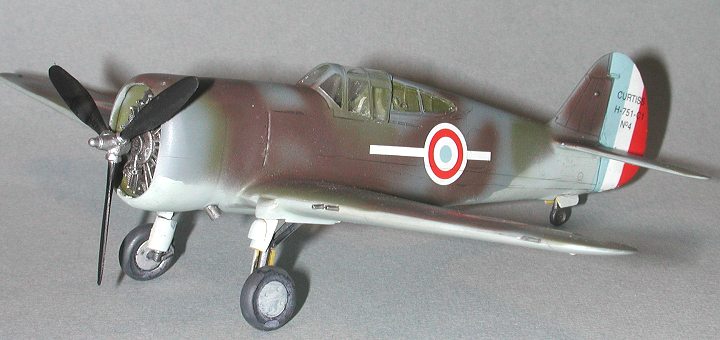
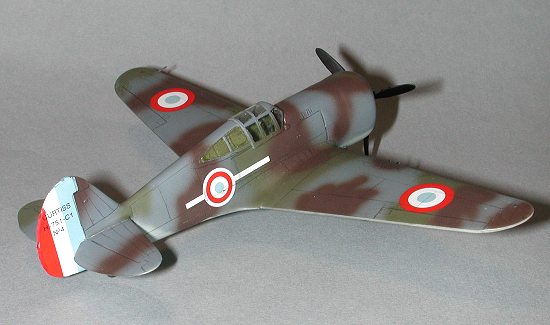
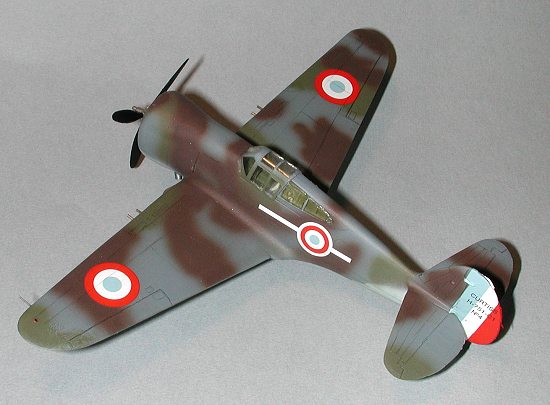
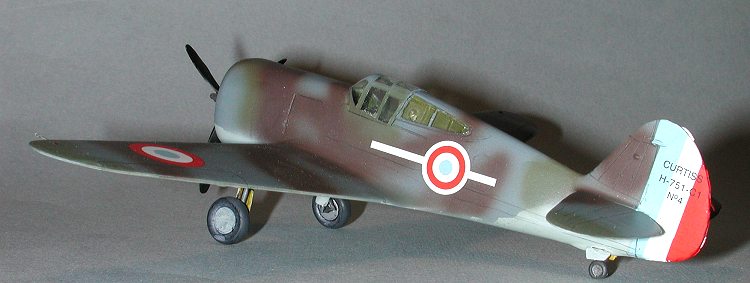
in preparation for decalling. I chose to do the first marking scheme
shown, an H-75A-4 of the 4th flight of GC (Groupe de Chasse) II/5, North Africa,
1942. The term "Groupe de uld have resembled bazooka barrels more
than French 7.92 mm machine guns! As much as I intended to and wanted to
build this model straight out of the box for review purposes, I found I was
forced to use hypodermic tubing to more realistically represent the barrels.
The uniquely shaped pitot tube was cast in resin. When I tried to remove
it from its block, it broke. I was unable to repair it, so used a thin
wire. Later, after Scott had taken pictures of what I thought was the
completed model, I went back and replaced the incorrectly shaped straight wire
pitot tube with one made from microsolder bent to shape.
The Silly Putty was removed
from the wheel wells and then three thin coats of Future were added to the model
in preparation for decalling. I chose to do the first marking scheme
shown, an H-75A-4 of the 4th flight of GC (Groupe de Chasse) II/5, North Africa,
1942. The term "Groupe de uld have resembled bazooka barrels more
than French 7.92 mm machine guns! As much as I intended to and wanted to
build this model straight out of the box for review purposes, I found I was
forced to use hypodermic tubing to more realistically represent the barrels.
The uniquely shaped pitot tube was cast in resin. When I tried to remove
it from its block, it broke. I was unable to repair it, so used a thin
wire. Later, after Scott had taken pictures of what I thought was the
completed model, I went back and replaced the incorrectly shaped straight wire
pitot tube with one made from microsolder bent to shape.
The propeller and its hub were one piece but had a lot of flash on the blades.
This was carefully cleaned up, the hub painted steel, the blades painted black,
and, when dry; the propeller was glued to the shaft. Because the engine
sat so low in the cowl, the propeller just doesn't look right to me.
|
CONCLUSIONS |
Now, a sad story. After finally completing what turned into a long-term
project, I carefully placed the model in a box with lid on it in anticipation of
taking it to an upcoming meeting. Later I was moving some books when one
fell on the box top! Quickly assessing the damage, I found that the left
tailplane had separated from the model. Easily fixed, right! Wrong!
As I was gluing the tailplane back in place the right main gear, only butt
jointed remember, decided to part company with the model. After much
internal discourse I waited a few days before trying again. This time I
used the paper clip method (see Scott's excellent article on how to do this) to
reattach the recalcitrant gear. Finally, complete. A contest model?
No, but it does build into an excellent representation of a nice aircraft.
If you have patience, this kit can be built into a beauty. Recommended.
|
REFERENCES |
Ketley, Barry, French Aces of World War 2. Osprey Publishing Limited.
1999. 96pp.
Copyright ModelingMadness.com. All rights reserved. No reproduction in part or in whole without express permission from the editor.
If you would like your product reviewed fairly and fairly quickly, please contact the editor or see other details in the Note to Contributors.
Back to Reviews Page 2024