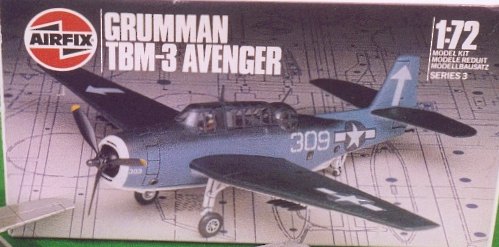
Airfix 1/72 TBM-3 Avenger
|
KIT # |
3033 |
|
PRICE: |
£5.99 MSRP if available |
|
DECALS: |
Two aircraft |
|
REVIEWER: |
|
|
NOTES: |
No modifications |
|
HISTORY |
The Grumman TBF Avenger was introduced to the US Navy in 1942, as a replacement for the Douglas TBD Devastator. It’s a large carrier based aircraft powered by a single Wright R2600 engine of 1700hp. It’s role is a torpedo bomber, and it has a 3 man crew. The Avenger was distinguished by having a power operated turret just behind the cockpit.
The Avenger had a disastrous combat debut at Midway with 5 losses out of 6 aircraft committed, however the Navy persevered and turned it into a highly effective attack aircraft with a record to be proud of. By the end of the war nearly 10,000 Avengers had been delivered to various Navies. Grumman built 2,291 Avengers but towards the end of the war were busy producing Hellcats, so the Avenger was redesignated TBM and production was turned over to General Motors who built 7,546. The Avenger was sometimes called the Tarpon by the Royal Navy FAA.
|
THE KIT |
 The Airfix kit has been with
us since 1965, and is frequently re-issued. Moulded in grey plastic, it
consists of 56 parts and is liberally coated in fine rivets – Classic
Airfix! Both my examples are flash-free, so the moulds are still in good
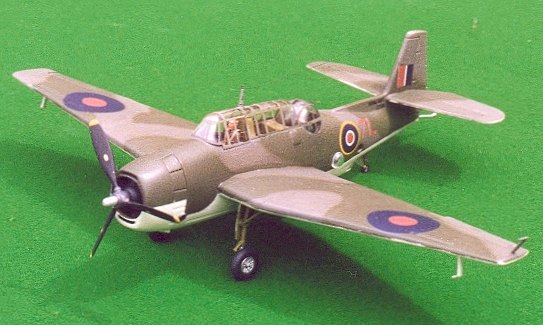
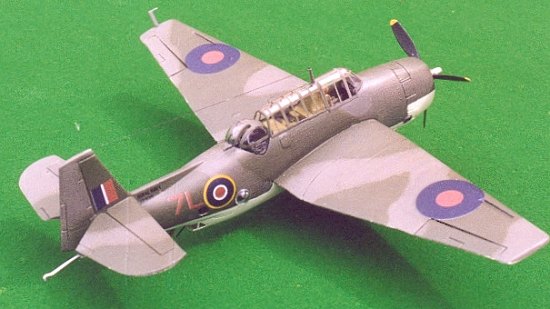
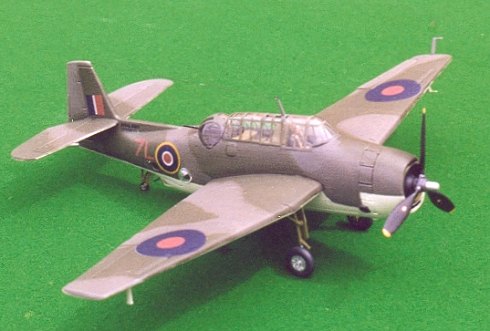
condition. My first had three tone sea camo for VT-88 USN and overall
dark blue for 703 NAS FAA, and my second had overall blue for CV36, and
three tone sea for CV17. I’ve used none so far – preferring to use ancient
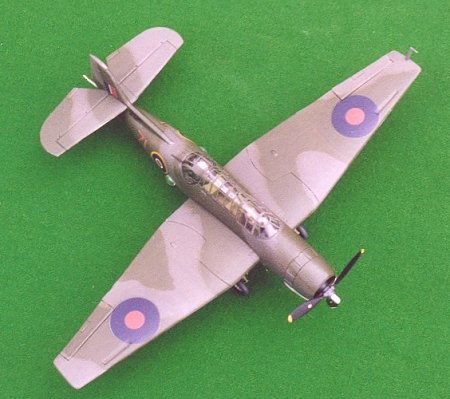
Frog decals from a friends spares for a green/grey/sky Tarpon of FAA
squadron 857, and am planning to finish the second in US Navy Atlantic
camo of grey over white.
The Airfix kit has been with
us since 1965, and is frequently re-issued. Moulded in grey plastic, it
consists of 56 parts and is liberally coated in fine rivets – Classic
Airfix! Both my examples are flash-free, so the moulds are still in good
condition. My first had three tone sea camo for VT-88 USN and overall
dark blue for 703 NAS FAA, and my second had overall blue for CV36, and
three tone sea for CV17. I’ve used none so far – preferring to use ancient
Frog decals from a friends spares for a green/grey/sky Tarpon of FAA
squadron 857, and am planning to finish the second in US Navy Atlantic
camo of grey over white.
My first Avenger cost 50p at the IPMS (UK) Nationals in 1999, and my second cost £1.60 on Ebay in 2003.
|
CONSTRUCTION |
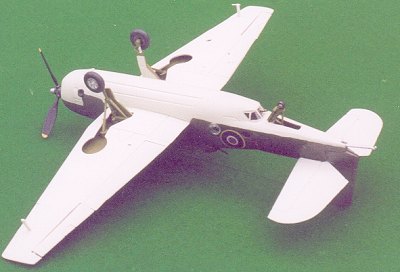
Construction starts with the cockpit, which consists of a crude seat, stick and roll-bar to fit to the floor. I painted the whole lot, and the fuselage interior, wing wheel wells, and all undercarriage components with Inscribe Avacado acrylic. This is the cheapest and closest shade I can find to Interior Green. Anything looking remotely like a seat was highlighted in black.
Next stage is the rest of the
fuselage, including the turret. As I couldn’t see a way to avoid including
the turret gunner, I also fitted a pilot, and strapped him in using thin
strips of Tamiya masking tape. I framed the turret before sandwiching it
between 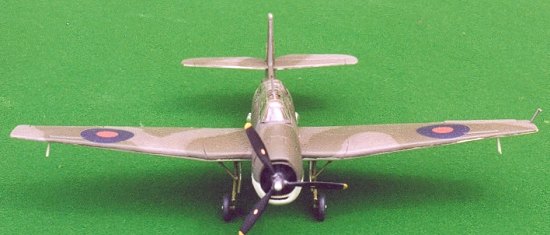 fuselage halves,
in the hope that it might still rotate – no chance! I omitted the fuselage
portholes, prefering to use Humbrol Clearfix after painting. I also
delayed fitting the arrestor, lower gun and glazing until painting. I did
find it VERY difficult to close the fuselage gap between the turret and the
fin fillet – eventually resorting to liquid paper.
fuselage halves,
in the hope that it might still rotate – no chance! I omitted the fuselage
portholes, prefering to use Humbrol Clearfix after painting. I also
delayed fitting the arrestor, lower gun and glazing until painting. I did
find it VERY difficult to close the fuselage gap between the turret and the
fin fillet – eventually resorting to liquid paper.
Stage 3 is the wings and horizontal tail. These were completed as instruction, slotting perfectly into the fuselage – without need for filler. I filled the moulding marks and holes for under wing rockets and fixed the ailerons – easy stuff. Around this time I sanded off all the rivets. When I build my next Avenger I’ll sand them off BEFORE assembly – or properly protect the turret from sanding damage.
I tacked the empty engine cowling to the fuselage with Johnsons Klear – until the upper fuselage was painted – as this would enable me to achieve the FAA under fuselage demarcations more easily. I painted the engine block tyre grey, assembled it – and put it aside.
The fuselage was finished off by fitting a decal instrument panel and the huge canopy, and filling the gaps with successive applications of Johnsons Klear.
|
CAMOUFLAGE & MARKINGS |
Painting
I hand painted the canopy framing and rest of the upper fuselage with Humbrol 224 Dark Slate Grey. I was generous with the paint, as I intended to correct with the underside colour later.
Then I carefully masked the canopy and turret.
I didn’t have proper painting
plans, but had noticed that the side pattern was very similar to that on a
Hellcat I was building at the same time, so I pencilled the same green
areas from my Italeri F-6F plans. The green is called Dark Sea Grey, and
is subject of intense debate about the paint that was actually used –
especially for American lease-lend planes! I think Humbrol
 117 US Light Green was most
appropriate, so I airbrushed my Avenger with that. I didn’t mask –
intending to produce feathered demarcations. Happy with the result, I
unmasked the glasswork and revisited some of the canopy frame with the same
green paint.
117 US Light Green was most
appropriate, so I airbrushed my Avenger with that. I didn’t mask –
intending to produce feathered demarcations. Happy with the result, I
unmasked the glasswork and revisited some of the canopy frame with the same
green paint.
Next I removed the engine cowling and fitted the lower fuselage gun and glazing. Now I painted the undersides Humbrol 90 Beige Green with solid demarcations.
Once happy (delighted) with the paintwork, I gave the entire upper airframe apart from glazing and control surfaces a coat of Johnsons Klear in preparation for decals. There are no underside decals for this scheme so I didn’t treat that. I avoided the control surfaces - as they have no decals, and the Klear marginally darkens the colour shade. This left the control surfaces marginally lighter - faded fabric effect!
Around this time I painted the cowling interior Avacado, and installed the engine. I fitted the engine to the model without permanently installing the propeller
Markings
Fortunately these are very few. My method of applying decals is to apply it over a blob of wet Klear and press it down. This expels any air, which is the cause of silvering, and quickly bonds decal to the model surface. After setting overnight, I give the model another coat of Klear. Markings for my Tarpon consisted of upper wing roundels, fuselage roundel and code, Royal Navy legend and serial, and fin stripes.
|
FINAL CONSTRUCTION |
Nearly there, I fitted the main undercarriage, and remaining pitots and aerials. All my references indicate that the legs are the same interior green as the wheel wells, so Avacado it is! I confirmed this on a visit to the FAA Museum at Yeovilton, but have no idea what shade of Dulux they used. Oleos on my aircraft are the brightest silver I have to hand. Wheels are Aluminum with Aeromaster Tire Grey tyres, I thought wheels were good, but the tyres have no tread pattern.
 After completion of detail
- I remasked the canopy and turret, and coated the upper parts of the
aircraft with Humbrol Matt Cote to dull it down.
After completion of detail
- I remasked the canopy and turret, and coated the upper parts of the
aircraft with Humbrol Matt Cote to dull it down.
The only remaining tasks, after a day’s drying time, are the cockpit mast and aerial, propeller, arrestor, and any detail painting such as exhaust ports and air intakes. The prop is a huge paddle job looking well capable of towing along the Avenger’s bulk. Unfortunately the prop hub is equally bulky – and instantly draws your eye to its grossness. To make it a little less conspicuous – and accurate, I surgically removed the bolts between the blades, and painted that part of the hub steel. With a silver point, and black blades, it looks much better!
Finally I sealed the rear fuselage portholes with Humbrol Clearfix. References indicated that FAA Avengers had blown windows in the forward portholes, so I fitted astrodomes from my spares box to each side. My completed TBM was now ready to join my miniature carrier fleet.
Accuracy
For the purposes of review completeness, I measure models to establish their accuracy, multiplying my measurements by 72 and comparing with the quoted dimensions.
This method is difficult for taildraggers, so I’m tolerant to minor errors.
In this case I have 72nd scale schematics in an Osprey book by Barrett Tillman – so was able to lay kit parts on top – unfortunately the TBM-3 diagram differed from a photo of the actual plane!
Span 230mm x72= 16.560M Quoted 16.51M Difference 50mm
Length 172mm x72= 12.383M Quoted 12.2M Difference 183mm
Height Ignored as difficult to measure, and conflicting quoted dimensions.
I’m well satisfied with with that accuracy, assigning discrepancies to my measuring – rather than damning this model. However laying parts over the diagram revealed that the cockpit is about 5mm too long - close scrutiny to photos revealed some other flaws:
1, The fuselage is a continuous taper from the turret rearwards, whereas the real aircraft has a change in taper between the turret and the start of the tail fillet – giving a slight hump.
2, Main undercarriage doors are oversimplified in shape.
3, Radar aerials under the wings are too far outboard. I have to admit to thinking these were pitots for years!
|
CONCLUSIONS |
 Overall I thoroughly
enjoyed building my TBM-3, and am delighted with the result which is
instantly recognisable as an Avenger. The icing on the cake was a contest
of Naval Aviation at my local IPMS branch, when it was placed first –
against a deck full of similar FAA American Iron.
Overall I thoroughly
enjoyed building my TBM-3, and am delighted with the result which is
instantly recognisable as an Avenger. The icing on the cake was a contest
of Naval Aviation at my local IPMS branch, when it was placed first –
against a deck full of similar FAA American Iron.
However reviewing is to look a little deeper, and the Airfix kit – although accurate in overall size, has minor flaws in shape and detail, and has been overtaken in moulding standards by newer examples. Although one of Airfix’s better kits from the period, the newer Avengers will now restrict this one to a ‘Good – but not the best’ grading.
June 2003
If you would like your product reviewed fairly and quickly, please contact me or see other details in the Note to Contributors.