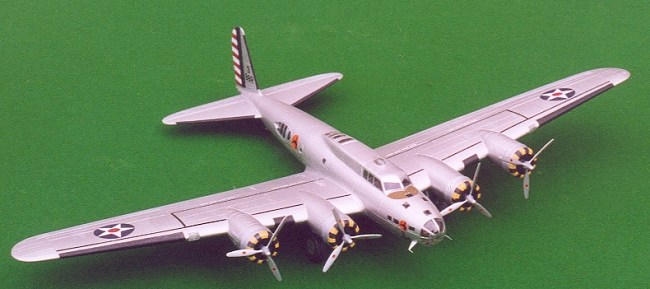
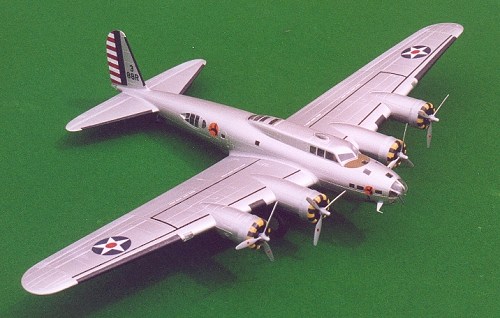
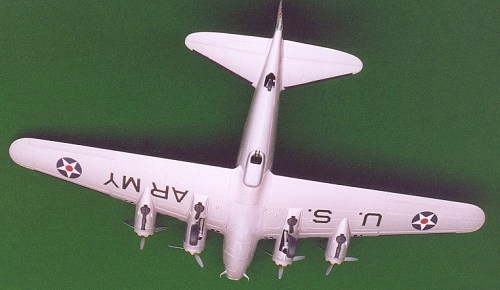
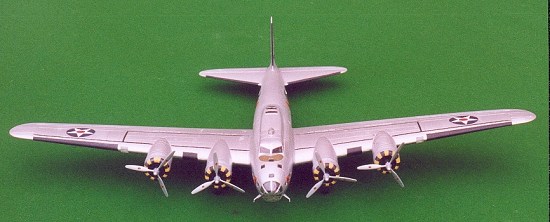
Academy 1/72 B-17D Flying Fortress
|
KIT # |
2150 |
|
PRICE: |
£17.99 MSRP |
|
DECALS: |
Two aircraft |
|
REVIEWER: |
|
|
NOTES: |
No surprises on this one. |
|
HISTORY |
The
Boeing B-17 Flying Fortress was the result of a USAAC competition for a
heavy bomber. It was revolutionary for having 4 engines, whilst all it
competitors had 2. The original aircraft was quickly destroyed in an
accident, - but the genie was out
 of its bottle! Having
seen the potential, the Army wanted to know more about 4 engines, high
altitude navigation, all metal construction, superchargers, hydraulics,
protection, bomb-sights, and a wealth of other emerging technology – lots
more. The main visible difference between early B-17s and those used in
the vast wartime daylight raids, was a different tail.
of its bottle! Having
seen the potential, the Army wanted to know more about 4 engines, high
altitude navigation, all metal construction, superchargers, hydraulics,
protection, bomb-sights, and a wealth of other emerging technology – lots
more. The main visible difference between early B-17s and those used in
the vast wartime daylight raids, was a different tail.
Early combat experience with B17C versions was gained by when 20 examples were given to the RAF in 1941 – whilst the USA was officially neutral. These were not used effectively, and losses were high – but it enabled the USAAC to send personnel, and gain operating experience. Most of the remaining early Fortresses were destroyed on the ground at Pearl Harbour, but some survivors fought on in the Pacific. I don’t know if ANY early Fortresses have survived in museums for us to enjoy today.
Captain Colin Kelly, an early war hero, flew the example shown on the artwork for this kit.
|
THE KIT |
 The Academy kit has been
with us since 1995, and I have to say it is a good one – which is
fortunate as it’s the only one we’re likely to see this lifetime! This
basic kit has been released by Academy as other early versions, and in
camouflage. It also shares common sprues with other B-17s in the Academy
range, so having built a B-17E and SB-17G previously, this kit held no
surprises. Moulded in hard grey, flash free plastic, it has 126 parts
including 23 clears. This kit has finely recessed panel lines, and is
free of rivets. Instructions are clear and concise with some inset
pictures of detail such as cockpit and bomb bay. There are 2 decal
options – both US Army natural metal. First being the B-17C flown by
Colin Kelly, alternate a B-17D. I chose to build the B-17D because it is
marginally more colourful.
The Academy kit has been
with us since 1995, and I have to say it is a good one – which is
fortunate as it’s the only one we’re likely to see this lifetime! This
basic kit has been released by Academy as other early versions, and in
camouflage. It also shares common sprues with other B-17s in the Academy
range, so having built a B-17E and SB-17G previously, this kit held no
surprises. Moulded in hard grey, flash free plastic, it has 126 parts
including 23 clears. This kit has finely recessed panel lines, and is
free of rivets. Instructions are clear and concise with some inset
pictures of detail such as cockpit and bomb bay. There are 2 decal
options – both US Army natural metal. First being the B-17C flown by
Colin Kelly, alternate a B-17D. I chose to build the B-17D because it is
marginally more colourful.
|
CONSTRUCTION |
Construction starts with the cockpit, which consists of a floor, 4 seats, instrument panel, and 2 control columns. I painted the interior with Inscribe Avocado acrylic. This is the cheapest and closest shade I can find to Interior Green. Seats were painted brown, and controls black, there is a decal for the instruments. The bombardier’s compartment was painted with the same décor, as was the radio room and waist compartment.
Next
stage is the bomb bay; I omitted the racks as I planned to seal the bay
doors. Although there is detail in there – there’s also the wing roots,
with nothing to disguise them. Once the interior is completed the
fuselage halves can be joined. At this
 point I omitted ALL
glasswork, waist windows can be fitted from the outside, and I prefer to
use Humbrol Clearfix for small windows – after painting.
point I omitted ALL
glasswork, waist windows can be fitted from the outside, and I prefer to
use Humbrol Clearfix for small windows – after painting.
Stage 4 is wing assembly; instructions recommend fitting undercarriage legs – which increases their vulnerability. These did get damaged, and have been repaired several times. Fitting after painting is difficult – but I’ll find a way to do that for my next Academy Fortress.
Stage 5 is wing detail – which along with the engines, I left till after painting.
Next stage is airframe assembly. Both my previous Academy Fortresses had the potential for excessive dihedral, which was corrected with thin plasticard and filler in the upper wing joint, - so this area was approached with caution. I have to say dry fitting revealed no such problems, so the wings were fitted without modification. Stabilisers were similarly uneventful.
Final pre-painting assembly was to dry fit the lower gun position, and bomb-doors. I dry fitted the cockpit, and lightly scribed the coaming onto the upper fuselage – then painted the coaming black. I scribed the position of the astrodome into the cockpit - then carefully pre-painted the metal bits, and let it set for a couple of days before installing it.
At this point masked the cockpit windows, and stuffed tissues into the waist windows, bombardier’s position, and radio room to protect them from spray.
|
CAMOUFLAGE & MARKINGS |
Painting
I had
heard great things of Halfords Nissan Silver aerosol paint, so this (and
an Airfix C-47) was my opportunity to try it. It went on smoothly and
evenly, dried quickly and gave a very bright shiny finish. Unfortunately
I thought it was very grainy, and it revealed some flow marks in the
plastic underneath. This was corrected with a second coat, but I still
think it’s very  grainy,
and don’t anticipate using this paint on another complete model. I
sealed the entire model with a coat of Johnson’s Klear, then used Tamiya
masking tape to help me paint the de-icer boots black (forgetting that
the wing ones are decals).
grainy,
and don’t anticipate using this paint on another complete model. I
sealed the entire model with a coat of Johnson’s Klear, then used Tamiya
masking tape to help me paint the de-icer boots black (forgetting that
the wing ones are decals).
As a final touch I painted the control surfaces with Matt Varnish to simulate fabric finish.
Markings
These consist of pre-war stars in 4 wing positions, underside US ARMY legend, tail-feathers, aircraft codes, walkways, anti dazzle panel, and some form of squadron marking. This consists of what looks like a rodeo-rider silhouetted against a Day-Glo orange sun. Decals were finely printed, but a little delicate for surface detail, and prone to tearing. They also took an absolute age to lift from the backing paper. I apply my decals over a blob of wet Clear, which leaves no space for any air - the cause of silvering. This was successful for the upper decals, but was unable to completely prevent silvering under that vast US ARMY decal underneath. Also the white bits of the decals are showing the base colour – so I’m glad this model is not multicoloured.
As a final touch I put a cereal box over the fuselage, and gave the wings and tail a quick aerosol coat of Humbrol Matt Varnish to simulate years of living outside.
|
FINAL CONSTRUCTION |
All that detail that was postponed earlier, is completed now. Superchargers and exhausts were painted Gunmetal and installed. The lower gun position was scribed – then removed. This enabled me to paint its interior Avocado. I also cut a hole in the fuselage for the gunner to crawl through. With hindsight this was a mistake – as was the B-29 tail gunner’s seat I gave him (which is almost impossible to see)!
I hand painted the engine cowlings and bomb-doors with Humbrol Silver, to slightly contrast the rest of the airframe. Interiors were Avocado and engine blocks tyre-grey. After allowing to dry for 48 hours, I painted the cowling fronts with Humbrol yellow. Again after generous drying time – I installed the black sections by decal. These were very fiddly, and are far from perfect – still they did have mechanics crawling over them all the time.
I framed the waist windows and nose glazing with a silver gel pen. I know this is prone to smudge, so left them about a week before touching them again. These transparencies were secured with Klear rather than cement, followed by a careful edging of Humbrol silver. There is no detectable change in shade of silver – so I am quite pleased with the results. I found gel pens to be more accurate and even than hand framing, so I did the radio-room cover after installation.
 During handling this
model lost its bombsight. These were removable anyway, but I installed a
spare 50 calibre in the nose for the bombardier to play with.
During handling this
model lost its bombsight. These were removable anyway, but I installed a
spare 50 calibre in the nose for the bombardier to play with.
Around this time I filled all the remaining windows with Humbrol Clearfix.
Academy have some small air intakes (part A35) on the engine sides. I could see these on pictures of B-17Cs but not on B-17Ds, so I left them off.
Wheels were painted silver with tyres grey and installed on the undercarriage legs. Propellers were hand painted silver along with all the remaining aerials and probes. These were installed, and were mostly knocked off again by the time I photographed this model.
My completed B-17D was now ready to join my fleet of 6 other Fortresses on a bombing mission.
Accuracy
For the purposes of review completeness, I measure models to establish their accuracy, multiplying my measurements by 72 and comparing with the quoted dimensions, then explaining the difference in real terms.
This method is difficult for taildraggers, as length is through the axis of the fuselage – rather than the ground length. Also I don’t know that the quoted figures are completely accurate.
Span 436mm x72= 31.392M Quoted 31.6M Difference 208mm or a cigarette packet on each wingtip!
Length 287mm x72= 20.664M Quoted 20.7M Difference 36mm, probably down to my measuring.
Height Ignored as difficult to measure, prone to undercarriage inaccuracy, and I’ve got and no figures for an early tail Fort.
 So, pretty much
spot-on!
So, pretty much
spot-on!
Amongst the other dimensions, I found imperial figures for undercarriage track, and inter-engine spaces, so I measured, multiplied by 4mm per foot, and compared those – all matched!
The only thing I have found with this kit, and my other Academy Fortresses is that the engine cowlings are too rounded in section at the front. This can be corrected with sandpaper wrapped round a dowl – but I forgot on this occasion.
I also measured the dihedral, as I was concerned during construction. I made a measure from a scale-rule and a clothes peg, to measure the height of each wingtip. Then moved the measure to the fuselage to compare the height of the wingtip with all my side elevation diagrams. Again a match!
|
CONCLUSIONS |
An excellent model of an early Fortress, which is fortunate as it’s the only one we’re ever likely to see. This kit goes together well with no difficulties for the sort of modeller who’s likely to want to build it. Did I mention filler – this kit doesn’t need any! As with a lot of recent kits – it rewards the effort spent in making a good job of construction and finishing.
The icing on the cake for mine was another first place at my local IPMS branch competition, against some other very high quality models.
Thanks and congratulations go to Academy for a worthy kit of a previously overlooked subject – which will enable any modeller to complete their collection of Flying Fortresses.
June 2003
Copyright ModelingMadness.com
If you would like your product reviewed fairly and quickly, please contact the editor or see other details in the Note to Contributors.