Monogram 1/48 P-61 Black Widow
|
KIT # |
7546 |
|
PRICE: |
$16.95 |
|
DECALS: |
Two Aircraft |
|
REVIEWER: |
|
|
NOTES: |
Terry Dean nose weights used |
|
HISTORY |
The Northrop P-61, was shrouded in secrecy from its inception. Known as the “BLACK WIDOW”, it was the first U.S. aircraft designed exclusively as a night fighter. The P-61 was the heaviest aircraft to ever bear the designation “P” for pursuit, with its initial weight of over 27,400 pounds. Specifications of the WIDOW were those of a medium bomber, with a wing span of 66 feet and an overall length of 48 feet 11 inches. Two Pratt & Whitney R-2800 engines powered the P-61A developing initially 1600 horsepower each. The P-61B had two R-2800-65 engines, with an increased horsepower of 2200 horsepower each. Top speed of this aircraft was over 370 miles per hour.
 The P-61 was the most advanced
night fighter of its day, possessing incredible capabilities of destruction.
Four .50 calibre machine guns were mounted in a dorsal turret and four 20
millimeter cannons in the ventral location on the fuselage pod. The four .50
calibre machine guns were designed initially as defensive weapons and could be
controlled by any one of the three crew members, pilot, rear gunner, or radar
operator who sat in the extreme rear of the fuselage pod. The dorsal gun turret
could be rotated 360o and elevated to a 90o angle.
The P-61 was the most advanced
night fighter of its day, possessing incredible capabilities of destruction.
Four .50 calibre machine guns were mounted in a dorsal turret and four 20
millimeter cannons in the ventral location on the fuselage pod. The four .50
calibre machine guns were designed initially as defensive weapons and could be
controlled by any one of the three crew members, pilot, rear gunner, or radar
operator who sat in the extreme rear of the fuselage pod. The dorsal gun turret
could be rotated 360o and elevated to a 90o angle.
The first thirty-six P-61A’s carried the dorsal turret. The remainder of the A production of 200 had the turret deleted due to a buffeting problem caused when the turret was rotated.
The P-61B was approximately 8 inches longer than the “A” model, its overall length being 49 feet 7 inches. Of the four hundred-fifty “B’s” produced, only the second two hundred had the dorsal turret which was re-introduced. The buffeting problem had been lessened by redesign of the structure. The P-61B also incorporated many improvements requested by pilots who had used the P-61A in combat.
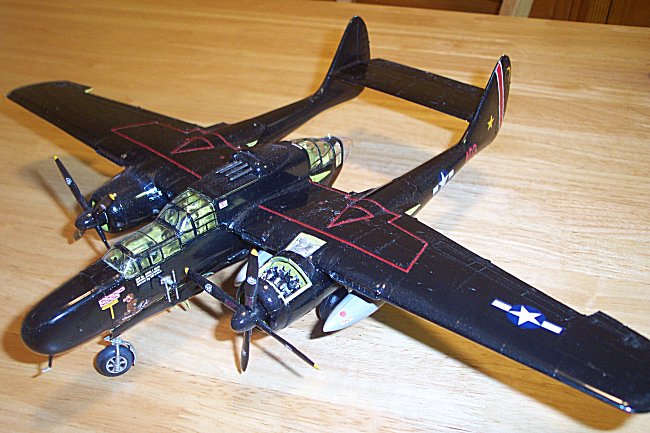
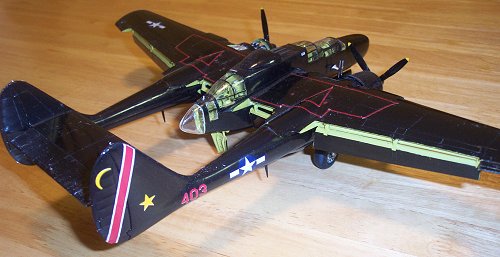
The P-61B was painted an overall gloss black as were many P-61A’s, although initially the P-61A was painted in the conventional olive drab over neutral gray. The P-61B, when painted a glossy black, was almost invisible in the night skies.
The premier ace of World War II night fighter fame was Major Carroll C. Smith of the 418th Night Fighter Squadron stationed in the Pacific. One December 29th, 1944, Major Smith and his radar operator, Lt. Phillip Porter, accomplished a feat unheard of in night fighter history as they intercepted and destroyed four Japanese aircraft in a single night with their P-61, “Times A Wastin’”. With these four Japanese aircraft, destroyed off the coast of Mindoro in the Philippines, Major Smith became the highest scoring U.S. Night Fighter Ace with a total of seven kills.
|
THE KIT |
This is a Revell-Monogram re-issue of the 1974 Monogram kit. The current box is about 25% bigger than the kit sprue trees. The kit is molded in black plastic and has some minor flash on the parts. There are raised panel lines and many access and canopy panels that can be open. Decals are provided for two airplanes, including “Times A Wastin’”. The kit instructions are the same from 1974; however the glossy insert on how to build a diorama for the kit is omitted.
The kit allows you to build either a P-61A or P-61B, per the kit decal choices. All P-61A options lets you build a nose radar set, open the access door to the fuselage cannons, and open the main landing gear doors. The P-61A in olive drab (with kit decals) lets you have the dorsal turret; the P-61A in black (with kit decals) doesn’t. The P-61B option lets you have a nose wheel mud guard, four external wing tanks, and dorsal turret.
|
CONSTRUCTION |
As a teenager, I built a P-61A back in 1978. After losing, breaking, replacing and rebuilding parts from playing, dusting, and dropping the model over the years (and one re-painting of olive drab/neutral gray over the original black), I built another kit with the lessons learned and a little more skill.
 First, decide on the version
you want since the P-61A and P-61B have different features as you start
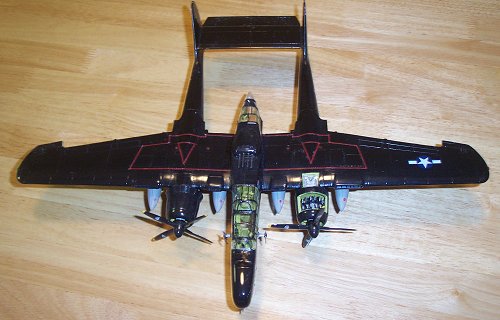
building. Note that this plane is like a P-38 and a definite tail-sitter. The
clear support to hold the plane up is NOT going to last over time; I re-glued
mine too many times over the years. This time I brought a $2 lead nose weight
to keep the plane on all its wheels. Unfortunately, this also means there is no
room for the nose radar set. There is really no other place to hide the
necessary weight since the cockpit and its access are so open. It was more
important to me to have the nose weight than show off the nice radar set.
First, decide on the version
you want since the P-61A and P-61B have different features as you start
building. Note that this plane is like a P-38 and a definite tail-sitter. The
clear support to hold the plane up is NOT going to last over time; I re-glued
mine too many times over the years. This time I brought a $2 lead nose weight
to keep the plane on all its wheels. Unfortunately, this also means there is no
room for the nose radar set. There is really no other place to hide the
necessary weight since the cockpit and its access are so open. It was more
important to me to have the nose weight than show off the nice radar set.
Construction is straight forward. The cockpit seats seem a little small if you wanted to put some aircrew inside (there are a couple of maintenance figures included though). Remember to keep track of what version you’re building because it effects the parts you install, glue, or alter. Be careful to allow all the subassemblies like the fuselage pod, engine booms, wings, etc. to dry thoroughly before assembling them together. The fuselage pod is especially weak because of all the openings for the canopy, access panels, and dorsal turret. The dorsal turret and guns will rotate if you use glue sparingly and allow it to dry (it’s the fun part of the model).
The starboard engine is complete and you can see it (barely) behind the propeller or from a top wing access panel. Some modelers use the R-2800 engine in other planes like Vought F4U Corsair.
The instructions call for zinc chromate interiors. I used Tamiya XF-4 Yellow Green although others call for a dark interior green. The yellow green does have a big contrast with the glossy black exterior but allows you to see the interior better.
|
CAMOUFLAGE & MARKINGS |
Using the kit decals, your
exterior color choices are: P-61A (with turret) is olive drab and neutral gray;
P-61A (without turret) is glossy black; P-61B (with turret) is glossy black.
The kit is molded in black plastic. I admit it. I built the P-61B and didn’t
paint it because it was already black and I don’t have an airbrush (hand
brushing may have left stroke marks). I did hand brush where I used putty at
the joints. Like any glossy black object, this model is a dust magnet and
you’re going to be 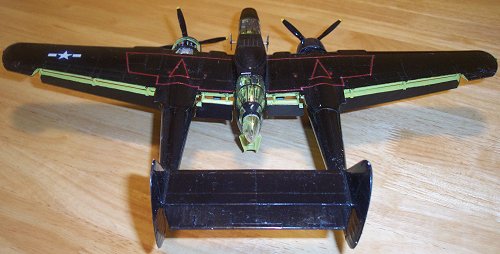 picking it up a lot to dust. With the twin engine booms and
wing flaps down, it’s also easy to drop.
picking it up a lot to dust. With the twin engine booms and
wing flaps down, it’s also easy to drop.
The canopies are greenhouses are require patience to paint. I use acrylic paint applied with a toothpick to the frame. When its dry, I use another toothpick to rub any paint that is on the clear panels.
Note that 3/64 inch wide “no step” red lines are shown atop the plane. Cutting these stripes from the red rectangle on the decal sheet was a hassle in 1978 (too put it mildly). In 2002 I used 3/64 inch wide red tape used for making charts. Floor polish was applied to make everything glossy.
|
CONCLUSIONS |
I now have a new P-61 to dust and trashed the old one (after salvaging a few unbroken and broken pieces). I’ve dusted it a few times and haven’t dropped it yet. This kit is for the patient modeler who can wait for all the subassemblies to dry and keep track of the selected options.
Copyright ModelingMadness.com. All rights reserved. No reproduction in part or in whole without express permission from the editor.
If you would like your product reviewed fairly and quickly, please contact the editor or see other details in the Note to Contributors.