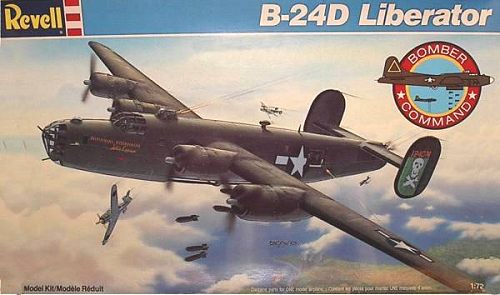
Revell 1/72 B-24D Liberator
|
KIT # |
4339 |
|
PRICE: |
$ Currently OOP |
|
DECALS: |
One Aircraft, 90th BG |
|
REVIEWER: |
|
|
NOTES: |
Minor conversion |
|
HISTORY |
Like most airplane model builders, I have always been fond of the Consolidated B-24 Liberator. My retired Air Force pilot father has been telling me stories of the B-24 since I was a child. My dad put in thousands of hours flying both the B-24 and B-17 during WW II. He was a Ferry and Air Transport Command pilot who has been almost everywhere except Antarctica. I recently asked him a popular question: Which is better, the B-24 or B-17? In his typical Command Pilot analytical mode, he responded that both planes had their strengths and weaknesses. For me, his stories about the B-24 stand out compared to the B-17. For instance, if you look at pictures of parked Liberators, almost all have their bomb-bay doors open. This is so that the gas fumes from the fuselage tanks would not accumulate. Several early-model liberators exploded on takeoff when operation of the flap-motor ignited gas fumes. After the problem was fixed, pilots of later Liberator models also left the doors open just in case...
 The “Baker Two Dozen” has the distinction of being the
most-produced American aircraft of all time. Over 19,000 Liberators were
built. It served in more combat theaters, over a longer time period, than any
other heavy bomber of World War Two. The B-24 was a “jack of all trades”
aircraft. It not only was built as a bomber, but also as a maritime patrol
aircraft, transport, photo-recon aircraft, dedicated trainer, and fuel tanker.
With its Davis wing, it was a technological marvel when designed.
The “Baker Two Dozen” has the distinction of being the
most-produced American aircraft of all time. Over 19,000 Liberators were
built. It served in more combat theaters, over a longer time period, than any
other heavy bomber of World War Two. The B-24 was a “jack of all trades”
aircraft. It not only was built as a bomber, but also as a maritime patrol
aircraft, transport, photo-recon aircraft, dedicated trainer, and fuel tanker.
With its Davis wing, it was a technological marvel when designed.
The B-24 was a complex plane and crew training was more lengthy when compared to other bombers such as the B-17. The argument about whether the B-17 was superior to the B-24 will never end, but everyone will agree that the Liberator and the Flying Fortress are two of the most recognized symbols of victory for WW-II. An interesting fact of the B-24, considering the quantity produced, is that at the end of the war almost all were scrapped.
|
THE KIT |
 The release of the B-24D kit was pretty early in the period when Revell
designed a whole series of constant 1/72 scale WW-II aircraft. According to
Fine Scale Modeler (Feb 2000, p. 62), Revell began its 1/72 Warbird series
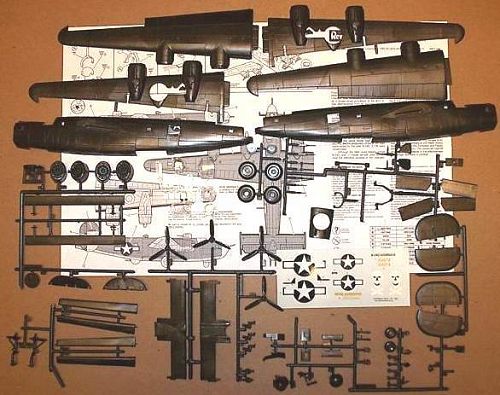
in 1963 with the release of the B-17F. With 102 parts, the Revell B-24D kit
reflects the time period of its release when rotating turrets, movable flying
surfaces, and retracting landing gear were all the rage. The Revell Liberator
also is typical of the classic kit days where football-sized rivets on very
thick plastic parts were the norm.
The release of the B-24D kit was pretty early in the period when Revell
designed a whole series of constant 1/72 scale WW-II aircraft. According to
Fine Scale Modeler (Feb 2000, p. 62), Revell began its 1/72 Warbird series
in 1963 with the release of the B-17F. With 102 parts, the Revell B-24D kit
reflects the time period of its release when rotating turrets, movable flying
surfaces, and retracting landing gear were all the rage. The Revell Liberator
also is typical of the classic kit days where football-sized rivets on very
thick plastic parts were the norm.
The Revell B-24D kit has been re-released in several different markings over the decades. My kit for this review dates from 1990 that maybe was the last time the Revell B-24 was produced. Until the relatively recent B-24D kit by Minicraft, the Revell kit was the only 1/72 B-24D model kit available. The Revell B24 kit is superior to the old Airfix B-24J kit, which is not nearly as accurate in shape.
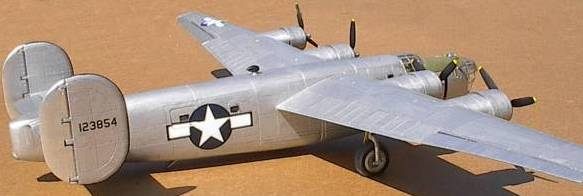
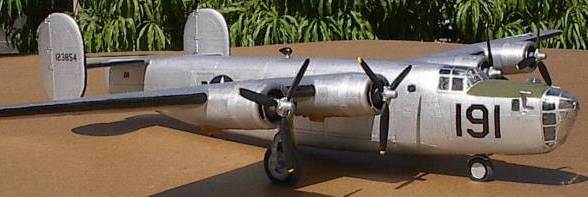
Over the years, I have completed at least three Revell B24D model kits. To be honest, building the classic 102-part Revell Liberator kit is not fun. The memory of seemingly endless hours of sanding off its humongous rivets kept my kit shelved for over a decade. That attitude changed a year ago when I was looking at one of my father’s old books on aviation titled “New Era of Flight” published by E.P. Dutton in 1956. On page 47 of this book was a picture of a B-24D with WWII insignia and devoid of camouflage paint (why this book had a B-24 picture in its section on U.S. Air Force planes is a mystery since the last B-24 was retired from the USAF way before 1956!). I was really intrigued by the photo because I had never seen a bare-metal B-24D. As far as I know, all early-model Liberators were painted before they left the factory. When asked about this picture, my father (who flew thousands of hours in B-24s in WW-II) stated that this B-24D was a trainer that had its turrets and paint removed. I then asked my IPMS chapter president, Stan Staples, another “Banana Boat” driver from WW-II, who stated that this plane was assigned to a U.S.-based training unit as evidenced by the large “airfield number” painted on its nose. Well, by then I just had to build this unusual B-24D trainer.
|
CONSTRUCTION |
This is an old kit so be prepared to spend some time making the crude parts fit right. I built this classic kit pretty much stock except for removing the gun turrets. Construction started with sanding the rivets off all the airframe parts. Elbow grease galore! Once the rivets were gone, I was amazed at the beautiful engraved panel lines of this kit. Since I was leaving all the guns off, interior construction of this kit was simplified. I used the kit cockpit and bombardier stations complete with crew figures (I like crew figures in aircraft models). I installed the completed cockpit before the fuselage was glued together. The bombardier in his seat was inserted after the fuselage was glued together since it is accessible from the open front of the nose. Since this model is so tail heavy, I did not add any nose weight, but used the kit tail bumper to hold the nose up.
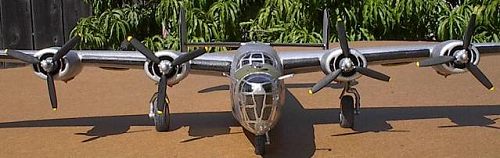
 The upper and lower turret openings were filled in after
the fuselage was glued together. I glued tabs into the turret openings and then
carefully cut plastic circles that matched the turret diameters and the
thickness of the fuselage plastic. Very little filler putty was required after
gluing the circles onto the tabs. I filled in the rear turret with multiple
sheets of plastic and lots of putty (more elbow grease !). The numerous
fuselage mold dimples were then filled with putty and more sanding was required.
The upper and lower turret openings were filled in after
the fuselage was glued together. I glued tabs into the turret openings and then
carefully cut plastic circles that matched the turret diameters and the
thickness of the fuselage plastic. Very little filler putty was required after
gluing the circles onto the tabs. I filled in the rear turret with multiple
sheets of plastic and lots of putty (more elbow grease !). The numerous
fuselage mold dimples were then filled with putty and more sanding was required.
After the rivets were removed, the wings were built stock except for the engine fronts, which were shortened (the propellers stuck out too far on the unmodified kit engines). Make sure you cut off the pins on the movable ailerons so that you glue them accurately in place. Do not forget to glue the main landing gear struts into the wings halves before they are put together. After removing the rivets, the horizontal and vertical tail surfaces were built-up following the kit instructions.
The wings were then glued onto the fuselage. I used white glue to fill in the gaps. I used multiple coats of white glue where the gaps were large. The wonderful thing about white glue as a filler is that you don’t sand it; just wipe off the excess before it dries. If you need to remove it after it is dry, just use a wet cloth. For me, Elmers is the wonder substance for model building.
I used True Details resin wheels for my model. I like the square tread represented on the resin wheels and the resin nose wheel has a fender. Unfortunately the resin tires are too flat and too bulged. I was able to sand off some of the tire bulge, but the flat tires were left as they were. I epoxied the wheels on to the kit struts.
|
PAINTING & MARKINGS |
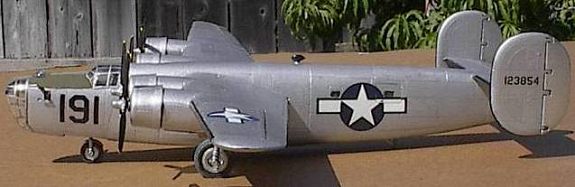 I brush-painted my B-24D trainer using Testors aluminum.
I first painted a thin base coat of aluminum, then I used two shades of aluminum
paint (add some black to one bottle of Testors aluminum). To produce a
multi-hued aluminum panel effect. I used a soft, flat-ended brush (use an
Exacto knife to trim the bristles). If you don’t paint over drying paint and
paint bordering panels in right-angle directions, brush-painted aluminum
finishes look pretty good. I also brush-painted the black de-icer boots since
their engraved lines make a neat border.
I brush-painted my B-24D trainer using Testors aluminum.
I first painted a thin base coat of aluminum, then I used two shades of aluminum
paint (add some black to one bottle of Testors aluminum). To produce a
multi-hued aluminum panel effect. I used a soft, flat-ended brush (use an
Exacto knife to trim the bristles). If you don’t paint over drying paint and
paint bordering panels in right-angle directions, brush-painted aluminum
finishes look pretty good. I also brush-painted the black de-icer boots since
their engraved lines make a neat border.
For the markings of this B-24D trainer, I used the kit star and bar insignia. I produced the field numbers for the nose and the tail serial numbers using my computer, inkjet printer, and clear decal paper from Bel Inc.
|
CONCLUSIONS |
I really enjoyed completing this unusual B-24D trainer. It is a great addition to my classic kit collection. As with almost any classic kit, the Revell B-24 is a bear to construct, but the end result is very satisfying. I recently acquired another Revell B-24D kit which is going to sit awhile until I get motivated to start sanding yet another Baker Two Dozen (maybe a C-87 next time).
|
REFERENCES |
Aerodata International. 1981. Bombers of WW II, Volume 1. Squadron/Signal.
Birdsall, Steve. 1975. B-24 in Action. Squadron/Signal.
David Donald, Edit. 1995. American Warplanes of World War II. Barnes & Noble.
Zarem, Lewis and Robert H. Maltby. 1956. New Era of Flight: Aeronautics Simplified. E.P. Dutton.
Copyright ModelingMadness.com
If you would like your product reviewed fairly and fairly quickly, please contact
the editor or see other details in the Note to
Contributors.