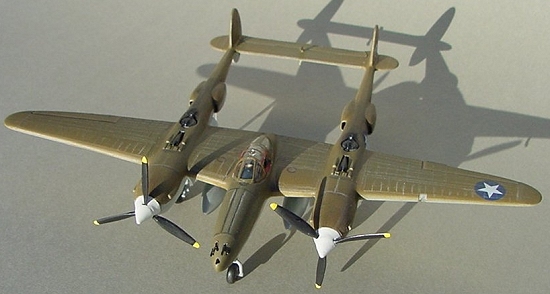
Airfix 1/72 P-38F/H Lightning
| KIT #: | 02088 |
| PRICE: | $5.99 |
| DECALS: | Two options |
| REVIEWER: | Greg Ewald |
| NOTES: | Detail Set Needed |
| HISTORY |
"I'd rather have an airplane that goes like hell and has a few things wrong with it, than one that won't go like hell and has a few things wrong with it," General Spaatz.
The “F” version of the greatest (in my opinion) fighter of WW2 weighed in at 19,000 lbs, and utilized Allison F-5’s for a tremendous amount of power…over 1320 HSP each! This nimble and deadly machine made a massive impact in the african theater…a huge amount of firepower in a fast, fast package…what is not to like? The “H” was had even larger engines, and a longer range…making it one of the finest planes in any theater of combat !
| THE KIT |
 When you purchase
one of these small kits, you know what you are in for…they are just fine
for a beginning builder who wants to get a good looking plane together
quickly, or as a base project for something more ambitious…all without
breaking the bank, or taking up too much shelf space.
When you purchase
one of these small kits, you know what you are in for…they are just fine
for a beginning builder who wants to get a good looking plane together
quickly, or as a base project for something more ambitious…all without
breaking the bank, or taking up too much shelf space.
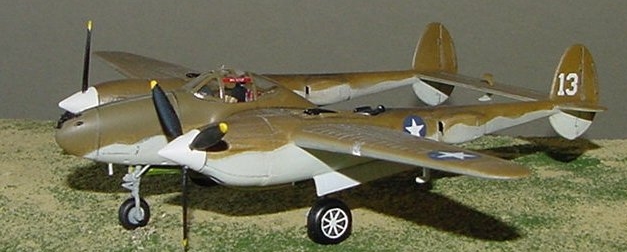
The sprues are cleanly molded, with very little flash, but there are quite a few ejector pin marks throughout the kit that take some sanding and filling. The instructions are brief, with only 6 steps of exploded drawings and a lot of arrows…but easy enough to figure out. Colour markings and decals are provided for two aircraft, an “F” from Guadacanal that has “shark teeth”, and an “H” type from New Guinea…both have Humbrol colour numbers listed, and are of the olive drab over grey configuration.
| CONSTRUCTION |
 With only 67
pieces, the Airfix Lightning is certainly a fast build, but no show stopper
without a lot of work…the kind of kit I actually like, since much of my
scratchbuilding days are over (at least for a time, until my wife
understands why I have to have so much styrene all over the place)…it is
fun to take a bare bones cockpit and make it into something nice!
With only 67
pieces, the Airfix Lightning is certainly a fast build, but no show stopper
without a lot of work…the kind of kit I actually like, since much of my
scratchbuilding days are over (at least for a time, until my wife
understands why I have to have so much styrene all over the place)…it is
fun to take a bare bones cockpit and make it into something nice!
The fit of the major components is reasonably good, the wing assemblies go together especially nice and tight to the booms, although you are going to need some filler around the major seams. For some insane reason, I left off part 9 during initial assembly, and it is the part that holds the nose gear in place…I did not realize this until I had finished with step 3 (the nose), which required a lot of sanding and filling, so I ended up scraping a wheel well together from sheet styrene to match.
Be sure to paint the inside of the lower front end of each boom prior to installing the lower cowling cover, using a dark grey to set off the intake holes (parts 24 and 31).
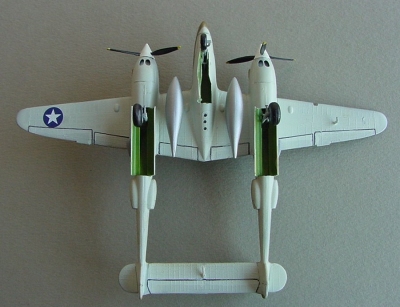 The reception
wells for the turbochargers (35,37) need to be widened slightly, and the
slope at the rear feathered out…easily done with a Dremel tool and some
fine sandpaper to match existing photos (see references). I also had to
widen the hole for the rear antenna in the stabilizer(32), to get it to fit
in correctly…just a knife will work for this.
The reception
wells for the turbochargers (35,37) need to be widened slightly, and the
slope at the rear feathered out…easily done with a Dremel tool and some
fine sandpaper to match existing photos (see references). I also had to
widen the hole for the rear antenna in the stabilizer(32), to get it to fit
in correctly…just a knife will work for this.
Once again, you have to deal with the twin wheel halves so famous with Airfix…sanded and painted satin black, they look good though! The landing gear is also quite sturdy…nose weight is going to be required if you aren’t going to permanently attach the plane to a surface, such as a diorama, though.
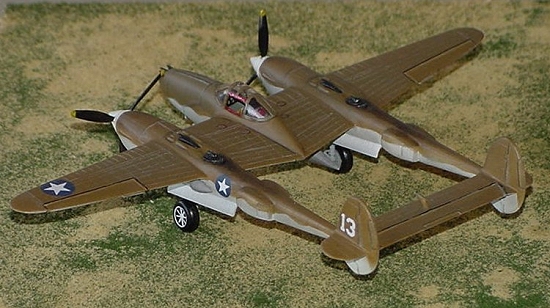
The tear drop tanks were glued together, puttied, and sanded smooth…and installed like a dream…very nice fit, and they add some interest to the bottom of the plane. I wasn’t as happy with the spinners and props…they needed a lot of cleanup, and quite a lot of filling and shaping, but take your time, as this plastic is somewhat brittle.
The cockpit received some scratch built details, and masking tape harnesses with brass photoetched buckles…just enough to make it interesting, without investing a ton of time into it. I also cut away the side windows from the injection molded canopy with a dremel cut-off wheel, and sanded the resulting hole(s) with a small hobby file…another option would be to modify a Squadron aftermarket canopy or vac your own.
| COLORS & MARKINGS |
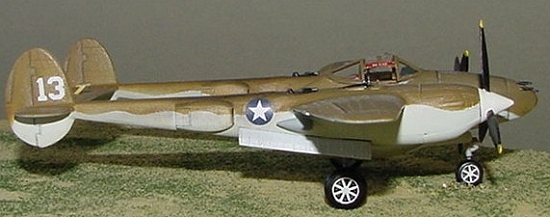
 Using Testor’s
Model Master paints, I sprayed the upper fuselage with Field Drab, then
oversprayed it again with a very thin coat of Olive Drab…this gives the
plane a more weathered appearance, and cuts down on it being too green.
The underside was painted light grey, with a slight wavy pattern separating
the two tones (upper and lower) Once this was dry, I weathered the whole
ship with pastels and a very light oil wash, paying special attention to
the booms just aft of the turbochargers, some highlighting with coloured
pencils brings out the surface detail, while ink was used to darken the
recessed wing features.
Using Testor’s
Model Master paints, I sprayed the upper fuselage with Field Drab, then
oversprayed it again with a very thin coat of Olive Drab…this gives the
plane a more weathered appearance, and cuts down on it being too green.
The underside was painted light grey, with a slight wavy pattern separating
the two tones (upper and lower) Once this was dry, I weathered the whole
ship with pastels and a very light oil wash, paying special attention to
the booms just aft of the turbochargers, some highlighting with coloured
pencils brings out the surface detail, while ink was used to darken the
recessed wing features.
The canopy was dunked in Future and set aside to dry, then modified decals completed the kit…a quick coat of flat restored a nice dull sheen to the little pacific plane. I let the kit outgas for a day, then adhered the canopy to the fuselage with Krystal Kleer.(note: the clear coats can fog the plastic for several hours after spraying)
| CONCLUSIONS |
Viola! I have a 1/72nd scale version of my favourite fighter sitting on the tarmac, just waiting to be added to my Pacific theater diorama…with only 10 bucks total invested in the kit, it is a deal…and a mere 15 hours of pleasurable labor is well rewarded…but then, I am an Airfix junkie !
| REFERENCES |
http://www.wpafb.af.mil/museum/research/p38.htm
April 2005
Copyright ModelingMadness.com
If you would like your product reviewed fairly and fairly quickly, please contact the editor or see other details in the Note to Contributors.
Back to the Review Index Page 2016