Eduard 1/48 P-400 Airacobra
|
KIT # |
8061 |
|
PRICE: |
$29.98 |
|
DECALS: |
See review |
|
REVIEW: |
|
|
NOTES: |
Decals are Superscale 48-499 |
|
HISTORY |
The P-39F was the second production model of Bell's Airacobra to see operational service. It was the USAAF equivalent of the Airacobra I/P-400, with a 20mm Oerlikon cannon substituted for the 37mm Oldsmobile weapon. Externally it was distinguishable from the P-400 by the use of a three-bladed Aeroproducts propeller in place of the Curtiss Electric propeller used by all previous Airacobras. The P-39F saw extensive service in New Guinea and North Africa.
For further historical comments on the Airacobra, refer to the preview of this kit.
|
THE KIT |
 Eduard's Airacobra comes on two sprues of light tan plastic, and include all
the different propeller blades and spinners and exhausts to do all versions of
the airplane up to the P-39Q if the modeler leaves off the underwing machine gun
gondolas of that sub-type (which in fact were often left off on operations to
save weight).
Eduard's Airacobra comes on two sprues of light tan plastic, and include all
the different propeller blades and spinners and exhausts to do all versions of
the airplane up to the P-39Q if the modeler leaves off the underwing machine gun
gondolas of that sub-type (which in fact were often left off on operations to
save weight).
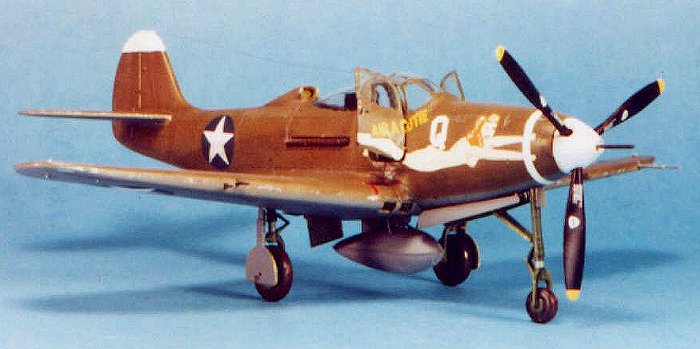
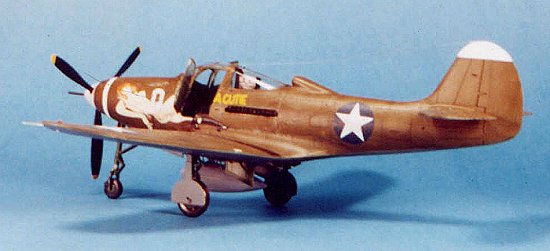
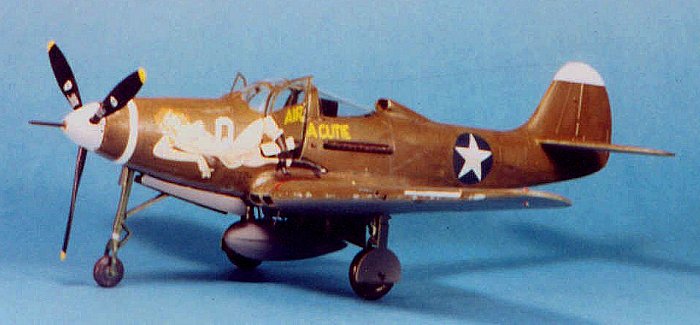
While the kit is a P-400, I opted to make a P-39F from it, using the Super Scale decal sheet 48-499, which includes a very wild-looking P-39F, "Air-A-Cutie," with some of the most stupendous "nekkid babe" pinup nose art to decorate a single-seat fighter in the entire war.
|
CONSTRUCTION |
The model goes together as well as any recent Tamiya or Hasegawa release, and I used no putty at all during construction. The only "complaint" I can register is that the trailing edges of the wings are a bit thick; five minutes with a sanding stick solves this problem for any modeler who isn't all thumbs.
I started with the cockpit, airbrushing all the parts "Bell Green." Having seen the P-39N being restored at Yanks Air Museum, and studied the photos of this plane in the Detail & Scale book, I determined the color was reproducible using 50-50 Gunze-Sanyo Field Green FS34097 and Green FS34092. I also painted the landing gear, gear door interiors and gear wells with this color. I masked both sides of the clear plastic cockpit doors and painted the interior this Bell Green.
 I then assembled the cockpit per instructions, differing only in that I used
the ProMaster decal sheet with the P-39 instrument panel, and a set of Eduard
seat belts. I slipped the weight into position and knew there was enough weight
to make the model sit back a bit as P-39s did when they didn't have full fuel
tanks. To me, it's a more rakish look. The fuselage went together with no
problems.
I then assembled the cockpit per instructions, differing only in that I used
the ProMaster decal sheet with the P-39 instrument panel, and a set of Eduard
seat belts. I slipped the weight into position and knew there was enough weight
to make the model sit back a bit as P-39s did when they didn't have full fuel
tanks. To me, it's a more rakish look. The fuselage went together with no
problems.
I then assembled the wing per instructions, painting the radiators before gluing them in position in the lower leading edge of the wing. I opted to have the exhaust gates open, and posed them about halfway down.
The wing assembled to the fuselage with no problem, and I then glued the horizontal stabilizer in position. I estimate it took me about 4 hours to accomplish what is described above, including time for the paint to dry and the instrument panel decal to set up. After letting things set up overnight, it was time to go to the paint shop.
|
PAINT & DECALS |
 Painting:
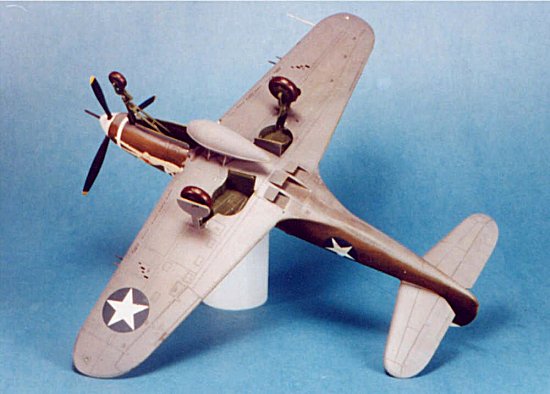
I pre-shaded the model with flat black over all panel lines, then painted the tip of the vertical fin and the spinner flat white. I then painted the undersides with Gunze Sanyo Neutral Grey. I painted the upper surfaces with Gunze-Sanyo Olive Drab 41; I lightened this with white and went back over it to simulate sun fading. When all was dry, I shot two coats of Future and let it set overnight.
Decals:
To do the nose art, I attached the cockpit doors in the closed position with a drop of cyanoacrylate. The SuperScale decals went down with no problem, though I used several coats of Micro-Sol to get the nose art to completely settle down. I used the kit decals for the stencilling. When all this had set up, I washed the model to get rid of any setting solution residue, then shot another coat of Future.
Final finishing:
I used Tamiya Smoke to simulate exhaust staining and gunfire residue, then used a very small brush with Testors Model Master Aluminum metalizer to make some paint chips in the obvious areas. I painted mud on the wheels, assembled the landing gear and fit them in position. When all this was done I shot several coats of Flat Future overall to get a flattened, sun-faded finish one would expect to see in New Guinea.
|
CONCLUSIONS |
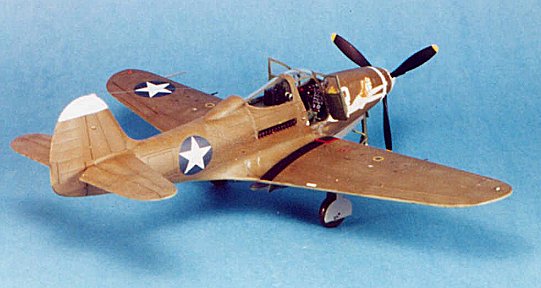
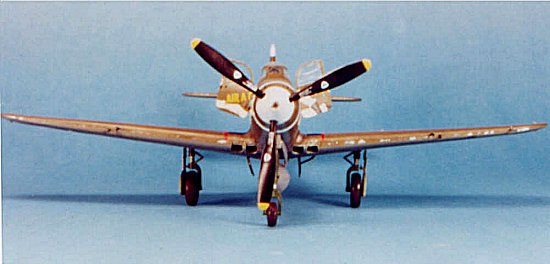 What a honey of a model! The Airacobra may not have had the best operational
record of the war, but it was certainly one of the best-looking airplanes of the
war aesthetically, and the tricycle landing gear makes it look very distinctive.
There's going to be a Profipack version with decals for other users than the US,
and the usual Eduard photo-etch detail fret. However, like the company's recent
releases in World War I airplanes, the "basic" version is more than
acceptable. I think Eduard has found themselves a "tentpole" model for
future releases. They are going to do "Cobra I" and "Cobra
II" with resin conversion parts; all you air race fans can thank me for
convincing them to try this (please buy them when they come out and prove I was
right that air racers will sell).
What a honey of a model! The Airacobra may not have had the best operational
record of the war, but it was certainly one of the best-looking airplanes of the
war aesthetically, and the tricycle landing gear makes it look very distinctive.
There's going to be a Profipack version with decals for other users than the US,
and the usual Eduard photo-etch detail fret. However, like the company's recent
releases in World War I airplanes, the "basic" version is more than
acceptable. I think Eduard has found themselves a "tentpole" model for
future releases. They are going to do "Cobra I" and "Cobra
II" with resin conversion parts; all you air race fans can thank me for
convincing them to try this (please buy them when they come out and prove I was
right that air racers will sell).
I am sure there will be more than one of these on my shelves in time. Anyone who is contemplating returning to the hobby after laying off through early adulthood should have no trouble creating a really nice model with this kit.
Thanks to Eduard for the review kit.
Copyright Modeling Madness.com. All rights reserved. No reproduction in part or in whole without express permission from the editor.
If you would like your product reviewed fairly and fairly quickly, please contact the editor or see other details in the Note to Contributors.
Back to Reviews Page 2024