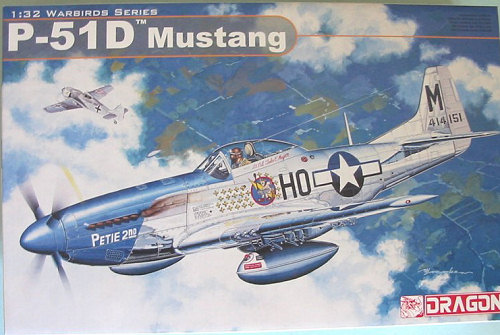
| KIT: | Dragon 1/32 P-51D Mustang |
| KIT #: | 3201 |
| PRICE: | 3,950 yen |
| DECALS: | Three options |
| REVIEWER: | Tom Cleaver |
| NOTES: |
| HISTORY |
Anyone who is interested in this kit already knows enough about the North American P-51D Mustang that there is no need to write up a history of the most famous American fighter of the Second World War.
What everyone wants to know is, what’s it like?
Wellll... this is one of those questions for which the answer is, “It depends.”
| THE KIT |
 When I opened the box
that arrived from Hong Kong this past week, I was so shocked, so dismayed, so
disappointed, that my first thought was to close the box, take it out to the
trash and dump it, since the next day was trash day. That way I would never
have to see it again.
When I opened the box
that arrived from Hong Kong this past week, I was so shocked, so dismayed, so
disappointed, that my first thought was to close the box, take it out to the
trash and dump it, since the next day was trash day. That way I would never
have to see it again.
As I picked up the bags and examined their contents, I asked myself how anyone could manage to make that many mistakes on the world’s most-common warbird, the most easily-researched World War II airplane in existence.
Truly, had Dragon merely scaled up the ancient Monogram 1/48 P-51D, they could not have done worse than they have here.
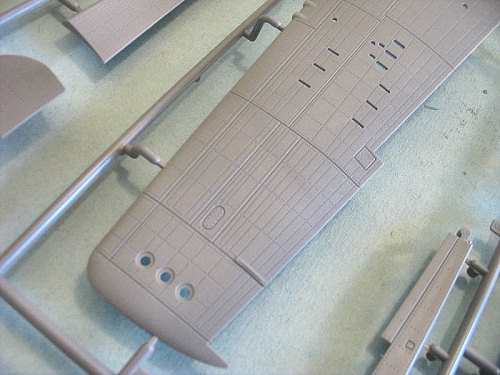
Let’s start with the obvious. Mustangs are smooth. In the 35 years I have spent around 1:1 P-51Ds, including helping to put two back together and going flying in three others, you cannot see any of the flush rivets on the airplane from further away than 12 1:1 scale inches, unless the airplane is highly polished and the light is at just the right angle, and then all you can see is a hint that a line of rivets might be there.
You don’t see line after line of divots. When I saw that the surface detail had 5,000 divots, er, I mean rivets, all over it, visible from a scale 50 feet in indoor lighting, I was seriously disappointed.
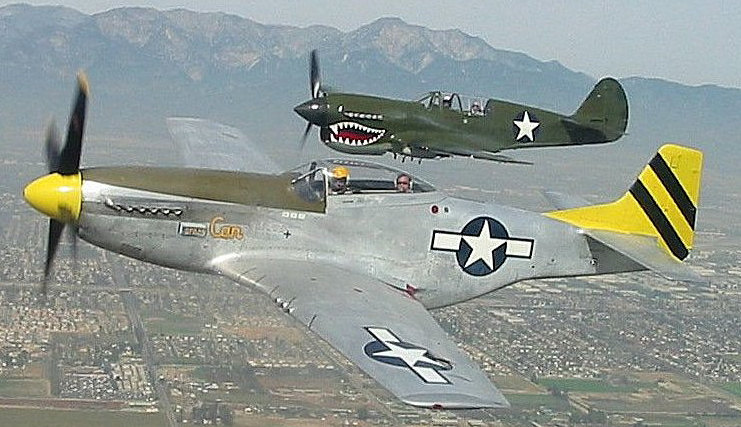 I am including here a
shot I have taken of “Spam Can,” the P-51D that has been operated by Planes of
Fame since 1957. For the past 10 years, the airplane has had an unpainted
aluminum surface. These photo shows clearly that the flush rivets do not show
up. (This shot will also give you a good idea of what a real NMF surface looks
like on an operational airplane - it looks completely unlike what 98% of most
modelers create.)
I am including here a
shot I have taken of “Spam Can,” the P-51D that has been operated by Planes of
Fame since 1957. For the past 10 years, the airplane has had an unpainted
aluminum surface. These photo shows clearly that the flush rivets do not show
up. (This shot will also give you a good idea of what a real NMF surface looks
like on an operational airplane - it looks completely unlike what 98% of most
modelers create.)
There are what I would call two schools of thought nowadays when it comes to
creating surface detail on a scale model. One might be called the “Hasegawa
method,” as seen on their Bf-109 and Fw-190 kits, where the surface is smooth,
with only engraved panel lines. They even do this on their Stuka kits, where
raised rivets would be right. For the most part, particularly for World War II
righters, this looks right. The other school can be called the “Trumpeter
method,” which is to put large engraved rivets all over the surface. For some
models this looks right, such as the SBD Dauntless - even though the Dauntless
had raised rivets rather than recessed rivets, at a distance of about a foot
this 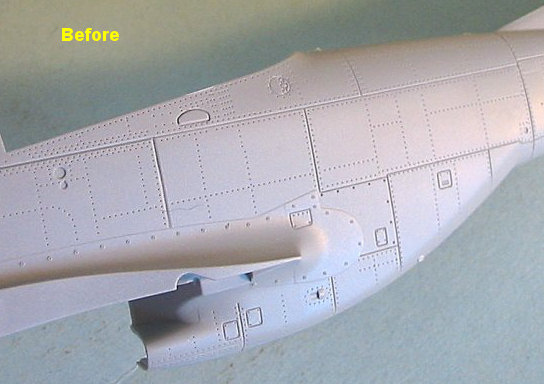 effect looks OK on that
model, and I say that as someone who has been around a 1:1 Dauntless for the
past 25 years.
effect looks OK on that
model, and I say that as someone who has been around a 1:1 Dauntless for the
past 25 years.
It’s really too bad that Dragon didn’t follow the Hasegawa method with this kit. Doing so would have given them a license to print money, even with all the other faults of the kit.
So, the question is, can this be fixed?
Fortunately, the answer is yes, it can be fixed. That is, it can be if you are willing to expend the necessary elbow grease to sand down the surfaces of all the major airframe parts, through several grits of sandpaper, then rub them out with polishing compound. And then do so again once the model is assembled, to cleanup the various seams, a few of which - like the joint of lower wing to lower forward fuselage are seriously “strange” as to why they were chosen.
If you sand down the surface, you won’t get rid of the divots, er, I mean the rivets, entirely, but you can reduce them to the point they aren’t much worse than those on the Tamiya 1/32 Zero. That’s still too much for a real Mustang, but it’s a bazillion times better than what we started with. Not only will this tame the rivets, it will also tone down the 1918 Hindenburg Line “trenches” masquerading as panel lines. A final application of rubbing compound worked into the surface will fill in the divots and the trenches even more, so that the final result is a surface that is acceptable. I was looking at the beautiful John Dibbs air-to-air photos of the Paul Allen Collection’s P-51D, which has been restored to 1944 specifications and left in unpainted aluminum, and the remains of the divots on the model are about as apparent as the rivets are in these photos of the real thing.
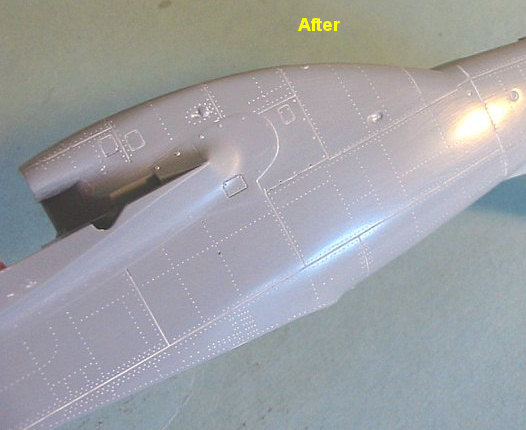 I have taken a photo of the right fuselage half after sanding down and
polishing, to demonstrate in comparing these parts to the unmodified parts that
the problem can be resolved.
I have taken a photo of the right fuselage half after sanding down and
polishing, to demonstrate in comparing these parts to the unmodified parts that
the problem can be resolved.
Alternatively, if you don’t want to go to all this effort, you could elect to do a full-camouflage airplane, since the divots won’t be so apparent on a non-metallic finish. This would allow you do many of the earlier P-51Ds flown by the 357th Fighter Group, some 60 of the Mustang IVs supplied to the RAF, or any of the 50 Mustangs used by the Israelis in the 1956 Suez War. You could also do Mustangs flown by Guatemala, El Salvador, or Dominican Republic. But if you’re going to do the most common finish used by most P-51Ds, major surface preparation is going to be a “must-do”.
Now that we’ve solved the most apparent mistake with the kit, what else is there to check on?
Given the problems that have been associated with all the other large-scale P-51 models (most particularly the Trumpeter 1/34 P-51D), it is good to be able to note that the external airframe shapes are right and the dimensions are correct.
The kit provides a Merlin engine and accessories that can form the basis of a detailed engine compartment if you wish to open up the model. I say “basis” because there is a lot of detail work that will be necessary, but the result could be very, very nice.
The gun bays are also nice, with well-molded ammo belts that will look quite realistic when properly painted. Fortunately, Dragon molded the gun bay covers closed, thus keeping a good wing surface for the overwhelming number of modelers who will elect not to do anything with this feature. There is no detailing of the inside of the gun bay covers, but any modeler who decides to open this up is going to most likely wait till the Eduard photoetch set comes out, which will undoubtedly take care of this issue.
All control surfaces are separate, which will allow a modeler to pose them dynamically. Unfortunately, the method chosen to insure the separate flaps are posed down at the right angle involves lots of extra plastic on the underside of the wing fairing, which means a modeler will be doing a lot carving away, as with the 1/48 Monogram or Hasegawa kits, when the flaps are dropped in order to get the right look to things.
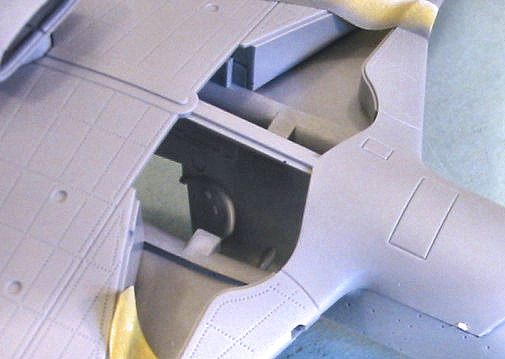 The wheel wells are poorly
done and incorrect. The rear wall follows the gear well opening as do all other
P-51 kits in all other scales, rather than being the wing main spar. This can
be corrected without a lot of effort with Evergreen strip for those so inclined.
The wheel wells are poorly
done and incorrect. The rear wall follows the gear well opening as do all other
P-51 kits in all other scales, rather than being the wing main spar. This can
be corrected without a lot of effort with Evergreen strip for those so inclined.
Drop tanks are provided, with a choice of the 75-gallon metal tanks or the 108-gallon paper tanks that were only used in the 8th Air Force. Alternatively, two 250-lb bombs are provided.
Out
of the box, the kit makes up as a P-51D-25NA Mustang. This is because only the
“Los Angeles” canopy is provided and because of the under wing armament.
Luckily, the canopy is bulged correctly along the front end of the canopy,
something most models have missed unless you were using Falcon vacuform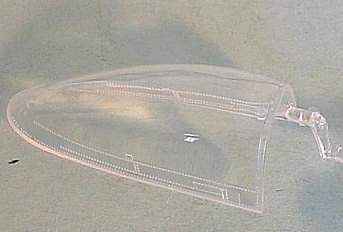 canopies. The kit provides rockets and zero-length launch stubs, which did not
appear till the P-51D-25NA. Unfortunately, where another model company might
have elected to flash over the positioning slots for the rocket stubs, thus
preserving the lower wing surface, the slots here are molded open, requiring
them to be filled if unused. Fortunately, since you will be sanding down the
surface to get rid of the divots anyway, filling in the holes won’t cause any
problems with the ultimate look.
canopies. The kit provides rockets and zero-length launch stubs, which did not
appear till the P-51D-25NA. Unfortunately, where another model company might
have elected to flash over the positioning slots for the rocket stubs, thus
preserving the lower wing surface, the slots here are molded open, requiring
them to be filled if unused. Fortunately, since you will be sanding down the
surface to get rid of the divots anyway, filling in the holes won’t cause any
problems with the ultimate look.
The cockpit is, well... it’s there. The money saved not doing the divots could have been profitably invested in a bit more detail here. The floor is completely smooth, with none of the gas gauges or anything else. One can modify this to correct it, and lightly sanding the floor before painting it flat black will give it the look of a wooden floor painted with non-skid. Most of the controls on the right cockpit wall are less detailed than one finds in a 1/48 kit, and would benefit from being re-done with plastic sheet stock, or waiting until the aftermarket boys start selling $40 resin cockpit replacements. If you Future the canopy and pose it closed, what’s in the cockpit will look fine.
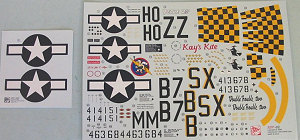 The decals provide
markings for three P-51Ds from 8th Air Force Fighter Groups. One is
the well-known “Petie 2nd” flown by top-scoring surviving Mustang
ace, and later Air Force Chief of Staff, John C. Meyers, from the 487th
Fighter Squadron, 352nd Fighter Group. The second is “Kay’s Kite”
from the 374th fighter Squadron, 361st Fighter Group. The
third is “Double Trouble II” from the 352nd Fighter Squadron, 353rd
Fighter Group. Unfortunately, the squadron codes for this last option are
incorrect, being done with yellow “shadow shading” when all available photos of
this airplane show the yellow border completely surrounding the black letters.
Markings for the other two options are correct. All three airplanes are in
unpainted aluminum without P-51 ID stripes on the wings or tail, or D-Day
stripes. Fortunately there will be bound to be lots of aftermarket decals
released over the course of coming months.
The decals provide
markings for three P-51Ds from 8th Air Force Fighter Groups. One is
the well-known “Petie 2nd” flown by top-scoring surviving Mustang
ace, and later Air Force Chief of Staff, John C. Meyers, from the 487th
Fighter Squadron, 352nd Fighter Group. The second is “Kay’s Kite”
from the 374th fighter Squadron, 361st Fighter Group. The
third is “Double Trouble II” from the 352nd Fighter Squadron, 353rd
Fighter Group. Unfortunately, the squadron codes for this last option are
incorrect, being done with yellow “shadow shading” when all available photos of
this airplane show the yellow border completely surrounding the black letters.
Markings for the other two options are correct. All three airplanes are in
unpainted aluminum without P-51 ID stripes on the wings or tail, or D-Day
stripes. Fortunately there will be bound to be lots of aftermarket decals
released over the course of coming months.
| CONCLUSIONS |
It is really unfortunate that every wrong decision that could be made was made in the development of this kit. Dragon is known for working with Subject Matter Experts on their armor kits, and it shows. It’s too bad they couldn’t have done the same with this project. They could have come up with the equivalent of the Hasegawa Bf-109s or Fw-190s or the Ki-84, and given themselves a license to print money, given the universal popularity of the P-51D Mustang. I hope they will take this criticism to heart on their next project, because this kit “coulda been a contendah.”
Out of the box with no modification, I give this kit a “C-”. If you take the time to clean up the overdone surface detail, the model can be brought up to “B+” or even “A-“ standard, and with the additional effort to straighten up the other mistakes, an “A+” model can result.
It’s sad that everything I have just mentioned is stuff that should have been done by the manufacturer to begin with. Had Dragon made the extra effort, the kit price might have gone up $10, making it comparable to the Hasegawa kits, which is a price most modelers would not complain about for similar quality. Had that happened, there are lots of folks - myself included - who would be building more than one of these, since there are nearly as many markings possibilities for the P-51D as there are for the Bf-109 or Fw-190.
Review Kit supplied by Dragon Models Limited.
December 2006
If you would like your product reviewed fairly and quickly by a site that has over 325,000 visitors a month, please contact me or see other details in the Note to Contributors.