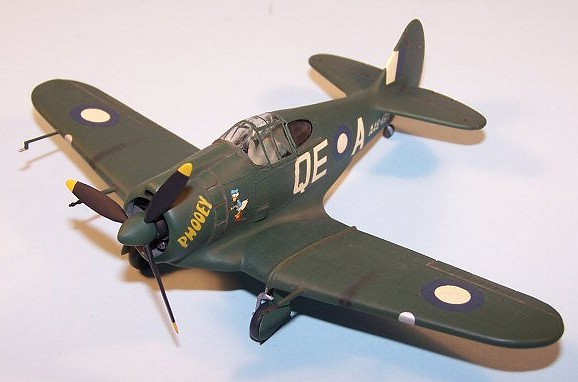
| KIT #: | 2099 |
| PRICE: | AUD$13.95 MSRP |
| DECALS: | Three options |
| REVIEWER: | Michael Johnson |
| NOTES: | ESCI decals used. |

| HISTORY |
The only aircraft that was completely designed built and operated exclusively in Australia during WWII. The Boomerang was not an exceptional fighter; it spent most of its career as a ground support aircraft and a feared one at that. Boomerangs were the only plane available to the RAAF at the beginning of the war, but were quickly replaced with Spitfires from Britain and the P-40 from the USA.
After Japan's
attack on Pearl Harbour, Australia found itself ill prepared. The only real
fighters the RAAF had were a small number of the Brewster Buffalo, which
were later found to be no match for the Japanese Zero fighter when flown by
the RAF defending Singapore. To overcome this shortfall and the possibility
that Australia could not get fighters from overseas, design work was
started on the CA-12 Boomerang. Using parts from the CA Wirraway, the
Boomerang was designed and built in only three months. 105 airframes were
built during 1942-3.
In 1943 a second batch of 95 improved CA-13 Boomerang mk II's were built.
The most obvious change was the addition of two 20mm cannon. Later versions
like the CA-14 had a turbocharger to improve high altitude performance and
the CA-14A had square tail feathers. Neither were produced in quantity
because of the availability of the Spitfire mk VIII. The final version was
the CA-19 Boomerang mk II with minor modifications over the CA-13. Only 49
CA-19's were built.
Preamble
I picked this elderly Airfix kit up at a local hobby shop sale for under $10 and after seeing the terrible decals, promptly picked up Red Roo’s most excellent sheet depicting a white tailed Boomerang. In the end I never used this particular sheet. More on that later!
| THE KIT |
The plastic parts are moulded in light grey plastic and are typical Airfix quality. Both fuselage halves, tail planes and the three wing parts are festooned in raised detail and rivets, which was going to make replacement of the raised detail difficult. There were numerous sink holes present on all the larger parts which would need to be filled.
The cockpit canopy and rear armoured glass were packaged loose as per Airfix standard practice.
The instructions were typical Airfix, simple and well illustrated, but the decals were terrible with images being vague, ill defined and in the main out of register. Aftermarket is a must here.
| CONSTRUCTION |
Construction (as always) started in the cockpit. Research indicated that the cockpit of the Boomerang was a tubular steel frame with no floor as such but as per the age of the kit only a rather simplified seat was supplied along with a pilot that looked a refugee out of a Frog kit. I decided to go the cheat’s way out and painted the cockpit interior flat black to hide the vast emptiness. I painted the seat Pollyscale Interior Green and added Tamiya tape harnesses, just to busy the seat up a little more.
The engine
moulding included the engine firewall and when cleaned up and painted
looked quite convincing for the scale. I painted the engine assembly flat
black and dry brushed various shades of Testors metallisers. I sprayed the
cowling interior with Tamiya AS-12
 Natural Metal.
I then cemented the fuselage halves together, which went together very well, with some filling, and sanding required to smooth over the joins. The cowling was a particularly bad fit requiring a good deal of filling and sanding to smooth out the join to the fuselage.
The lower wing half was offered up to the completed fuselage and a moderate amount of filler was needed to smooth over the joins fore and aft. Fit of the wing at the wing roots was average with a fair amount of remedial work needed to remove small steps and problems along each side. One area was so bad; I had to add plasticard shims to plug the gap. At the same time I added the horizontal stabilisers, cleaning up the resultant joints as well. This was a frustrating time as it seemed to take for ever to get all looking ready for primer. A subsequent primer coat revealed several flaws, particularly around the 20mm cannon roots, which were cleaned up quickly.
The undercarriage legs cleaned up well and look adequate when painted and washed. The undercarriage legs were painted Tamiya AS12 Natural Metal and Citadel Mithril Silver. Tyres were painted Aeromaster Tyre Black and weathered with a little Citadel Shadow Grey.
The undercarriage bay was painted with Pollyscale Interior Green and when cured, washed with a burnt umber sludge wash weathering mix, and then dry brushed with Interior Green lightened with a little white.
I then carefully cut the transparencies from the sprues, cleaned them up and attached them to the fuselage. Small amounts of PVA glue watered down with a little water were used to fill any glaring gaps with excess glue wiped away with a mark one moistened finger. The rear panels were then cleaned up and added to the fuselage. This proved to very frustrating with minute amounts of model glue added by toothpick to “tack” the transparency in place with gaps carefully filled using PVA glue. All transparencies were then masked with interior framing pre-painted in interior green. Now the kit was ready for painting.
| COLORS & MARKINGS |
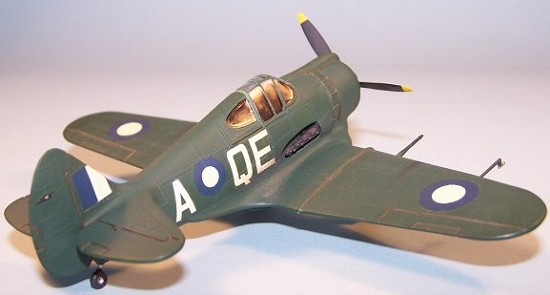
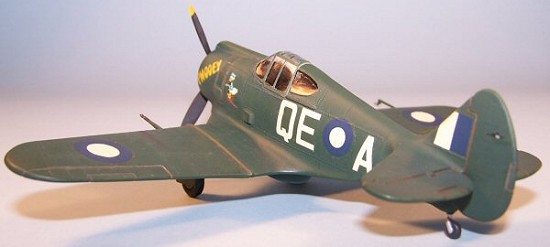
Kit decal options are provided for three aircraft – two, overall foliage green and one disruptive green/brown/sky blue. Although I had a new Red Roo decal sheet in my decal locker, I opted for “Phooey” which was included on the kit sheet. However, as mentioned earlier, the Airfix decals were only worth binning. So where could I source “Phooey” from? A quick Google search revealed that Esci released a Boomerang sheet many years ago and another question on ARC resulted in a sheet arriving at my doorstep a couple of weeks later. Thanks Hal!
Both the Esci and the Airfix instructions indicated that “Phooey” was Foliage Green with sky undersides. Yet another question on the Aussie Modellers Forum linked me to a profile done by Noel Barnes indicating that “Phooey” was actually overall Foliage Green.
 Here is
the description as provided with colour profile.
“CA-13 Boomerang, QE-A - "Phooey" of No 4 Squadron, RAAF. Flown by Flight Officer Ian Pedersen, Labaun, North Borneo, 1945. The aircraft made a forced landing at the Awar airstrip, Hansa Bay, New Guinea in February of 1945. It eventually crash landed on the 29th of July 1945.”
This is the profile I based my Boomerang on and as such an overall coat of Pollyscale Foliage Green was applied. Many thanks to Noel for contacting me and pointing me in the right direction.
At this stage I also sprayed the spinner cover green as well.
Once all the paint had cured, I applied several coats of Johnsons Future with a wide flat brush, kept especially for this purpose, to seal everything in and preparing the surface for the decals.
I then added the “hedgehog” exhaust, which had been cleaned up and pre-painted Modelmaster Burnt Iron into the exhaust recess on the starboard fuselage side.
Now the fun began. Pre-warned is pre-prepared!
Stage 1
I brush painted Microscale Decal Film on the Esci decals to prevent shattering.
Stage 2
Decals were soaked in very hot water whereby they promptly curled. I brush painted a puddle of Future onto the decal final location. The decal was placed and excess Future wicked away with a tissue.
Stage 3
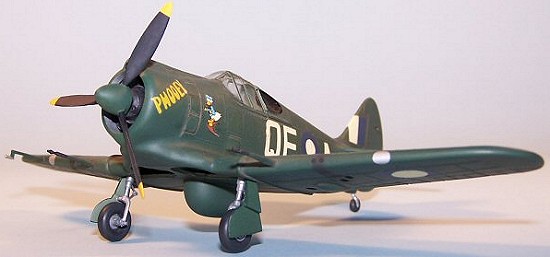 Each decal was massaged with a cotton bud into
conforming to the model surface carefully and with lashings of Future.
After a while each decals annoying necessity to curl was overcome. Future
was brushed over the top to lock down the decal.
Stage 4
After drying overnight an application of decal sol was used to snuggle each decal down further. When dry all looked great with only a little silvering corrected by careful brushwork.
In contrast, the Aussie Decals black dots I used to represent the machine gun wing openings and the Aeromaster solid silver decal stock used for the wing landing lights performed flawlessly with no decal sol needed. (The landing lights were circles punched out by a sharpened 3mm dia brass tube).
Total time for 18 decals was around 8 hours!
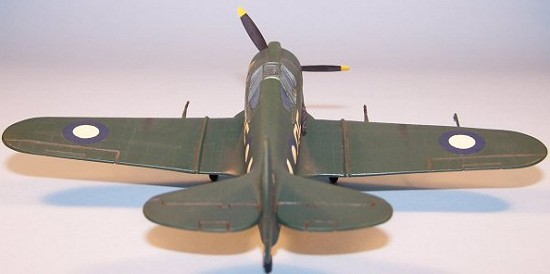
My favourite part of building a model kit would have to be weathering! I then used a raw umber Vallejo acrylic sludge wash to enhance the recessed lines defining the control surfaces and cowling gills.
As these aircraft served in the hot tropical sun, I “bleached” the high points of the upper surface paintwork with a lightened shade of the overall green. I the dry brushed Humbrol matt aluminium over the “wear” areas of the fuselage side under the cockpit and the wing roots.
Once again the model was put aside to cure and finally sprayed with Aeromaster flat, to give a matt appearance.
| FINAL CONSTRUCTION |
The undercarriage attachment was essentially trouble free, although I needed to use a 5mm length of brass tubing to install the tail wheel into the oversized hole under the tail. Finally I added the assembled propeller and the Pitot tube.
Careful applications of powdered pastel around the engine exhaust and gun barrels were then applied. I then lightened various panel lines to add a degree of sun bleaching. All masking was then removed and my Boomerang was complete!!
| CONCLUSIONS |
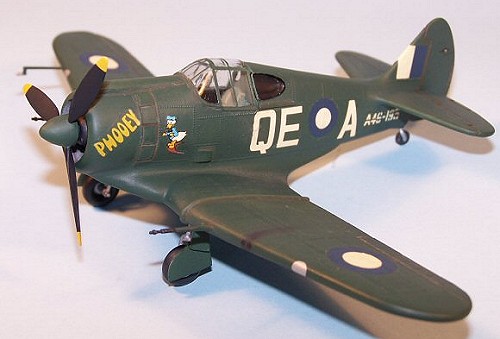 Well, I
happen to like this stubby little Aussie aircraft! BUT the frustration and
angst generated whilst constructing it almost outweighed my liking of the
Boomerang.
Unfortunately the Airfix release is the only game in town if you want a 1:72 Boomerang for your display shelf. This is changing soon though, with Special Hobby supposedly releasing a new Boomerang kit this year.
I would recommend this kit to any experienced modeller mainly due to its age. That said and done, a junior modeller could still get a great result straight OOB. There is also an alternative scheme available from Red Roo which is a massive improvement over the poorly printed kit decals. I chose to use very old Esci decals, which needed a great deal of work to perform well.
| REFERENCES |
World Aircraft Files
http://www.aussiemodeller.com/Images/4%20March%202005/Phooey.jpg
September 2005 If you would like your product reviewed fairly and fairly quickly, please contact the editor or see other details in the
Note to
Contributors.