| KIT #: | 5117 |
| PRICE: | $23.00 SRP |
| DECALS: | Two options |
| REVIEWER: | Dan Lee |
| NOTES: |
| HISTORY |
The
Mk XII was the first Spitfire powered by a Griffon engine to go into
service. The first of 100 Supermarine-built production aircraft started
appearing in October 1942; two RAF squadrons in total were equipped with the
XII. Mk XIIs were manufactured from Mk VC and Mk VIII airframes: early
production airc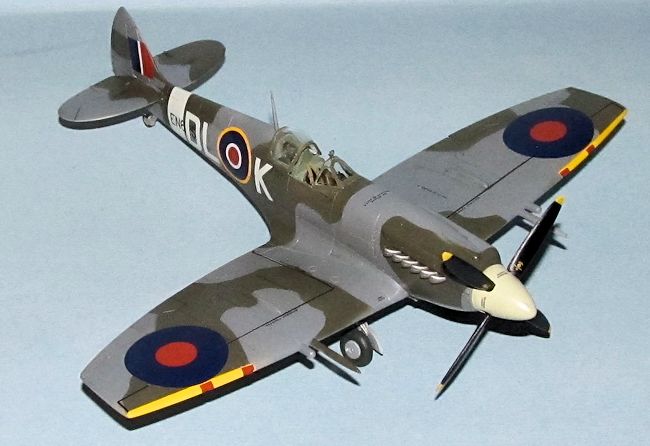 raft had the fixed tail wheels, Dunlop AH2061 pattern "five
spoke" mainwheels and small elevator balances. They had a single 85 gal main
fuel tank, giving a short range of little over 380 miles (610 km) on
internal fuel. All were fitted with the larger, pointed tip rudder. The last
45 or so Mk XIIs, were based on Mk VIIIs with two wing fuel tanks, each
containing a maximum fuel load of 14 gal, and featured the larger horn
balances, retractable tailwheel and undercarriage legs with torque-links,
"dished" leg fairings and the stronger Dunlop AH10019 four spoke wheels. The
wheels were occasionally fitted with disc-style covers. A later model IFF
was fitted, replacing the aerials from the tailplane tip to fuselage with a
rod aerial under the starboard wing. Another important feature of the
Griffon-engine Spitfires was the entirely flush-riveted finish which was
progressively introduced on all Spitfires
raft had the fixed tail wheels, Dunlop AH2061 pattern "five
spoke" mainwheels and small elevator balances. They had a single 85 gal main
fuel tank, giving a short range of little over 380 miles (610 km) on
internal fuel. All were fitted with the larger, pointed tip rudder. The last
45 or so Mk XIIs, were based on Mk VIIIs with two wing fuel tanks, each
containing a maximum fuel load of 14 gal, and featured the larger horn
balances, retractable tailwheel and undercarriage legs with torque-links,
"dished" leg fairings and the stronger Dunlop AH10019 four spoke wheels. The
wheels were occasionally fitted with disc-style covers. A later model IFF
was fitted, replacing the aerials from the tailplane tip to fuselage with a
rod aerial under the starboard wing. Another important feature of the
Griffon-engine Spitfires was the entirely flush-riveted finish which was
progressively introduced on all Spitfires
| THE KIT |
See Tom Cleaver’s preview of the kit for what is in the kit.
| CONSTRUCTION |
It all
began with the cockpit.
I opted
to use the Airfix cockpit with Eduard PE based on my previous experience
with building Spitfires.
I’ve
used aftermarket cockpits in a couple of my Spitfire models but always ended
up disappointed because most of the fine resin detail wasn’t visible due to
the small cockpit
 opening while I ended up with a big headache due to trying
to jam/cram a resin ‘pit into the model.
I’ve learned (painfully) that the most aftermarket needed is some PE
including a instrument panel, a few small details that can not be captured
in plastic and a PE harness.
A
resin seat is another option if you so choose.
I did not have any problems adding the PE detail to the cockpit.
opening while I ended up with a big headache due to trying
to jam/cram a resin ‘pit into the model.
I’ve learned (painfully) that the most aftermarket needed is some PE
including a instrument panel, a few small details that can not be captured
in plastic and a PE harness.
A
resin seat is another option if you so choose.
I did not have any problems adding the PE detail to the cockpit.
The fine
details were painted according to color photos from the internet and the
instructions.
Once the interior
was glued in place, I added the propellor mount and not the propeller as per
instructions.
I didn’t add the
prop due to the complications masking the rest of the plane so I just glued
the fuselage parts together
 The rest
of the kit assembled very easy following the instructions then I let it sit
for a month waiting for the glue to cure so as to avoid phantom seams.
I did some filling along the wing roots as well as the fuselage
centerline seam.
I wiped away
the excess filler in the wing roots (used Vallejo plastic putty for those
seams) and carefully sanded the filled (used CA glue for filler there)
centerline seam smooth.
The rest
of the kit assembled very easy following the instructions then I let it sit
for a month waiting for the glue to cure so as to avoid phantom seams.
I did some filling along the wing roots as well as the fuselage
centerline seam.
I wiped away
the excess filler in the wing roots (used Vallejo plastic putty for those
seams) and carefully sanded the filled (used CA glue for filler there)
centerline seam smooth.
The blisters for Griffon powered Spitfires were added last. Unlike the Mk22/24 kits, these fit very well and did not require much filler except around the join.
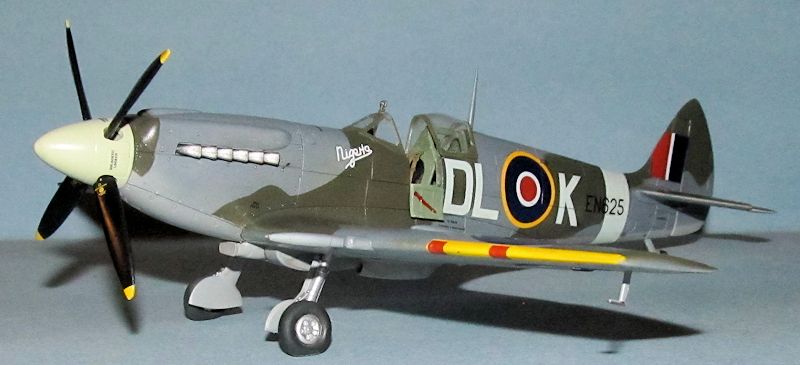
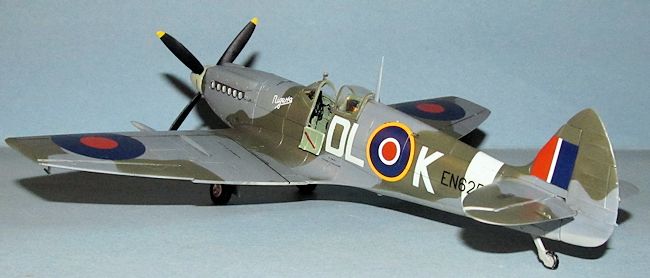
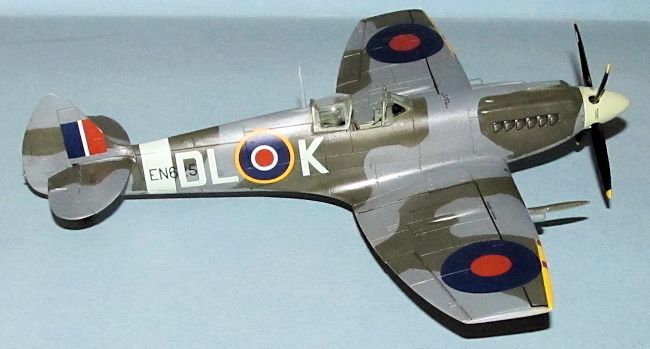
| COLORS & MARKINGS |
Spitfire
Mark XIIs were painted in the RAF mid war combo of Ocean Grey, Dark Green
and Medium Sea Grey pattern (all Tamiya colors.)
I preshaded the model using flat black.
Once the flat black was dry, I sprayed the wing leading edges white
then yellow.
A day later,
the leading edges were masked off with
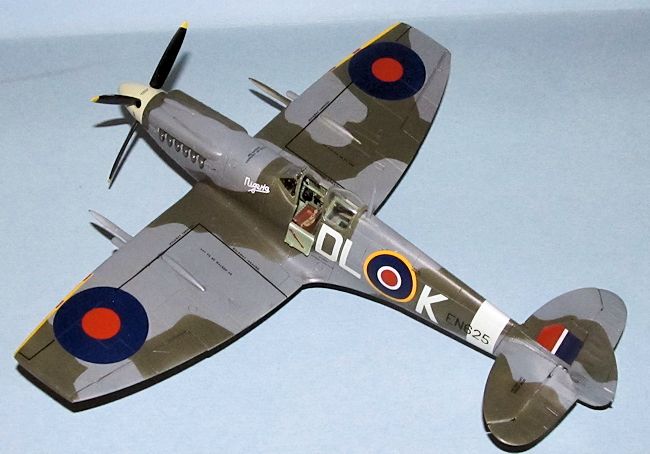 Tamiya tape and then I painted the
underside Medium Sea Grey, let it dry for an hour and then sprayed the
topside with two to three thin coats of Ocean Grey.
I used cut hard masks made from Tamiya and Painters tape for the Dark
Green portion (this took longer than actually painting the plane.)
I was lucky (or skilled, hey it sometimes happens) enough that I
didn’t have to do any touch ups.
Once dry, I sprayed on a couple of coats of Future to provide a gloss
coat for the decals.
Tamiya tape and then I painted the
underside Medium Sea Grey, let it dry for an hour and then sprayed the
topside with two to three thin coats of Ocean Grey.
I used cut hard masks made from Tamiya and Painters tape for the Dark
Green portion (this took longer than actually painting the plane.)
I was lucky (or skilled, hey it sometimes happens) enough that I
didn’t have to do any touch ups.
Once dry, I sprayed on a couple of coats of Future to provide a gloss
coat for the decals.
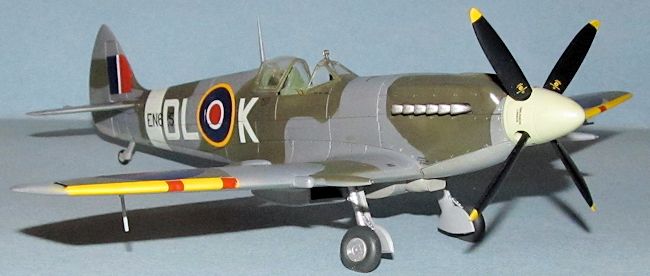
The prop
hub was painted Tamiya Sky while the prop blades were painted flat black.
When it was dry, the tips were masked off then painted flat white and
chrome yellow.
The wheel hubs
and landing gear were sprayed with Tamiya TS-30 Old Silver while the tires
were painted using RLM-66.
I opted
to use the 91 Squadron markings.
The decals were good and conformed well to the model with after using
some MicroSet and a little bit of SolvaSet.
The weathering was kept to a minimum using only a thin watercolor wash around the panel lines. The excess was removed using wetted Q-tips. I sprayed on two thin coats of Xtracrylix Satin Coat for the final coat.
| CONSTRUCTION CONTINUES |
 The
landing gear subassemblies were glued together and then once dry, glued to
the plane.
Next the various
antennas were glued in place.
The
landing gear subassemblies were glued together and then once dry, glued to
the plane.
Next the various
antennas were glued in place.
I opted
not to use the one piece open canopy.
Tom Cleaver is correct that it does not look right.
However, I ended up losing the rear clear piece and just put the
sliding canopy in position.
It looks fine until you look at it close up.
| CONCLUSIONS |
The Airfix Spitfire Mk XII is a pretty good kit for the price. It provides enough detail to build a decent looking Spitfire without needing much aftermarket and is an easy build. I am leaving the quibbling about accuracy to those who know way more than myself. It looks like a Spit Mk XII to me and that’s what I’m going with. Count me as a fan of what the “new” Airfix has done.
| REFERENCES |
http://en.wikipedia.org
August 2014
Copyright ModelingMadness.com. All rights reserved. No reproduction in any form without express permission from the editor.
Lf you would like your product reviewed fairly and fairly quickly, please contact the editor or see other details in the Note to Contributors.