| KIT #: | A05119 |
| PRICE: | $24.99 SRP |
| DECALS: | Two options |
| REVIEWER: | Dan Lee |
| NOTES: | Barracuda exhausts, wheels, cockpit set, intake, canopy and Xtradecal decals |
| HISTORY |
The Spitfire PR Mk.XIX grew out of a requirement for an extremely fast high altitude photo reconnaissance aircraft. Supermarine took the Rolls-Royce Griffon engine and merged it with the Spitfire PR Mk XI wings, Spitfire PR Mk X cabin and Spitfire Mk XIV airframe to meet the requirement. Some 225 were produced by the war's end.
 The MkXIX (WW2) or Mk19 (post war designation) was
the backbone of the late war and early Cold War RAF reconnaissance force. They
served from 1944 to 1954 ending their service as the last operational Spitfire
in the RAF.
The MkXIX (WW2) or Mk19 (post war designation) was
the backbone of the late war and early Cold War RAF reconnaissance force. They
served from 1944 to 1954 ending their service as the last operational Spitfire
in the RAF.
The Squadron
No 541 Squadron was tasked with carrying out photo reconnaissance missions all over Europe from the coast of Spain to the fjords of Norway from 1942 to 1945. It helped provide photo intelligence for Commonwealth forces fighting in Overlord, Market Garden, the liberation of the Netherlands and the final battle of Germany.
It was active between 1942 and 1946 before it was disbanded in the post war drawdown. No 541 Squadron was reactivated between 1950 to serve in Germany with the 2nd Tactical Air Force before being finally deactivated in 1957.
| THE KIT |
See Scott's excellent preview of the kit.
I had bought several resin sets from Barracuda Decals to use with this kit. The cockpit details set, the resin four spoke wheels (which are wrong for this build as they were used post war, oops), resin exhausts, resin intake and vaccuformed canopy which is the better option for an open canopy than the kit parts. The detail is excellent with minimal flash on the cream colored resin parts.
| CONSTRUCTION |
 I decided to use Roy Sutherland's Barracuda sets
with the PR Mk19 kit because I like to use aftermarket parts to spruce up the
details. Also wanted to see how they work out as I have a bunch of Spitfires I
would like to build.
I decided to use Roy Sutherland's Barracuda sets
with the PR Mk19 kit because I like to use aftermarket parts to spruce up the
details. Also wanted to see how they work out as I have a bunch of Spitfires I
would like to build.
The kit build started after cutting off the various resin details from their casting blocks. Each of the resin cockpit parts were added to the Airfix details using CA glue. The one thing I really like about the Barracuda cockpit parts is that they don't ask you to remove most or all of the original surface details which makes them easy to add to a build.
The cockpit was sprayed XF-71 (Mitsubishi Interior Green) and flat black while the seat was painted Tamiya XF-9 Hull Red to represent the Bakelite seat..
The Barracuda set also comes with resin seatbelts and restraints so I used those and brush painted them tan and silver. For the most part I think these cockpit sets are a pretty good idea as they cover a lot of missing details, but don't require much effort to add. When the paint was dry I added some of the detail set's cockpit stencil decals that could be seen through the small cockpit opening.
The cameras were sprayed with light grey with brush painted black lenses. I read in earlier reviews that other reviewers had issues with the cameras being aligned properly so I adjusted the cameras so they aligned with the windows before everything was glued in place.
The rest of the Mk19 went together without much
trouble owing to the well designed Airfix parts. One thing I did
 not like was
how they added the prop. I ended up having to glue the prop mount to one
fuselage half and then glue the rest of the plane together. I wish that Airfix
would follow what Hasegawa and Tamiya have done with securing a moveable prop to
the model (ie: with polycaps.)
not like was
how they added the prop. I ended up having to glue the prop mount to one
fuselage half and then glue the rest of the plane together. I wish that Airfix
would follow what Hasegawa and Tamiya have done with securing a moveable prop to
the model (ie: with polycaps.)
It turns out the only self induced issue I had was with the lower resin intake when I removed part of the surface cutting away the casting block. Used some CA glue to fill in the gaps and then used the same CA glue to secure it in place. The model sat in the box for a couple of weeks to allow the Tamiya extra thin glue to cure and then I used CA glue to fill in the seams and sanded the seams smooth.
Meanwhile I removed the resin prop blades from resin blocks and glued them into the resin prop barrel. The prop was then painted flat black and then when it was dry, the tips were masked off and painted flat white then flat yellow. The painted plastic prop hub parts were glued to the resin prop with CA glue. It was left off till final assembly.
I also cut out the vacuformed canopy using brand new Xacto knife blades and sanded the edges smooth. After washing out the plastic dust from the canopy pieces, they were masked them off using low tack Kabuki rice paper craft tape. I sprayed the interior color on and then went off to the painting stage.
| COLORS & MARKINGS |
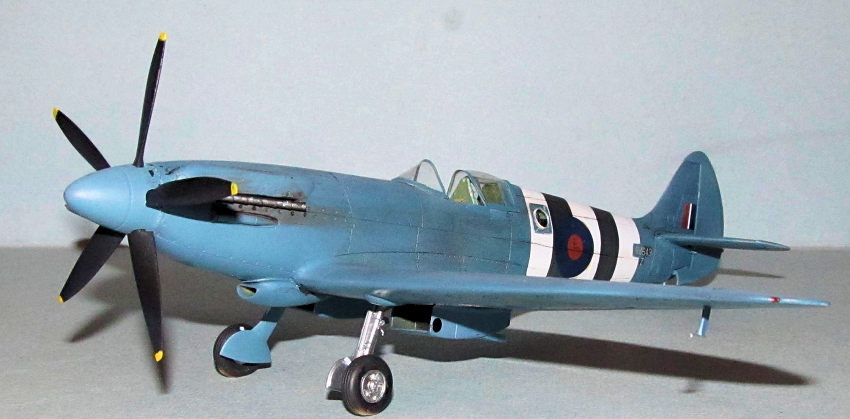
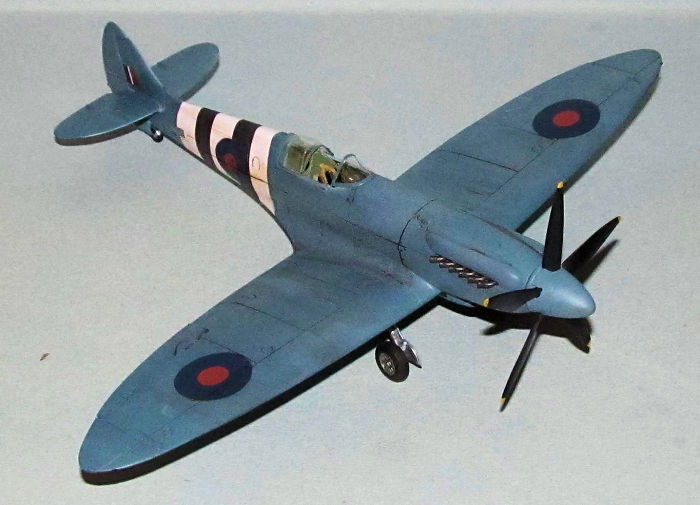
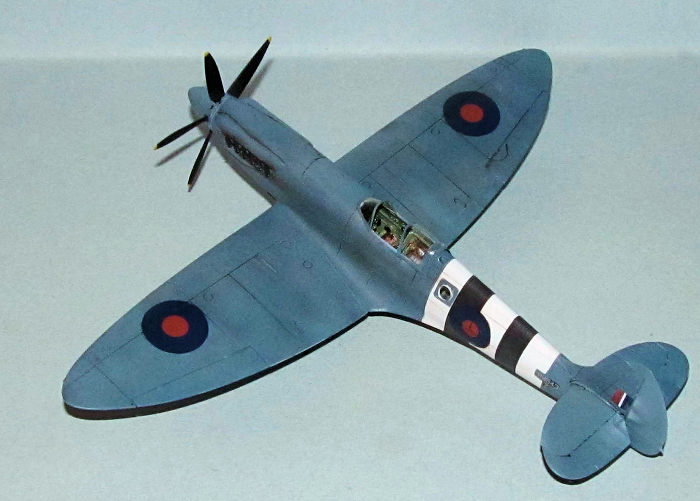
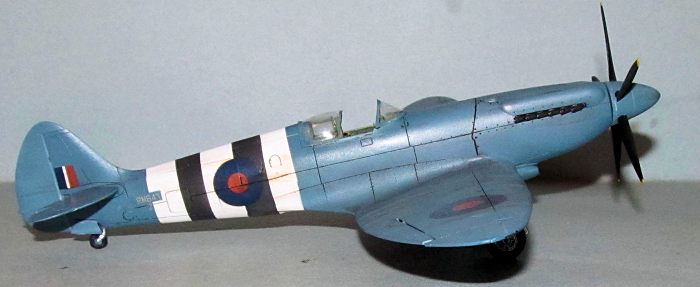
You can build a PR.Mk19 in any color as long as it is RAF PRU Blue. I am joking of course because sometimes a PR.Mk19 was painted in something other than PRU Blue, but that is rare. The camera port holes were masked off and canopy parts were held in place with white glue before the plane was preshaded flat black.
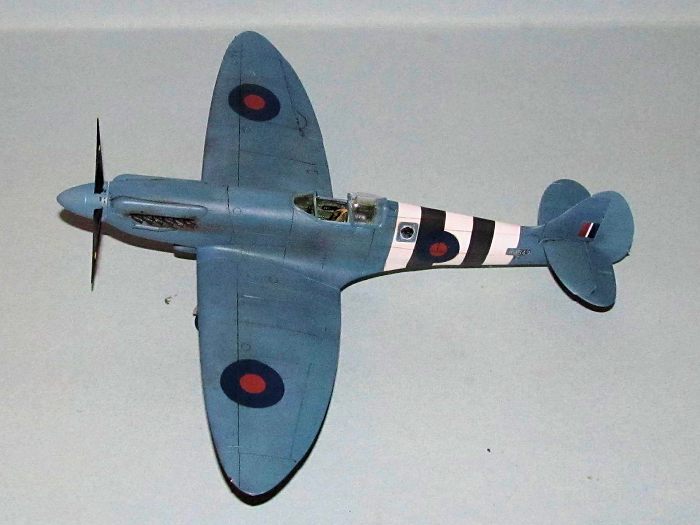 I sprayed on two thin coats of Xtracrylix PRU Blue
all over and on the other parts which I didn't attach at the time like the
ailerons and landing gear doors. Another thin coat of painted was sprayed on to
touch up the missed areas. When the PRU blue was dry, the rear fuselage was
masked off and then sprayed on flat black for the invasion stripes. When the
flat black was dry, I added strips of tape to mask off the white ares and it was
first painted gloss coat then painted flat white. I removed all the tape and
didn't have any over spray due to the initial gloss coat. I noticed that my
invasion stripes were a bit uneven and I am okay with it (poorly aligned
invasion stripes are more accurate due to the improvised nature.)
I sprayed on two thin coats of Xtracrylix PRU Blue
all over and on the other parts which I didn't attach at the time like the
ailerons and landing gear doors. Another thin coat of painted was sprayed on to
touch up the missed areas. When the PRU blue was dry, the rear fuselage was
masked off and then sprayed on flat black for the invasion stripes. When the
flat black was dry, I added strips of tape to mask off the white ares and it was
first painted gloss coat then painted flat white. I removed all the tape and
didn't have any over spray due to the initial gloss coat. I noticed that my
invasion stripes were a bit uneven and I am okay with it (poorly aligned
invasion stripes are more accurate due to the improvised nature.)
Once the paint was dry, two thin coats of Xtracrylix Gloss were sprayed on in preparation for the decals.
I used Xtradecal 48118 decal sheet which had the markings for RM643 No 541 Squadron 1944 as well as the Airfix stencils. I did not have a problem with the decals from either decal sheet. Micro Set and Micro Sol were used without issue to make the decals snuggle onto the surface details.
I used a mix based of diluted burnt umber
watercolor with a drop of dish soap to break the surface tension. The mix was
slathered onto the model and the excess was wiped awa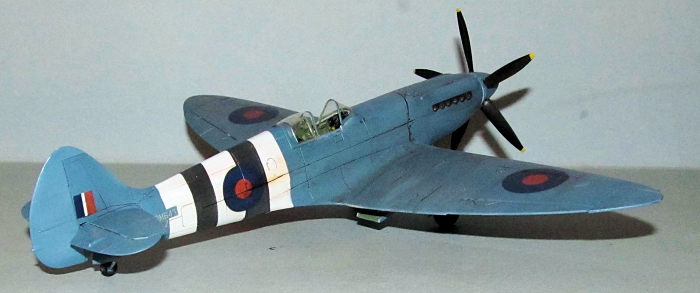 y using Q-Tips. I left more
than I usually would just to make the Spitfire look a bit more worn and vary the
tone of the monochromatic paint job.
y using Q-Tips. I left more
than I usually would just to make the Spitfire look a bit more worn and vary the
tone of the monochromatic paint job.
The model was sprayed with Xtracrylix Flat to seal everything in.
The various bits were glued in place including resin exhausts and the kit pitot tube. As it turned out the only parts that gave me fits during this part of construction was the landing gear as I had to use CA glue to secure them in place. If I build this kit again then I think I will get white metal replacement landing gear which is strange as I don't recall having extra wobbly landing gear with my Airfix Mk XII build.
| CONCLUSIONS |
The Airfix PR.19 kit is a nice kit on its own with only one issue which is the weakness of the landing gear. I think it looks a lot better with the Barracuda parts especially the vaccuform canopy, replacement prop blades, intake, wheels (which are wrong era for the markings I used) and the exhaust stacks.
Thanks to for the preview kit. You can find this kit at your favorite hobby shop or on-line retailer.
If you would like your product reviewed fairly and fairly quickly, please contact the editor or see other details in the Note to Contributors.
Back to the Main Page Back to the Review Index Page Back to the Previews Index Page