Academy 1/72
Hawker Typhoon
| KIT #: | 1664/FA 164 |
| PRICE: | AUD $10.00 |
| DECALS: | Two options |
| REVIEWER: | George Oh |
| NOTES: |
Beautifully moulded.
Inexpensive.
Thick decals. |
| HISTORY |
 Designed as the
replacement for the Hawker Hurricane fighter, the Typhoon was rushed into
service and proved to have a few airframe and engine teething problems that
needed resolution. By the time they
were fixed, a modified version was also being produced as the Tempest.
So the Typhoon was adapted into service as a ground-attacker, with its 4
x 20mm cannon supplemented by 8 x 60-pound rockets – the same weight as that
fired by an 8” Navy cruiser’s broadside (they fired 60-pound shells).
It was in this role that the ‘Tiffie’ earned its fearsome reputation as a
tank and train buster. As a side note,
pilots found the transition from Typhoon to Tempest very easy, and after flying
a Tempest, they suddenly likened the Typhoon a carthorse.
Designed as the
replacement for the Hawker Hurricane fighter, the Typhoon was rushed into
service and proved to have a few airframe and engine teething problems that
needed resolution. By the time they
were fixed, a modified version was also being produced as the Tempest.
So the Typhoon was adapted into service as a ground-attacker, with its 4
x 20mm cannon supplemented by 8 x 60-pound rockets – the same weight as that
fired by an 8” Navy cruiser’s broadside (they fired 60-pound shells).
It was in this role that the ‘Tiffie’ earned its fearsome reputation as a
tank and train buster. As a side note,
pilots found the transition from Typhoon to Tempest very easy, and after flying
a Tempest, they suddenly likened the Typhoon a carthorse.
| THE KIT |
My 6 y-o son
was accompanying me to my local hobby (read model) shop (LHS) when he spied an
Academy 1/72-scale Typhoon. He
latched onto it and pleaded with me to buy it for him.
Well, I bought it for him (he’s irresistible), and a second one for me so
that I could teach him about building models by building them in parallel (Like
this, do that).
| CONSTRUCTION |
 Building these
models was pretty routine. We
started with the office.
Surprisingly little filler was needed on either of the models because the fit
was quite good. I was even able to
show my son some drybrushing by using the radiator and IP.
He, of course, wanted to add tape seatbelts because I did.
Normally, I woulda glued the upper wings
to the fuselage, but I didn’t this time because he is a bit young to hold it all
steady while it dried. Later.
After only a few sessions, they were ready for painting.
Building these
models was pretty routine. We
started with the office.
Surprisingly little filler was needed on either of the models because the fit
was quite good. I was even able to
show my son some drybrushing by using the radiator and IP.
He, of course, wanted to add tape seatbelts because I did.
Normally, I woulda glued the upper wings
to the fuselage, but I didn’t this time because he is a bit young to hold it all
steady while it dried. Later.
After only a few sessions, they were ready for painting.
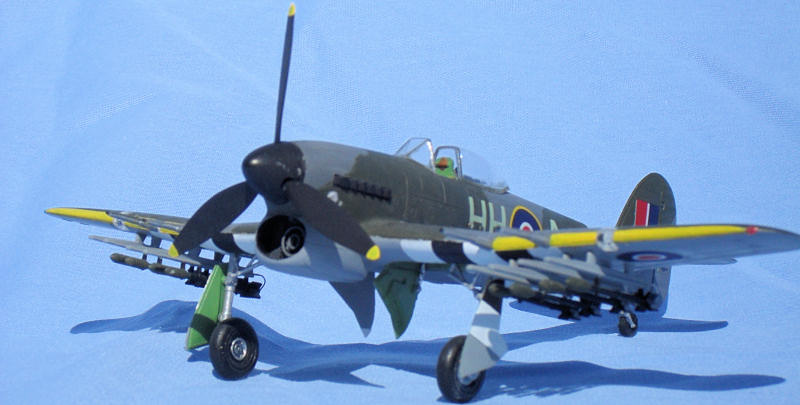
| COLORS & MARKINGS |
Painting
Both of us
painted our Typhoons with Citadel Miniatures acrylic paints because my son is a
bit young for MY airbrush, and the paints brush nicely.
The belly was done with Space Wolves Grey, a light blue/grey.
OK, I had to mask the fuselage & canopy for him before we used Fortress
Grey, a dark grey, on the sides and upper surfaces.
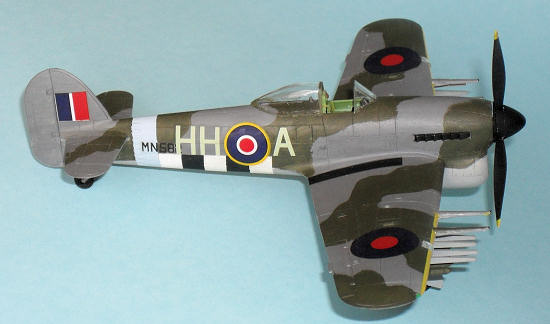
Decaling
I will digress
here because, while I allowed my son to merely attach his decals, I, on the
other hand, still tried to do the job properly (‘cos I’m BIGGER than him).
I started with an over-wing invasion stripe decal.
It went on like a mitten – thick, non-conforming and proud of the
surface, even after applications of Microset and Microsol.
So (when my son wasn’t around) I painted them on using CM Skull white and
Chaos black, with masks of 6mm Tamiya tape.
The UC doors were held in position with blu-tac to get the striping
right. But I didn’t have the
capability to paint the rest of the decals and my spare decals couldn’t agree on
a uniform set of colours, so I reluctantly used the kit decals.
This time, I positioned them over puddles of Future Floor Wax, hoping
that they’ed be sucked down into the engraved detail.
Nope (Rats!!). More Future
on and around them did not fix the problem.
On advice from another modeller, I applied a sponge, soaked in near
boiling water, over the top of them.
This caused the edges of the decals to curl upwards, and the Future to
turn white. (Double Rats!!).
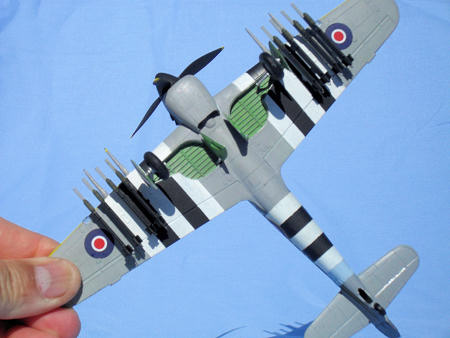
| FINAL CONSTRUCTION |
 The underwing
rockets were a little tricky to position because they need to be vertical and
parallel to each other. Once they
were safely attached, I had the sudden urge to attach firing wires from the
tail-pipe of each rocket to the rear of its rocket rail.
I drilled fine holes in the rear end of the rails and the tails, then
attached the tails. The rail/tail
height was measured and I found a drill-bit of the same diameter.
Eight lengths of thin wire were bent over the drill bit, trimmed to
length, then the tips were inserted into the holes with superglue.
There were no such problems with the UC legs and doors, though the rams
that open the inner doors were a tad too long so that they lean inwards past
vertical. But the inside faces are
nicely detailed, and I LOVE the way that the propeller can be attached after
final assembly has been completed.
The underwing
rockets were a little tricky to position because they need to be vertical and
parallel to each other. Once they
were safely attached, I had the sudden urge to attach firing wires from the
tail-pipe of each rocket to the rear of its rocket rail.
I drilled fine holes in the rear end of the rails and the tails, then
attached the tails. The rail/tail
height was measured and I found a drill-bit of the same diameter.
Eight lengths of thin wire were bent over the drill bit, trimmed to
length, then the tips were inserted into the holes with superglue.
There were no such problems with the UC legs and doors, though the rams
that open the inner doors were a tad too long so that they lean inwards past
vertical. But the inside faces are
nicely detailed, and I LOVE the way that the propeller can be attached after
final assembly has been completed.
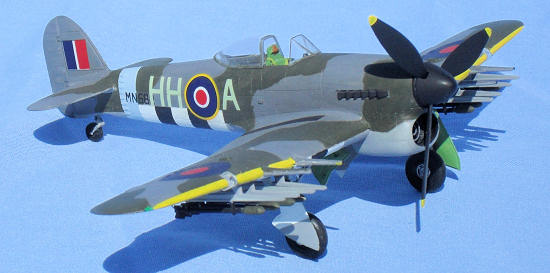
| CONCLUSIONS |
 I dunno how
long it took us, but my son & I enjoyed the build and the time together.
Perhaps he never liked the paint job, because he gave it several coats,
usually of differing colours. We
both liked the way our respective models turned-out, and my son loves to blow
the propeller around. If I
was to build another, I’d start by procuring an after-market decal set, ‘cos the
Academy ones are waaaaaaaaay too thick and rigid (and now I’m gun-shy of Academy
decals from now on). I gotta go
now, because my son has acquired an Airfix Blenheim from my stash, and I’d
better find another one for me.
I dunno how
long it took us, but my son & I enjoyed the build and the time together.
Perhaps he never liked the paint job, because he gave it several coats,
usually of differing colours. We
both liked the way our respective models turned-out, and my son loves to blow
the propeller around. If I
was to build another, I’d start by procuring an after-market decal set, ‘cos the
Academy ones are waaaaaaaaay too thick and rigid (and now I’m gun-shy of Academy
decals from now on). I gotta go
now, because my son has acquired an Airfix Blenheim from my stash, and I’d
better find another one for me.
| REFERENCES |
The box-top and
kit instructions.
September 2010
Copyright ModelingMadness.com. All rights reserved. No reproduction in any form without express permission from the editor.
If you would like your product reviewed fairly and quickly, please contact the editor or see other details in the Note to Contributors.