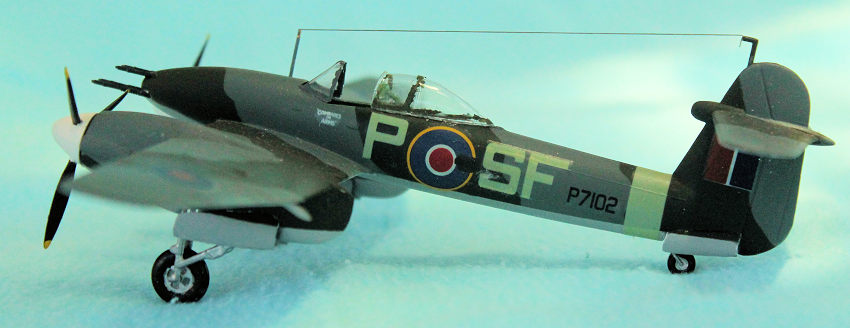
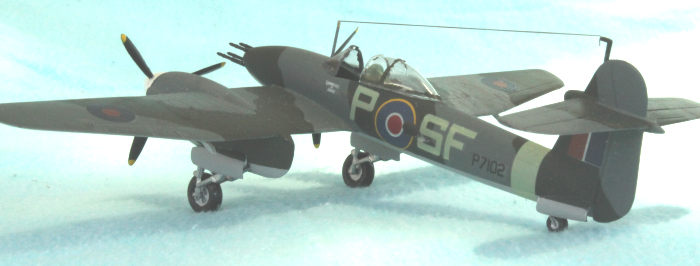
Airfix 1/72 Whirlwind I
| KIT #: | 02064 |
| PRICE: | AU$8.00 |
| DECALS: | One option |
| REVIEWER: | George Oh |
| NOTES: | Second (1978) moulding from Airfix. Superior to the first. |
| HISTORY |
Developed by
Westland Aircraft
in the late 1930s, the Whirlwind
was a contemporary of the
Supermarine Spitfire
and
Hawker Hurricane.
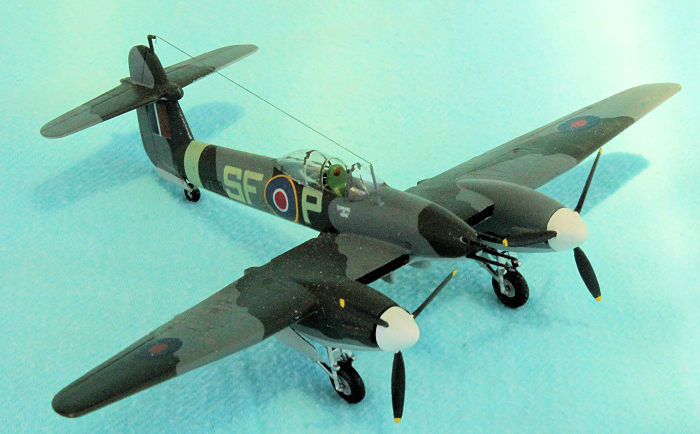
It was unique in many ways. With two engines, it was one of the fastest aircraft
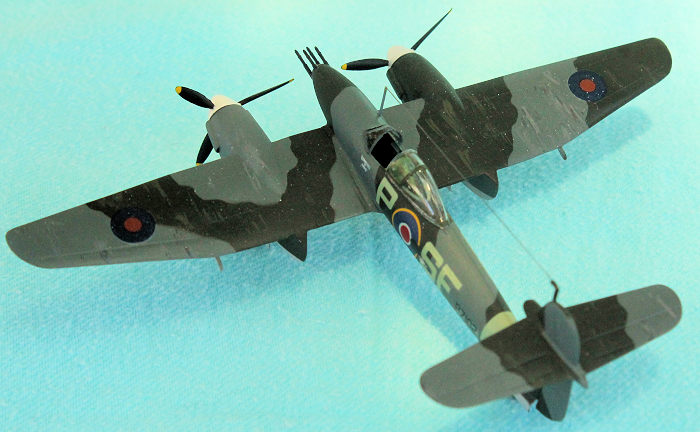
in service when it flew. By sporting four 20mm cannons, it was more heavily
armed than any other fighter in existance. But its most revolutionary feature
was its bubble canopy, which was destined to become the norm on fighter planes.
Initially produced as a fighter, the
 Whirlwind was tried as a ground-attacker by
fitting it with two external bomb racks. There were even moves to fit it with a
37mm cannon.
Whirlwind was tried as a ground-attacker by
fitting it with two external bomb racks. There were even moves to fit it with a
37mm cannon.
However, four things killed the Whirlwind. Production of its Rolls-Royce Peregrine engines was reduced, than ceased, in favour of the Rolls-Royce Merlin. The Merlin-engined Spitfires and Hurricanes were beating the Luftwaffe and their designs were being modified to fit them with 20mm cannons. Also, another aircraft with two Merlins, four 20mm cannons AND four machineguns was coming into production – the Mosquito. The final nail in the Whirlwind’s career was the introduction into service as a ground-attacker, of the rocket-firing Typhoon. Even the 37mm cannon option was trumped by the fitting of two 40mm cannons onto a Hurricane.
This left the Whirlwind with no role, and no engines, so the RAF withdrew it from service in 1943. Just over 100 were ever built, and it had equipped only two RAF squadrons as a successful fighter and fighter-bomber.
(with thanks to Wikipedia)
| THE KIT |
 I only bought this kit only because I was moved to aid
a friend who was reducing his stash – besides, my younger brother had one when
we were boys. It was started in that the visible insides were painted a (wrong)
dark green. Unfortunately for me, I discovered the deficiencies of this kit when
I was deep into the build. The red centres and the yellow surrounds of the
decals were visibly off-register, and the canopy was missing. Fortunately, I had
Falcon's No.2 vacform canopy set that contained a suitable canopy. But decals
would have to be found from somewhere. This is Airfix’s second mould of the
Whirlwind, because this one has fairings suspended under the belly of the
fuselage, and the engine nacelles are moulded as part of the lower wing halves.
The kit’s main deficiencies are the fact that wings have little to attach them
securely to the fuselage, and each 20mm cannon barrel is merely a featureless
blunderbuss. These problems doomed the kit to stay in its box.
I only bought this kit only because I was moved to aid
a friend who was reducing his stash – besides, my younger brother had one when
we were boys. It was started in that the visible insides were painted a (wrong)
dark green. Unfortunately for me, I discovered the deficiencies of this kit when
I was deep into the build. The red centres and the yellow surrounds of the
decals were visibly off-register, and the canopy was missing. Fortunately, I had
Falcon's No.2 vacform canopy set that contained a suitable canopy. But decals
would have to be found from somewhere. This is Airfix’s second mould of the
Whirlwind, because this one has fairings suspended under the belly of the
fuselage, and the engine nacelles are moulded as part of the lower wing halves.
The kit’s main deficiencies are the fact that wings have little to attach them
securely to the fuselage, and each 20mm cannon barrel is merely a featureless
blunderbuss. These problems doomed the kit to stay in its box.
| CONSTRUCTION |
I started building this model because of a lucky find. I was marching along a road (I was a soldier) when I picked-up a flat strip of steel 8”/200mm long, 3mm wide, @1mm thick and quite rigid. Instead of binning it (my original intent), I kept it because I immediately realized that its rigidity and length would make it an ideal spar to stiffen and level the very-thin wings of this model, and its size would allow it to fit inside the wings. Good thing it was a Friday, ‘cos that evening, I began construction. If I knew how hard this build was going to be, I might have left it in the box.
 There were three things I
targeted for attention (besides reinforcing the thin wings with this metal
spar). I’d do a little work inside the cockpit, I wanted to replace the
kit-supplied cannon barrels with something more refined that I’d seen previously
on a website and I’d use the vacform canopy. I’ve never succeeded with a vacform
anything before.
There were three things I
targeted for attention (besides reinforcing the thin wings with this metal
spar). I’d do a little work inside the cockpit, I wanted to replace the
kit-supplied cannon barrels with something more refined that I’d seen previously
on a website and I’d use the vacform canopy. I’ve never succeeded with a vacform
anything before.
The kit dictated that the spar should attach to the underside of the wing tops. The first step was to cut a gap in the wall of both upper wing roots, to accept the spar, then to glue it underneath one (the port/left) upper wing top half with 5-minute epoxy glue. To get the wings right, I clamped the fuselage halves together, dry-fit the upper wing halves, and clamped the spar to the underside of the upper starboard wing half. With this ensuring that both wings were level, I could safely glue the port wing to its fuselage. While this dried, the cockpit parts received my attention, which involved narrowing the seat and adding tape seat belts. I also removed most of the plate that blocked the tail wheel well, and thinned the edges.
 Next day, I inserted the
seat (and a few lumpy shapes) into the cockpit, closed the fuselage, glued the
starboard wing to its fuselage, and finally epoxied the spar to the starboard
wing. Here the build stalled because I had to devise a means to insert brass
tubes into the engine nacelles to accept the brass shafts that I was planning
for the propellers. Normally, I’d embed the tubes into a blob of Milliput, but
as I’d recently run out of it, I resorted to mounting each tube in a suitable
disk cut from plastic card. Attaching the nose tip, the underwing halves and the
tailplanes completed the airframe. This took me to Saturday night – warp-speed
for me. But the airframe was complete.
Next day, I inserted the
seat (and a few lumpy shapes) into the cockpit, closed the fuselage, glued the
starboard wing to its fuselage, and finally epoxied the spar to the starboard
wing. Here the build stalled because I had to devise a means to insert brass
tubes into the engine nacelles to accept the brass shafts that I was planning
for the propellers. Normally, I’d embed the tubes into a blob of Milliput, but
as I’d recently run out of it, I resorted to mounting each tube in a suitable
disk cut from plastic card. Attaching the nose tip, the underwing halves and the
tailplanes completed the airframe. This took me to Saturday night – warp-speed
for me. But the airframe was complete.
Naturally, she needed some filling and sanding to smooth things over, especially at the underwing / fuselage joins, and at the back of the nacelles. Another chore was to split the undercarriage doors, and thin them to an apparently-thin appearance. These jobs took me a looooong time - especially the filling/sanding/priming repeats.
| COLORS & MARKINGS |
The belly got a couple of
brush coats of Citadel Miniatures fortress grey that was lightened with some of
their skull white. Then it was masked with tape and the top sprayed with Tamiya
XF66 Light grey (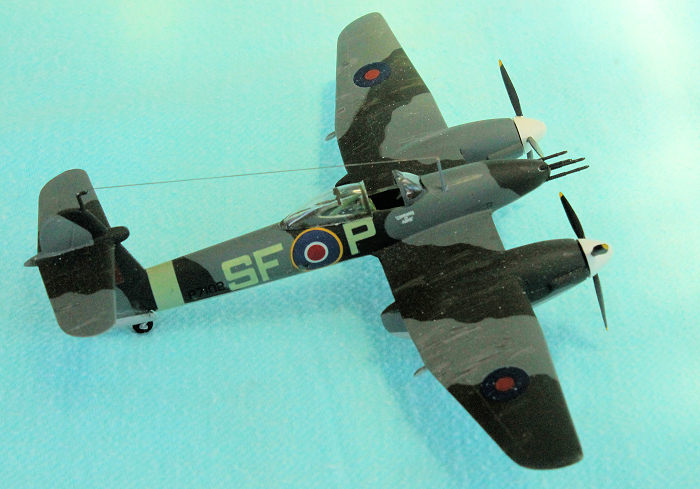 which is a dark grey). Its cam was XF11 IJN green (OK, so the
Paint Police hate me) sprayed around masks of paper cut from an expanded copy of
the kit instructions. She received two coats of Future as a foundation for the
decals. Lightening the paint was a mistake because I forgot to paint the
undercarriage doors. Because I couldn't replicate the shade, I eventually had to
repaint the whole underside.
which is a dark grey). Its cam was XF11 IJN green (OK, so the
Paint Police hate me) sprayed around masks of paper cut from an expanded copy of
the kit instructions. She received two coats of Future as a foundation for the
decals. Lightening the paint was a mistake because I forgot to paint the
undercarriage doors. Because I couldn't replicate the shade, I eventually had to
repaint the whole underside.
The red centres of the kit decals were out of register. Rats!! Well, I received a set of markings from my good friend, Mr. Ed, with separate red centres, but the yellow surrounds were out of register, too. Double rats!! From these, and bits from the decal dungeon, I eventually cobbled a set together. At all times, I used the Micro set/sol system to settle them. They were sealed under a clear flat coat of strained Gunze H 20 during which time my spraygun spat-out some snow at my model. And nothing I did would remove it all. Tripple rats!! This earned my Whirlwind a long stint on the Shelf of Doom (through no fault of its own).
| FINAL CONSTRUCTION |
Construction resumed when I
dragged it down (to clear space for another model – but that is another story).
To hide the flecks of snow, I dotted each with a spot of paint which I dragged
back along the model. Hopefully it looks like weathering. I painted the fronts
and rears of the exhaust covers so that they looked more like in/outlets and
less like mere bulges. I would have preferred to drill them out, but there is no
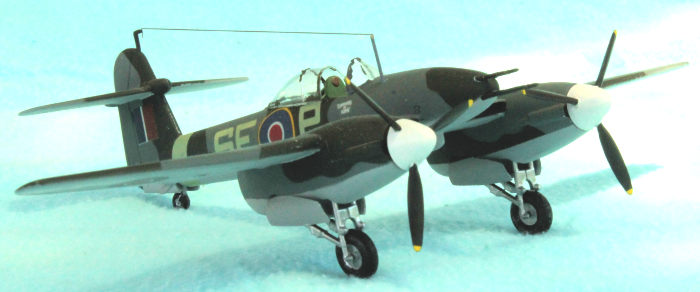
such thing as a semi-circular drillbit. Now, I was able to add the legs, wheels
and doors underneath. I hate the fact that there is little contact surface
between the undercarriage doors and the rest of the model. I discarded the
plastic antenna mast in favour of a brass wire that extends right do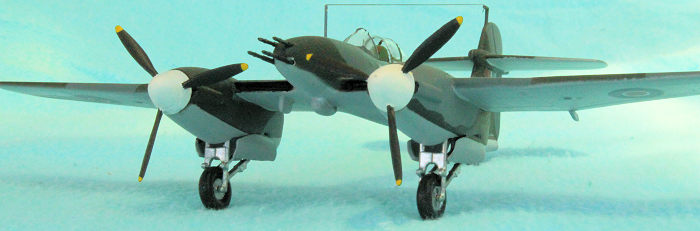 wn to the
bottom of the fuselage (for a good foundation). For her teeth, I used a set of
‘Masters’ 20mm cannon barrels. These are beautifully turned from brass and
incorporate the external recoil spring. They cost peanuts, and were designed for
a Mk.II Hurricane with each barrel being supplied with a separate fairing (which
I consigned into the spares box) for its base. Paint the canopy frame (I’d
forgotten it) on the ‘Falcon’ vacformed canopy, attach it with white glue, and I
consider her done. Nope – add an EZ-Line antenna wire.
wn to the
bottom of the fuselage (for a good foundation). For her teeth, I used a set of
‘Masters’ 20mm cannon barrels. These are beautifully turned from brass and
incorporate the external recoil spring. They cost peanuts, and were designed for
a Mk.II Hurricane with each barrel being supplied with a separate fairing (which
I consigned into the spares box) for its base. Paint the canopy frame (I’d
forgotten it) on the ‘Falcon’ vacformed canopy, attach it with white glue, and I
consider her done. Nope – add an EZ-Line antenna wire.
When I removed the masking from the canopy, the tape took with it some of the paint from the canopy framing. Then when I shook a piece of masking off my fingers, it fell onto a side roundel and ripped-off a portion when I snatched it off. Double double rats!! In a final insult, the belly fuselage seam and underside wing/fuselage seams decided to reappear. Rats, rats and TRIPPLE rats!!! I saw that I'd forgotten to install the underwing down-lights, so I did so with Krystal Kleer. That's when I saw that I'd not sealed the seam between the main undercarriage legs. And I can't get to them now. Triple Double Rats!!!!
| CONCLUSIONS |
This was a build that fought me all the way. The decal and painting problems didn't help. The build WAS enhanced by the good fit of the parts and bolstered by the inclusion of that steel spar that levelled the wings and reinforced them. It 'aint that bad a kit to build for an experienced modeller, but be warned. I do not doubt that other modellers could do a much better job on this kit than I did. This model sits at the back of one of my display shelves and I don't talk to it.
| REFERENCES |
Just the instructions, and the boxart, and Wikipedia.
8 January 2018
Copyright ModelingMadness.com
If you would like your product reviewed fairly and fairly quickly, please contact the editor or see other details in the Note to Contributors.
Back to the Main Page Back to the Review Index Page Back to the Previews Index Page