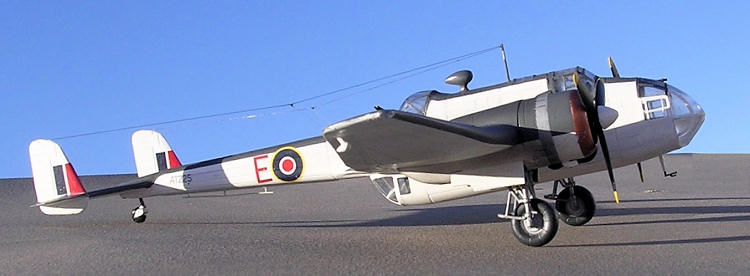
Valom 1/72 Hampden B.I
| KIT #: | 72033 |
| PRICE: | €28.00 |
| DECALS: | Two options |
| REVIEWER: | Carmel J. Attard |
| NOTES: | Short run kit with etched metal parts |

| HISTORY |
In September 1932 the Air Ministry issued its specification B9/32 for a
twin-engined bomber which represented a big hope for the British Bomber Force.
Handley Page and Vickers, two aircraft companies were each awarded a contract
and the resulting prototype, the HP52 and the Vickers Type 271 flew within a
week of one another. The former on
 Following
trials at the Aircraft and Armament Experimental Establishment, at Martelsham
Heath, and at the
Still the Hampden’s inadequate defensive armament caused it suffer
heavily at the hands of the German fighters when used as a day bomber. On the
Night of 25-26 August 1940 Hampdens and Whitleys took part in the RAF’s first
raid on Berlin and the Hampdens continued to support the night bombing offensive
till
late 1942, when in the night of 15-16 September aircraft of the Royal
Canadian Air Force No 408 Squadron attacked Wilhelmshaven in the Hampden’s final
sorties with Bomber Command. From April 1942 the Hampdens had gradually been
transferred from Bomber Command to Coastal Command, entering service
with the latter as a torpedo bomber in the form of Hampden
TB Mk1. The first two units were No144 and 455 Squadrons, the latter
 a RAAE unit
and detachments from both Squadrons went to the
In spite of the inadequacies the Hampden did have its good points. Among
them were the pleasant handling characteristics and an excellent view to the
pilot. Still the accommodation was very crammed and in view of the narrow
fuselage interior individual crew members being able to change places only with
extreme difficulty, which posed great problems in case of injuries. In all 1432
Hampden bombers were built, 502 of these by Handley Page, 774 by English
Electric, 160 in
| THE KIT |
 The kit
comes in a top opening cardboard box having an impressive box cover art work of
a Hampden P1333 of No 49 Squadron RAF circa 1940 in formation with another
Hampden on a bombing mission over enemy territory. Upon opening the box there
are two sprues of medium grey coloured plastic, another smaller sprue of
transparencies and a fret of brass etch items. The A5 size instructions folded
to make a 12 page booklet contains 13 stages of construction, easy to follow
with clear illustrations. There is one page containing five black and white
photos showing interior detail. Judging from these photos gives a clear
indication of how crammed and narrow the interior of the bomber is. There is a
page dedicated to no less than 5 equivalent brands of paint which include
Humbrol, Agama, and Model Master. Another page contains specification and
history of the bomber. Two more pages depict two lots of colour 4-view
information drawing which are useful when painting the model and for reference
for decal emplacement.
For a look at the parts, visit the preview.
| CONSTRUCTION |
The fuselage and wing parts are separated from the sprues. One will notice that there are no locating pegs and corresponding locating holes on any of these parts. The surface of these had detailed recessed panel lines. The cockpit area is first assembled. The brass items for the instrument panel, seats harnesses, rudder pedals and side consoles are all included and assembled in the fighter type narrow cockpit, crammed as it may be just like the real thing. There is a plastic bomb bay roof that fits nicely and one may start to wonder why the kit did not incorporate open doors and stores. There are reasons to believe that Valom has plans for other future releases of the type in different format that will include also stores. The kit also contained 8 pairs of rack brackets I form of inverted ‘Y’ but were nowhere to fit on this kit so far.
The dorsal gun turret had a crew seat that
fits on a bracket attached to one side of the fuselage. There is a clear canopy
for this 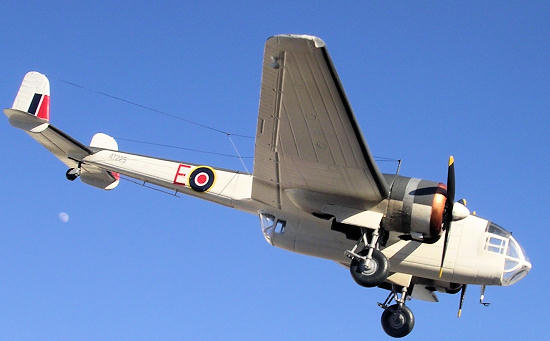 station
but I had to cut a slot to fit the twin gun position. The alternative was not to
mount the Vickers guns.
The transparencies are very clear
and contain recessed frame detail. As for the ventral single gun position there
is indication to drill the transparency to fit the gun into. Unless one desires
to open the transparent canopies I fond it that it is not worth detailing the
interior more than given with the kit as these are rather thick in spite of
clarity of the plastic and little could be appreciated from the outside. There
are two square windows just aft of the bomb bay which I preferred to glaze with
Kristal Kleer. With all the parts including the nose seat, all in place I then
closed the fuselage together.
Dry fitting the nose transparency indicated that
this was wider than the place where it was to sit. I have partly solved the
problem by inserting a spacer made from sprue to the interior to keep the
fuselage from caving in. The lower clear nose part fitted as it should. The
cockpit canopy had its sides moulded separately. The reason being that these
windows were slightly concave and hence why coming in part. It was a difficult
task to put these together unless one makes a ground diorama to justify these
being left open. The best way that I found to tackle this was to assemble the
canopy in one piece before bringing it to sit on its spot on the fuselage. The
tail [plane unit splits horizontally which also caries part of the tail boom.
Once assembled the whole tail unit is butt jointed to the fuselage. The
instruction sheet indicates that the tail wheel roof has to be hand made from a
rectangular piece of plastic. A hole was then drilled to accept the tail wheel.
Once the tail assembly is butt jointed this needed some smooth fairing for a
continuous joint with the rest of the fuselage.
Joining the main planes together needed some care as these had no locating pegs
on the inside to help aligning the parts together. The wings are then slid into
recesses that are moulded on each side of the fuselage. In order to fit the
inner faces of both wings were slightly scraped. The engine cowlin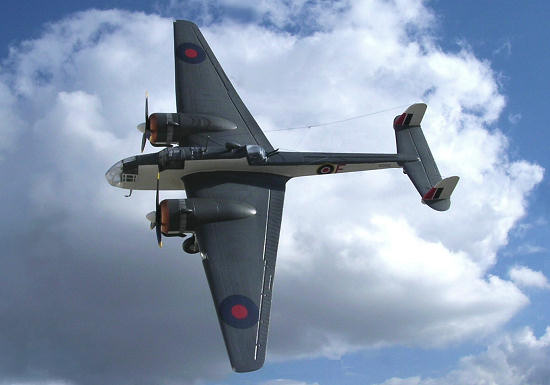 gs
had locating pins which simplified alignment. These had the detailed resin
radial engine parts to fit inside and allow the front to just protrude joust
outside the cowling. In order to fit the radial parts required slight filing at
the circumference, thus reducing slightly the diameter until they fit. The
assembled cowlings were then brought to the rest of the wing. Any slight
mismatch that was present was attended to with careful filing and filler.
The undercarriage assembly is well detailed and once assembled and set it was very sturdy. I made sure that once fitted inside the wheel well these were vertical to the ground level. Having convinced that this alignment was correct I then detailed the rest of the cowling adding air intake scoops, exhaust stack and went on with adding antennae, elevator balance items, tail wheel, guns to the rest of the kit. I threw away the wing tip transparencies which I replaced with solid Perspex as my examples had a shrink hole in them. These I fitted slightly oversize using super glue then filed the perspex to conform exactly to the rest of the wings.
| COLORS & MARKINGS |
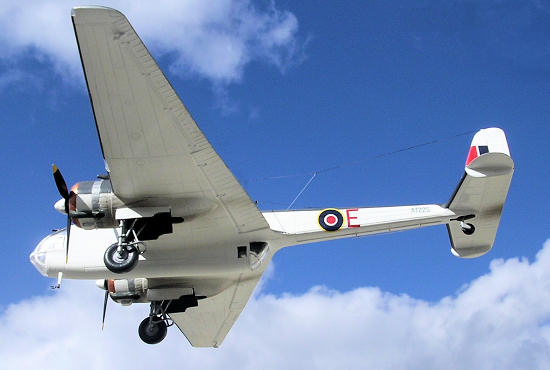
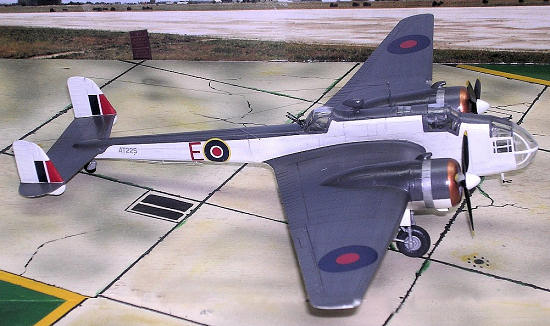
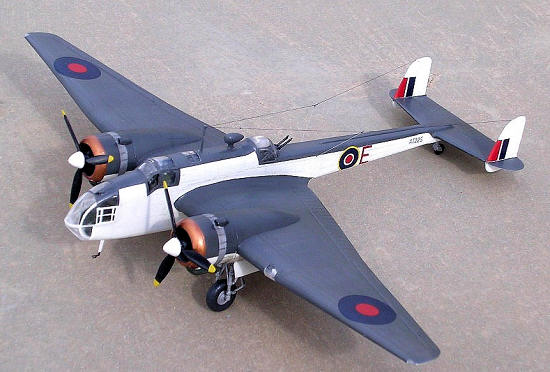
The
kit can be built either in standard dark earth and green camouflage with black
underside as used during the war by the RAF bomber Command or as a Coastal
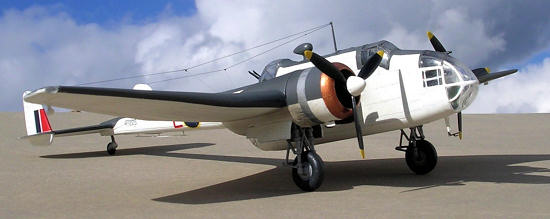
patrol aircraft. My choice fell on a Coastal Command Hampden sporting a
contrasting colour scheme of white lower surfaces and fuselage sides and dark
sea grey on upper. I used Humbrol enamel white and Humbrol ocean grey M106
followed by a coat of Clear. Decals were thin and correct register. These were
easy to apply. The kit was finally given a coat of Revell semi matt clear
varnish. A small amount of weathering in form of varying degrees of grey was
added to exhaust areas.
| CONCLUSIONS |
January 2009
Copyright ModelingMadness.com. All rights reserved. No reproduction in part or in whole without express permission from the editor.
If you would like your product reviewed fairly and quickly, please contact the editor or see other details in the Note to Contributors.